Contents
- 1 Getting Started
- 1.1 Disable Battery Optimizations
- 1.2 Setup Wizard
- 1.3 License Unlock
- 1.4 Licensed User Menu
- 1.5 Sample Logs and Videos
- 1.6 Mount Your Mobile Device
- 1.7 Calibrate Accelerometer
- 1.8 Test Your Setup
- 1.9 Prepare For Your First Event
- 1.10 At The Event
- 1.11 Contextual Help
- 1.12 Support
- 1.13 Manually Connecting Devices
- 1.14 Configure Cameras
- 2 Logger Screen
- 2.1 Main Menu
- 2.2 Logger Toolbar
- 2.3 Logger Controls
- 2.4 Logger Status
- 3 License Unlock
- 4 License Recovery
- 5 Register and Unlock (CircuitStorm Only)
- 6 Predictive Lap Timer and Coach
- 7 Analysis Screen
- 8 Video Analysis
- 9 Trace Channels
- 10 Sectors and Markers
- 11 Sector Analysis
- 12 Event Optimal Lap
- 13 Apex Coach
- 14 Charts
- 14.1 Speed and Time Delta vs Distance
- 14.2 Speed and Throttle vs Distance
- 14.3 Lateral and Combined Accel vs Distance
- 14.4 Engine RPM vs Speed (Gearing)
- 14.5 Lateral Accel and Speed Histogram
- 14.6 Turn Radius and Lateral Accel Histogram
- 14.7 Speed Histogram
- 14.8 Engine RPM and Throttle Histogram
- 14.9 Throttle and Speed Histogram
- 15 Video Playback
- 16 Video Overlay
- 17 Manage Sponsors
- 18 Video Sync – Real Time
- 19 Video Sync – Select Frame
- 20 Storage – Browse Events
- 21 Storage – Import Events and Logs
- 22 Trash Bin – Browse Events
- 23 Storage – Browse Logs
- 24 Trash Bin – Browse Logs
- 25 Configure Event
- 26 Create New Event
- 27 Manage Drivers
- 28 Course Markers
- 29 Calibrate Internal Accelerometer
- 30 Calibrate External Accelerometer
- 31 Calibrate DL1 Accelerometer
- 32 Settings
- 33 Create New Settings Profile
- 34 GPS / Logger Settings
- 35 Vehicle Telemetry Settings
- 36 Vehicle CAN Library
- 37 CAN Bus Logger
- 38 Live Stream Settings
- 39 Logger and Maths Channels
- 40 Logger Channel Settings
- 41 Logger Channel CAN Signal Mapping
- 42 Maths Channel Settings
- 43 Video Settings
- 44 Internal Camera Settings
- 45 Wi-Fi Camera Settings
- 46 Calibrate Internal Video Recorder
- 47 Calibrate Wi-Fi Video Recorder
- 48 Live Camera Preview
- 49 Trigger Settings – Staged Race Modes
- 50 Trigger Settings – Circuit Race Modes
- 51 Analysis Settings
- 52 Storage Settings
- 53 Create Database Backup
- 54 Restore Database Backup
- 55 Display Settings
- 55.1 Setting Values
- 55.1.1 Screen Orientation
- 55.1.2 Units
- 55.1.3 Voice Notifications
- 55.1.4 Voice Notification Volume
- 55.1.5 Solo Delta Time Indicator
- 55.1.6 Pop-Up Notifications
- 55.1.7 Color Palette
- 55.1.8 Full Screen Mode
- 55.1.9 Full Screen Brightness
- 55.1.10 Disable Screen Lock
- 55.1.11 Logger Off on Startup
- 55.1.12 Auto Shutdown
- 55.1.13 Disable Battery Optimization Check
- 55.1.14 Battery Optimization
- 55.1 Setting Values
- 56 Find Logs and Videos
- 57 Sharing
- 58 Logs and Video Downloads
- 59 Find Logs – Matching Event
- 60 Search Criteria – Owner Name
- 61 Search Criteria – Shared With Team
- 62 Search Criteria – Event Name
- 63 Manage Logs and Videos
- 64 Manage Teams
- 65 Create or Modify Team
- 66 Team – Invite Member
- 67 Manage Teams Members
- 68 Find Teams
- 69 Search Criteria – Team Name
- 70 Pending Requests
- 71 Pending Invites
- 72 Petrel Cloud Settings
This content is based on app build 646.
Getting Started
This is a high-level guide meant to walk you through common scenarios. For detailed information, see the in-app contextual help.
Disable Battery Optimizations
To use the app, you must exclude it from Android battery optimizations.
Some devices will terminate long-running processes in order to conserve battery. For this app, these include:
- Running the logger in the background or with the screen off
- Maintaining a connection to an online telemetry service such as Podium.live
- Exporting overlaid videos
When starting up, the app will check that it is excluded from batery optimizations. If it is not excluded, you will be prompted to open the device power management settings.
Setup Wizard
When you first open the app, you will be prompted to run the Setup Wizard which will help discover and configure your Bluetooth devices.
At this time, only the following Bluetooth devices are supported by the Setup Wizard:
- Qstarz 818-XT GPS Receiver
- Qstarz 818-GT GNSS Receiver
- RaceBox Mini / Mini S / Micro
- RaceCapture Logger
- OBDLink Scan Tool
- GoPro Hero 9+ Camera
You can also run the Setup Wizard at any time by tapping
 to open the main menu, and then tapping
 .
.
Note: The Setup Wizard should be run prior to attending an event, so that it does not discover Bluetooth devices belonging to other drivers.
Preparing Your Devices
Once the setup wizard starts, follow the instructions that are displayed on the device screen.
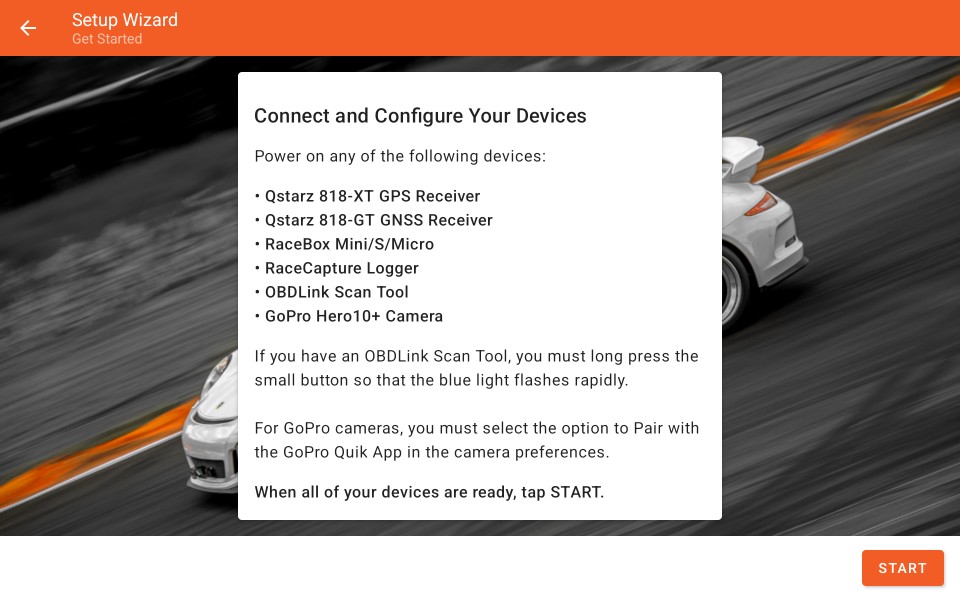
Ensure that all of your devices are powered on and, where required, placed in pairing mode.
Scanning for Devices
After starting the device scan, it will take some time for results to be displayed.
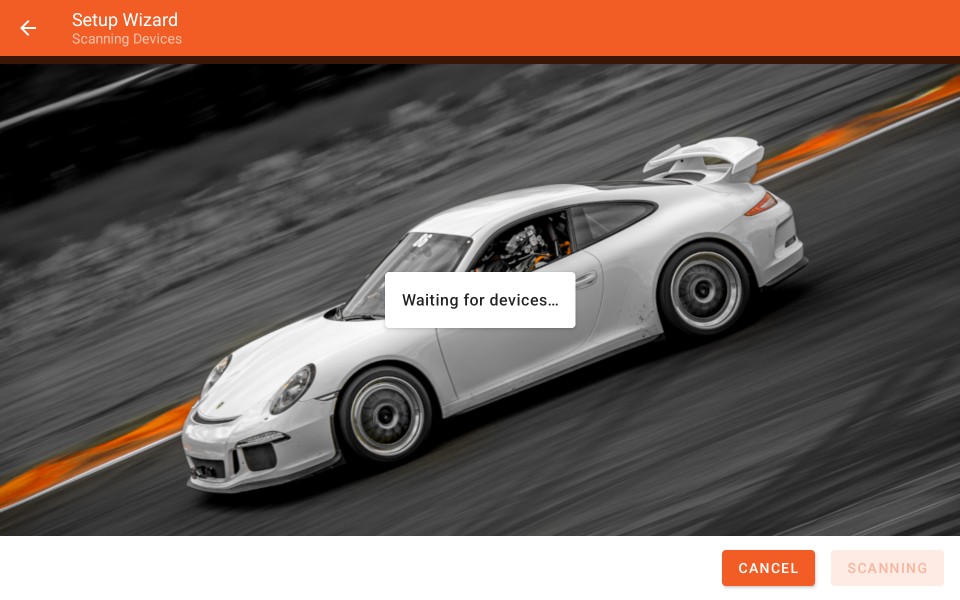
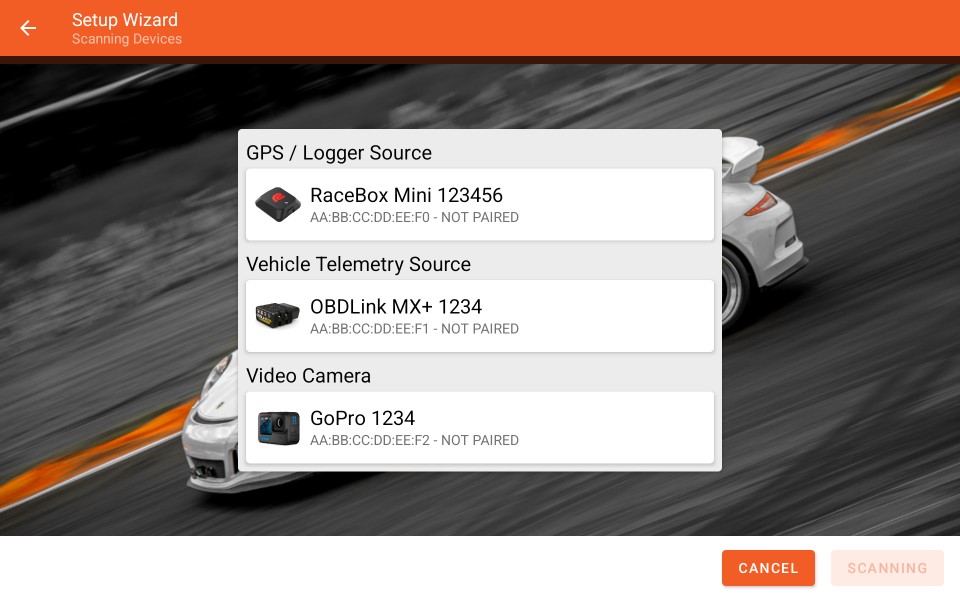
Discovered devices will be displayed once they are detected. You can cancel the scan at any time if you see all of your devices in the list.
After the scan has completed, you can confirm the device list to proceed with configuration..
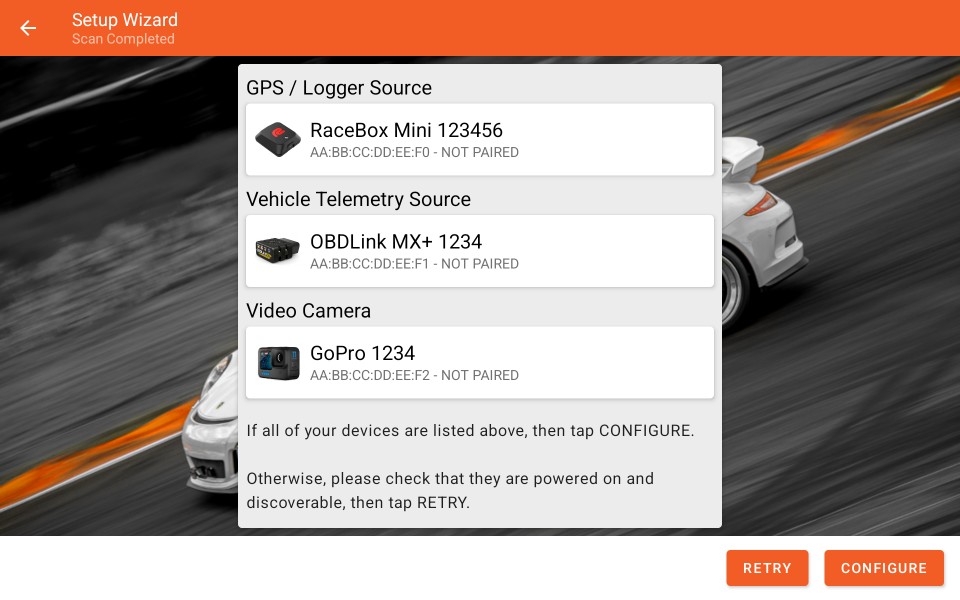
If all of your devices were not discovered, confirm that they are powered on and discoverable and retry the scan.
Configuring Devices
You will be prompted to allow each device to be paired if required.

Devices that support vehicle data (RaceCapture Loggers, OBDLink Scan Tools) will have a number of default channels enabled. You can modify the selected channels in the main settings.
Next Steps
You can now perform these recommended additional steps before your first event.
License Unlock
Tap
 to open the main menu.
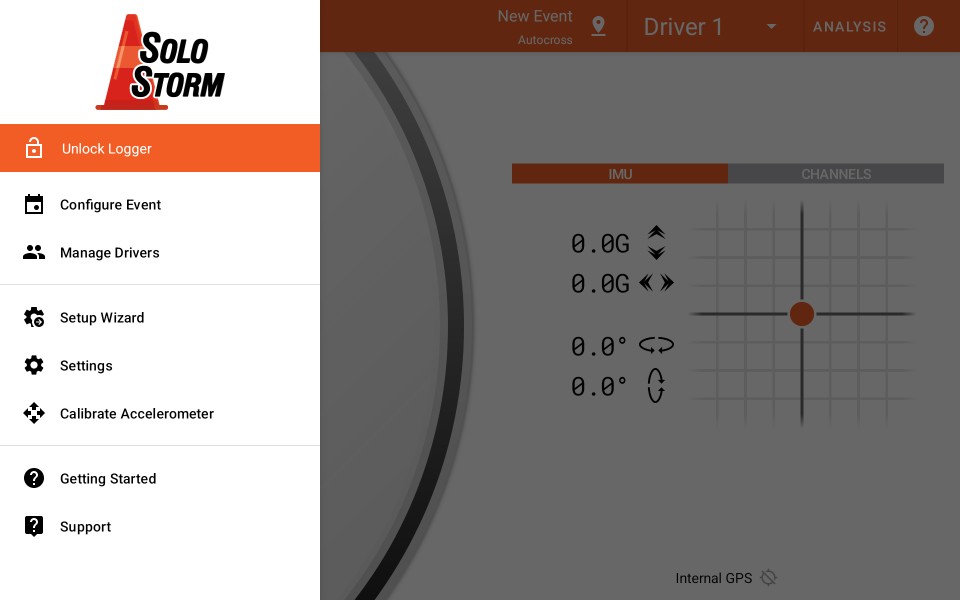
From the main menu, tap
 to enter your unlock code.
You may also click on the unlock link in your license email in order to open the app and automatically enter your unlock code.
Licensing the app is necessary to enable the full data logger, and to access cloud and support functionality.
Licensed User Menu
After licensing the app, a licensed user menu will be available.
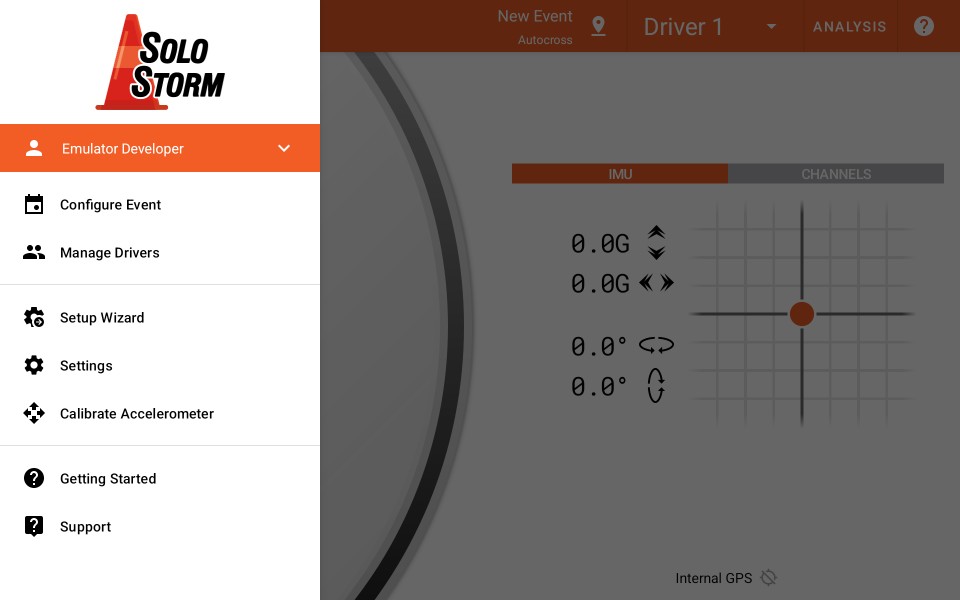
Tap
 to expand the licensed user menu:
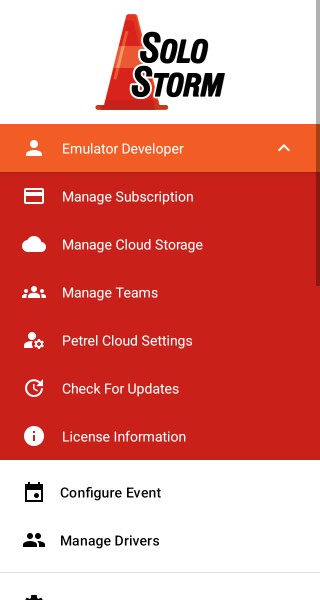
Manage Subscription
After the logger is unlocked, you can access the User Menu. From there, tap Manage Subscription in order to manage your subscription services.
SoloStorm
From within SoloStorm, you may manage your Petrel Cloud subscription to access additional storage capacity. This will open a web page on the Petrel Data Systems web site.
If you do not have a current Petrel Cloud Subscription, you may select a subscription level and then complete your order using our secure checkout.
If you have an existing Petrel Cloud Subscription, you will be taken to your account page where you can upgrade your subscription service.
CircuitStorm
From within CircuitStorm, you may select and manage your Google Play subscription for CircuitStorm. This will also include varying levels of Petrel Cloud storage.
Manage Cloud Storage and Teams
These options allow you to manage the logs uploaded to your Petrel Cloud storage, as well as manage teams that you own plus your membership in other teams.
Check for Updates
The app will periodically check for updates and prompt you to install them.
Tap on this option in order to force this check to occur imediately.
License Information
This opens a dialog that displays the details of your current license including any active subscriptions and their expiry date.
Sample Logs and Videos
To learn how to use the analysis functions of the app, when you tap on the Analysis button you will be prompted to download sample logs and videos. These files can be quite large and will require several GB of free storage.
Mount Your Mobile Device
 If you are using the internal accelerometer, internal camera, or the predictive lap timer/coach, then you must securely mount your mobile
device in your vehicle. For phones, a suction-cup mount will work well. For tablets, we recommend a rigid mounting solution such
as the ones we sell in our store.
Calibrate Accelerometer
If using the internal accelerometer, you must first calibrate it with the mobile device mounted in-place. You will need to find a safe space to perform this step. Follow the instructions in the calibration contextual help.
If using an external GPSS receiver or data logger that contains an accelerometer, you may calibrate it as well using a similar process.
Some external accelerometers must be calibrated manually or via 3rd party software. You will be notified if this is the case.
Test Your Setup
Before attempting to use the app at an event, we strongly recommend that you configure and connect your hardware a few days before the event, and create a test event in order to verify that everything is functioning correctly.
Create a Test Event
From the main menu, tap
 to create a test event where sample data will be logged. You can later delete this event.
Configure Manual Triggers
From the main app settings, open the Logger Trigger settings and select manual logger triggers. This will allow you to manually start and stop recording.
Manual triggers are provided for testing purposes only and are not meant for racing use.
Capture a Test Log
Connect and power your logger and telemetry devices and cameras, and toggle the logger power in the logger screen. If using a data logger or OBD scan tool, also start your vehicle.
Verify that the app is able to connect to all of your configured devices, and confirm that any configured channels are displaying the correct values. You can do this by swiping on the logger values widget.
After confirming that your devices are connected and correctly configured, tap the Start button to manually start recording. After several seconds, tap the Stop button to end recording.
After confirming that the log was loaded for analysis, you may toggle to logger power off, and power off your devices.
Don't forget to change the logger triggers back to automatic! We find that the default settings work best.
Prepare For Your First Event
Ensure that your GPS receiver and Wi-Fi camera are charged before the event. We recommend running any devices that contain a battery off of vehicle power if possible.
Manage the Driver List
From the main menu, tap
 to define the list of drivers for the event.
Create An Event
From the main menu, tap
 to create an event. Provide an event name and racing mode. You may also select a course location or circuit depending on the selected
racing mode.
At The Event
Warm and Update the GPS Receiver
When you arrive at the event, we recommend that you power the GPS receiver and place it in a mounted location where it can 'see' as many satellites as possible. Leave it powered all day, and make sure it is powered for at least 45 minutes before racing so that it can update the satellite almanac and achieve optimal accuracy.
Course Walks
During course walks, you may take your portable GPS receiver with you and use it to set course markers depending on your event racing mode. Ensure that your GPS receiver is turned on, open the app and togget the logger power. You can then set GPS markers when the logger sees that adequate GPS conditions are met.
For more information, see the contextual help for the markers screen.
You may also use the internal GPS on your mobile device to set course markers.
In Grid
Power your wireless devices, mount your mobile device, and toggle the logger power on. Select the current driver.
Logging will start automatically as per your trigger settings. For staged racing modes, video recording will start when you arrive at the staging marker, or if you tap the “Auto Video” button.
Note: For staged racing modes, a staging trigger will automatically be set after your first lap is recorded.
Note: For staged racing modes, the logger may stop due to a spin, red flag, etc. You can correct/adjust lap data as necessary in the storage browser.
Contextual Help
All help in the app is contextual, meaning that the help offered is always specific to the screen or task at hand.
Contextual help can be opened by tapping
 in the toolbar, in one of the analysis view widgets, or tapping in pop-up dialogs.
Support
From the main menu, tap
 to access the support options.
Documentation
Tap to view up-to-date release notes for the app.
Debugging
Tap to configure debug log options, and if necessary email a debug report to support.
Reporting
Configure automated transmission of crash reports and anonymous analytics so we can make continuous improvements.
Notifications
Your device can receive notifications if certain options are enabled, for example the option to automatically download your own logs that were uploaded from another device.
If for some reason you are not receiving notifications, you may refresh the notification identifier on your device.
Manually Connecting Devices
If you choose to not use the Setup Wizard, or if you are using a device that it does not support, then you can manually configure it in the app settings.
From the main menu, tap
 to access the app settings and select your GPS / Logger and optional Vehicle Telemetry source.
Note: You may be able to rename your Bluetooth or Wi-Fi devices. We suggest doing so in order to avoid any connectivity issues caused by competitors attempting to incorrectly connect to your device.
Bluetooth GPS (Qstarz 818-XT, etc)
 To configure a generic Bluetooth NMEA GPS/GNSS receiver, first turn it on and pair it with your Android device in the system Bluetooth settings.
The pairing code will be either 0000 or 1234. After the receiver is paired with your mobile device, you may then select it as the GPS / Logger in the app.
Qstarz BLE GNSS (Qstarz BL1000-GT, etc)
 To configure a Qstarz Bluetooth Low Energy GNSS receiver, first turn it on and pair it with your Android device in the system Bluetooth settings.
The pairing code will be either 0000 or 1234. After the receiver is paired with your mobile device, you may then select it as the GPS / Logger in the app.
To calibrate the accelerometer on a Qstarz BLE receiver, mount the unit and turn it on, then long press the large center button on the top of the unit until a beep sounds.
RaceBox Mini, Mini S, or Micro
 To configure a RaceBox Bluetooth Low Energy GNSS receiver, ensure that the battery is charged and then select it as the GPS / Logger in the app.
After mounting the RaceBox receiver, make sure that you run the accelerometer calibration process from the main menu.
Note: You can not manually pair a RaceBox receiver with your Android device. Simply select it from the list of available devices in the app settings where it will be displayed when scanned.
RaceCapture Logger
 Various RaceCapture logger models are supported, and they may be connected via either Bluetooth (preferred), USB, or Wi-Fi.
Use of a RaceCapture logger requires that you download download and install the free RaceCapture App from the Google Play store.
Bluetooth
To connect to your RaceCapture logger via Bluetooth, first turn it on and pair it with your Android device in the system Bluetooth settings.
Next, use the RaceCapture app to configure your RaceCapture logger channels and CAN bus options. Follow the directions found on the Autosport Labs web site. When you are done testing the logger, close the RaceCapture app as you can not have more than one Bluetooth connection to a single device.
You may now select the RaceCapture logger as the GPS / Logger in the app. You will need to open the Logger and Maths Channels settings and select the configured RaceCapture channels as data sources.
USB
To connect to your RaceCapture logger via a USB cable, turn it on and then plug one of your USB cable in to your mobile device, and the other end into the logger.
Next, use the RaceCapture app to configure your RaceCapture logger channels and CAN bus options. Follow the directions found on the Autosport Labs web site. When you are done testing the logger, close the RaceCapture app as you can not have more than one USB connection to a single device.
You may now select the RaceCapture logger as the GPS / Logger in the app. You will need to open the Logger and Maths Channels settings and select the configured RaceCapture channels as data sources.
Note: Your mobile device must support USB host mode operation in order to connect to a RaceCapture logger via a USB cable.
Wi-Fi
To connect to your RaceCapture logger via Wi-Fi, first turn it on and configure it as a Wi-Fi access point in your Android system settings. If your device allows you disable the option to use cellular radio when no internet is available via Wi-Fi, then you should do so.
Next, use the RaceCapture app to configure your RaceCapture logger channels and CAN bus options. Follow the directions found on the Autosport Labs web site. When you are done testing the logger, close the RaceCapture app.
You may now select the RaceCapture logger as the GPS / Logger in the app. You will need to open the Logger and Maths Channels settings and select the configured RaceCapture channels as data sources.
Race Technology DL-1
 To configure a Race Technology DL1 logger, you must purchase and configure a serial to bluetooth reader and fabricate a custom cable.
See the contextual help for GPS / Logger selection for a detailed guide.
Note: The app need to 'calibrate' the DL1 accelerometer by knowing the orientation of the logger mounted inside the vehicle.
Racelogic VBOX Sport
 To configure a Racelogic VBOX Sport logger, first turn it on and pair it with your Android device in the system Bluetooth settings.
The pairing code will be either 0000 or 1234. After the VBOX Sport is paired with your mobile device, you may then select it as the GPS / Logger in the app.
OBD II PID Scan Tool
 To configure an OBD PID scan tool, first turn it on and pair it with your Android device in the system Bluetooth settings.
Some models such as the OBDLink MX+ require you to press a button in order to place it into pairing mode.
The pairing code will be either 0000 or 1234. After the OBD Scan Tool is paired with your mobile device, you may then select it as the Vehicle Telemetry source in the app.
Configuring a scan tool in this manner will retrieve standard OBD II PIDs from your vehicle ECU and map them to the appropriate logger channels.
Note: Only OBD scan tools that use an ELM327 compatible chipset are supported. While you can purchase low-cost clones of these devices from offshore vendors, our testing has shown them to be unreliable and slow, and the devices are prone to failure.
OBDLink CAN Bus Scan Tool
The OBDLink LX, MX and MX+ can also perform as CAN bus scan tools. Follow the same Bluetooth pairing steps as with an OBD II PID Scan Tool, however you must select OBDLink CAN Bus Scan Tool as the Vehicle Telemetry source.
You will need to manually configure each CAN channel (engine RPM, throttle position, etc) by providing the correct CAN parameters. To assist in this, there is also a built-in CAN bus scanner to help you log messages from the connected CAN bus.
You will need to research your own vehicle in order to determine what the correct channel CAN parameters are. We do not provide support for this.
Porsche Wi-Fi Gateway
 To configure a Porsche GT car Wi-Fi gateway, first start the vehicle and configure it as a Wi-Fi access point in your Android system settings.
The password for the gateway will vary on the vehicle model and year. We recommend using the Porsche Precision app in order to verify the password.
After the Wi-Fi gateway is configured as an access point on your device, you may then select it as the Vehicle Telemetry source in the app.
Configure Cameras
Configure, calibrate and test the cameras that you wish to have the app control.
Internal Camera
 Select the internal camera that you wish to use to capture video. When selecting the video quality, we suggest 720P @ 60FPS.
Most mobile devices can process 720P video with an overlay, and 60FPS gives more detail than the standard 30FPS.
Calibrate the internal camera using a mirror(s) in order to account for the delay when starting recording.
Finally, mount your device in the vehicle and turn on the logger and verify that the camera is aimed correctly. Swipe on the logger values widget to access the camera preview window.
Wi-Fi Camera
 Connect your mobile device to your supported Wi-Fi camera as per the camera instructions, and select it in the app Wi-Fi camera settings.
When selecting the video quality, we suggest 1080P @ 60FPS.
Most mobile devices can process 1080P video with an overlay, and 60FPS gives more detail than the standard 30FPS.
Note: Some cameras (such as the GoPro Hero6 and newer) support a combination of Bluetooth + Wi-Fi control. To configure this type of camera, you must select the camera from a list of paired Bluetooth devices. Once the camera is connected, the Wi-Fi network will be automatically configured.
Note: On newer Android devices, Wi-Fi access points that are configured by one app (for example, the GoPro app) are not available for other apps. Any Wi-Fi camera access point used by this app MUST be manually created using the device system settings.
When connecting a GoPro Hero 5 and below camera for the first time, note that the GoPro app must be used. This will create a Wi-Fi access point for you. You can use the app to change the access point password, and then remove and re-create the access point in the device system settings.
Calibrate the Wi-Fi camera in order to account for the delay when starting recording.
Logger Screen
The Logger screen allows you to control and view the operational state of the data logger.
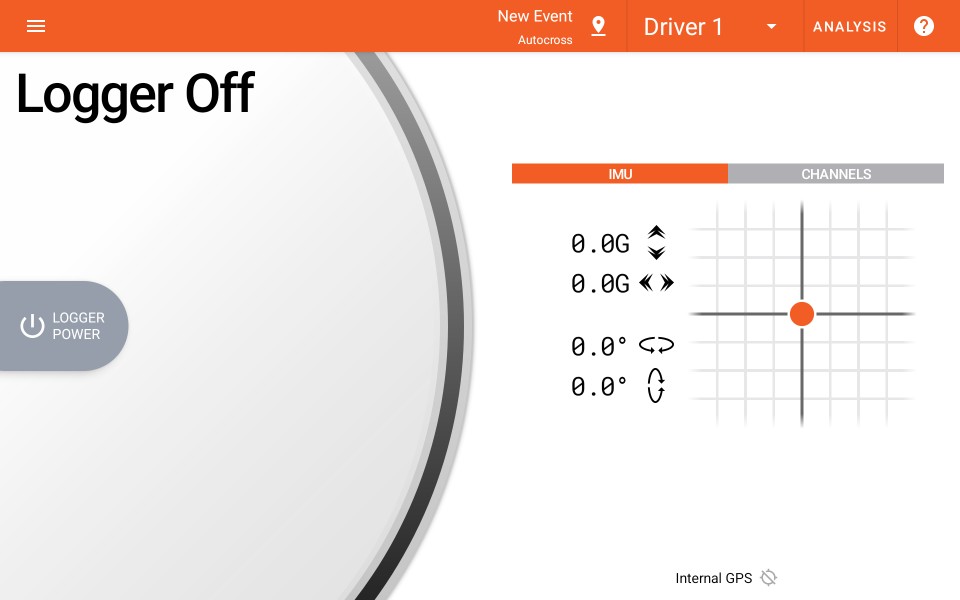
From here, you may access the main application menu, select the current driver, and open the Analysis screen.
Main Menu
Tap on
 in the toolbar, or swipe in from the left of the screen to open the main application menu:

|
For additional help with the main menu, tap on
|
Logger Toolbar

The Logger screen toolbar displays the current logger state, information about the logger configuration, and important navigation options.
Toolbar Controls
Current Event

The details of the current event configuration are displayed in addition to the selected race mode. Event configuration is found under the main menu.
Markers

Tap to set GPS markers. Only enabled when the logger is ready and had an adequate GPS fix, and the event configuration supports setting markers.
Current Driver

The currently selected driver. Tap to select from a list of enabled drivers. Driver management can be accessed from the main menu.
Analysis

Tap to switch to the analysis view in order to review recorded logs. If no logs are open, this will open the storage browser.
Logger Controls
Logger State

The logger will be in one of the following states:
- OffThe logger is disabled and not connected to any devices.
- StartingThe logger is initializing but not yet attempting to connect to any devices.
- ConnectingThe logger is attempting connect to your GPS receiver or hardware logger.
- ReadyThe logger is connected to a GPS receiver and is monitoring the logging triggers.
- StagedThe logger has detected that the vehicle is near the staging marker. If configured, video recording will start when staged.
- RecordingThe logger is capturing data and video and saving it in memory.
- ProcessingThe logger has stopped recording and is processing the new log before saving it to the database. After this, the app will switch to the analysis view to review the log.
Power Button
Tap
 to toggle the logger between Off and Ready. When ready, recording will start and stop when the trigger conditions have been met.
When not using the logger, make sure to turn it off in order to conserve your device battery.
When the logger is ready, additional controls and information will be available:
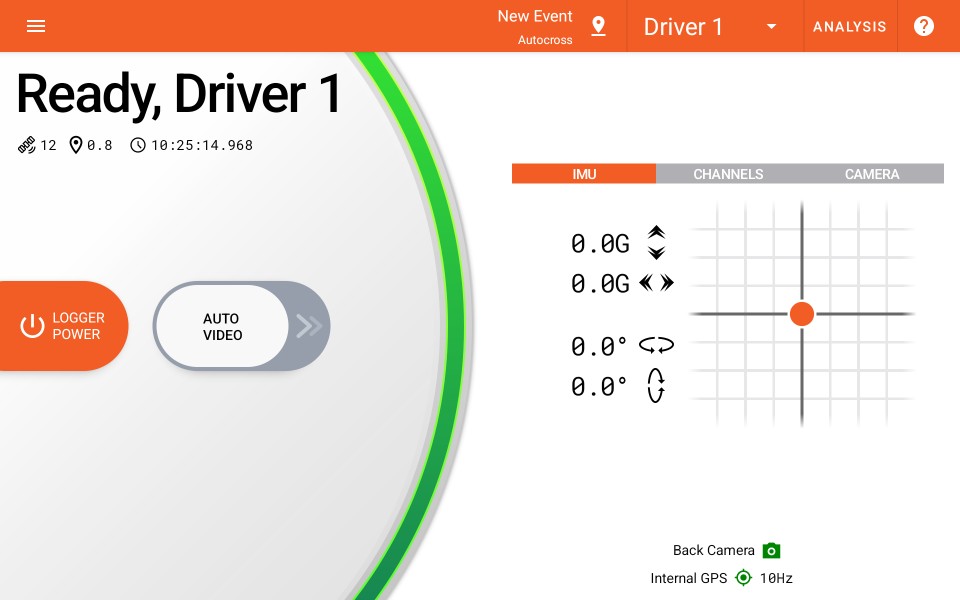
The progress indicator / colored ring also indicates the logger status:
- Black/GreyThe logger is off.
- BlueThe logger is connecting.
- GreenThe logger is ready to record, or processing captured data.
- RedThe logger is recording.
When the logger is ready, you can manually start the video recorder or the logger itself, depending on the current configuration.
Start Video (Automatic Triggers – No Staging Marker Set)
Tap
 to force all configured video cameras to start recording.
This is used to capture the vehicle launch when a staging marker has not been set, or to capture the out lap on a circuit before the start/finish line has been crossed.
This button is displayed only when no staging marker is set, and the logger is ready and is configured with automatic triggers
Auto Video (Automatic Triggers – Staging Marker Set)
Tap
 to force all configured video cameras to start recording.
This is used to force the logger to begin capturing video before the staging area is detected.
This button is displayed only when a staging marker is set, and the logger is ready and is configured with automatic triggers.
Start Logger (Manual Triggers)
Tap
 to start recording data.
This should only be used for testing and verifying your setup. Always use automatic triggers when racing.
This button is displayed only when the logger is ready and is configured with manual triggers. The event race mode must support staging (Autocross, Pro Solo, etc).
Logger Ready – Video Recording
Stop Video (Automatic triggers)
Tap
 to abort recording for all configured video cameras.
Logger Recording
Stop Logger (Manual Triggers)
Tap
 to stop recording data.
Logger Status
GPS Health and Logger State

|
The logger state is displayed in the top left corner of the screen. When the logger is in the READY state, either the current driver or course side will also be displayed depending on if the current racing mode supports staged courses and/or course sides. When the current event uses a racing mode that supports staging and the vehicle is staged, the logger status will be displayed as Staged. The current satellite count is displayed along with the GPS accuracy (DOP) in meters. As a general rule, at least 8 satellites and a maximum of DOP of 1.1m are required for satisfactory GPS accuracy. If the GPS health is unsatisfactory, then a warning message will be displayed. The current time from the GPS receiver is also displayed, as well as the logger status. When a reference lap is loaded for the current event, then the reference lap time is also displayed below the GPS status. |
Connected Devices and Services Status

The status of each connected device and camera appear along the bottom of the logger screen. Refresh rates will update next to each icon if applicable. If a device does not appear, it has not been selected in the logger settings.
GPS / Logger / Vehicle / Telemetry Status
The connectivity state and update rate of any connected GPS source, data logger, vehicle data source, or telemetry service is displayed.

|
Device State
Device Update Rate
|
Camera Status
The status of the internal camera and the Wi-Fi camera are displayed.

|
Camera State
|
Wi-Fi cameras may also indicate battery level and download status.
Note: For longer recording sessions, Wi-Fi cameras will split up captured video into individual chapter files. If this is the case, all of the recorded chapters will be downloaded and merged. This can take some time.
Solo Delta Time Indicator
When running Autocross and ProSolo events, a simple progress indicator can be displayed in the logger screen. This feature can be enabled in the Display Settings screen (SoloStorm only).
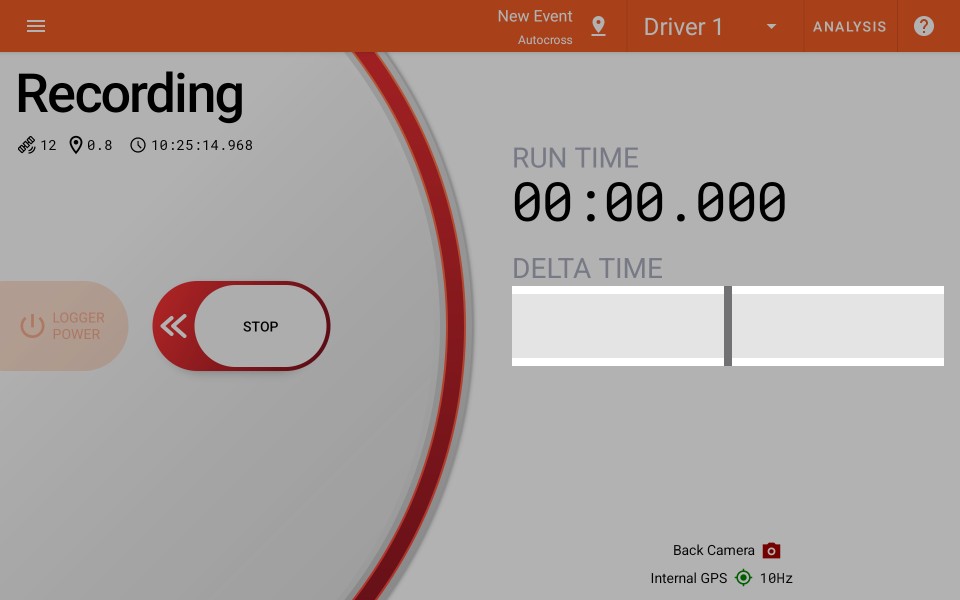
This progress indicator functions similar to the circuit lap timer, in that is compares the current run to the fastest run from the current event.
It displays a progress bar on the left when the delta time is negative (faster).

It displays a progress bar on the right when the delta time is positive (slower).

Note: Only runs that have passed both a start and finish marker will be loaded as the fastest run. The current event must have both start and finish markers set for this to occur. This is to prevent spins and partial runs from being loaded as the fastest run, and to provide the best accuracy possible when calculating the delta time.
Note: Event markers can be set either while walking the course, or during analysis when editing sectors.
Logger Values
The right hand side of the logger screen displays the IMU (accelerometer + gyros, if available), data channels and video preview that are connected to your device.
To scroll through these options, swipe left or right on the display area.
IMU
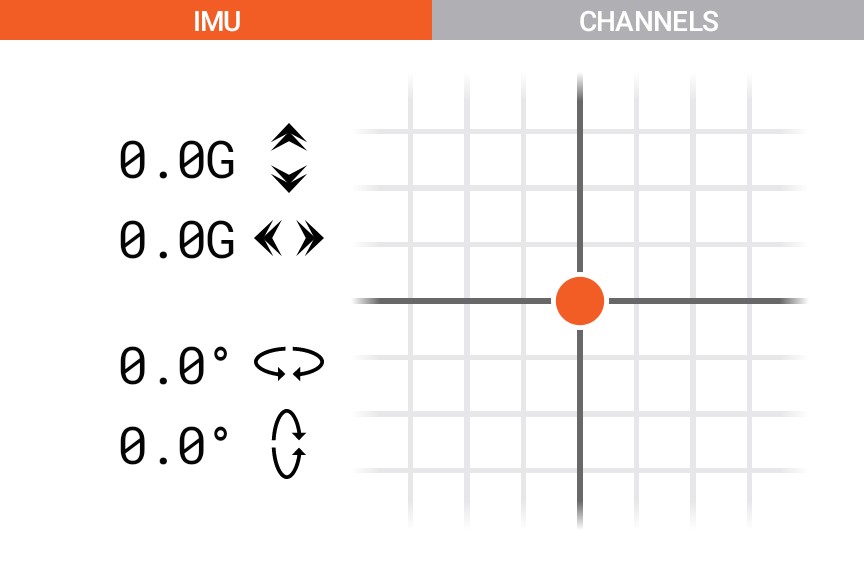
|
Vehicle acceleration is visualized using the orange ball in the acceleration indicator. The current accelerometer values are displayed along with the current roll and pitch rates from the logger gyros, if available. This view can be used to confirm that your accelerometer is configured correctly. |
Data Channels

|
Configured data channels are displayed with their current values. Speed, elevation and device battery temperature are always displayed. Device internal temperature is displayed if it is available. Additional channels such as throttle position, engine rpm, etc are displayed if configured in the Logger Channel settings. This view can be used to confirm that your data logger or vehicle telemetry configuration is correct and that the correct values are transmitted. |
Video Preview

|
If an internal video camera is configured, the video preview window will be displayed here. This view can be used to ensure that your device is aimed correctly in order to capture video. |
License Unlock
Enter your unlock code to enable the SoloStorm logger and access the Petrel Cloud service.
Until you unlock the app, the logger will not function.
Select your license email address and type or paste the provided unlock code:
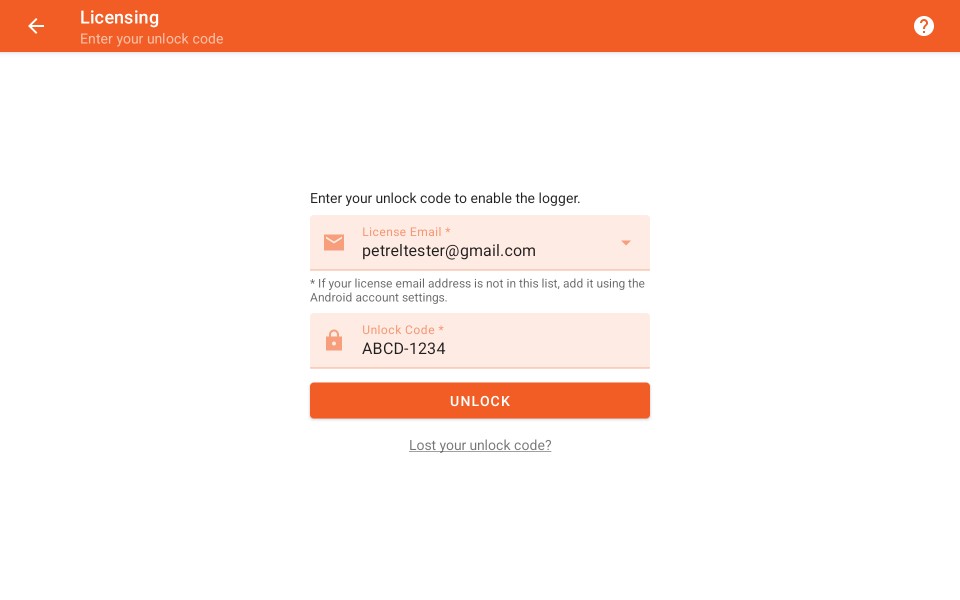
Your unlock code can be found in the license email that was sent to you soon after your purchase.
Please note:
- The license email that you select must be the same one that is associated with the unlock code.
- The license email address must be registered as an account on your mobile devices. Google accounts seem to work best.
- You must grant this app permission to view the license email address on this device.
- If you need to change your license email, please contact support.
If you are experiencing difficulty licensing the software, please contact support.
License Recovery
If you have lost your unlock code or wish to receive a current download link, please tap on the 'Lost your unlock code?' link.
License Recovery
Use the in-app recovery form in order to have a copy of your unlock code and a current download link sent to your license email address.
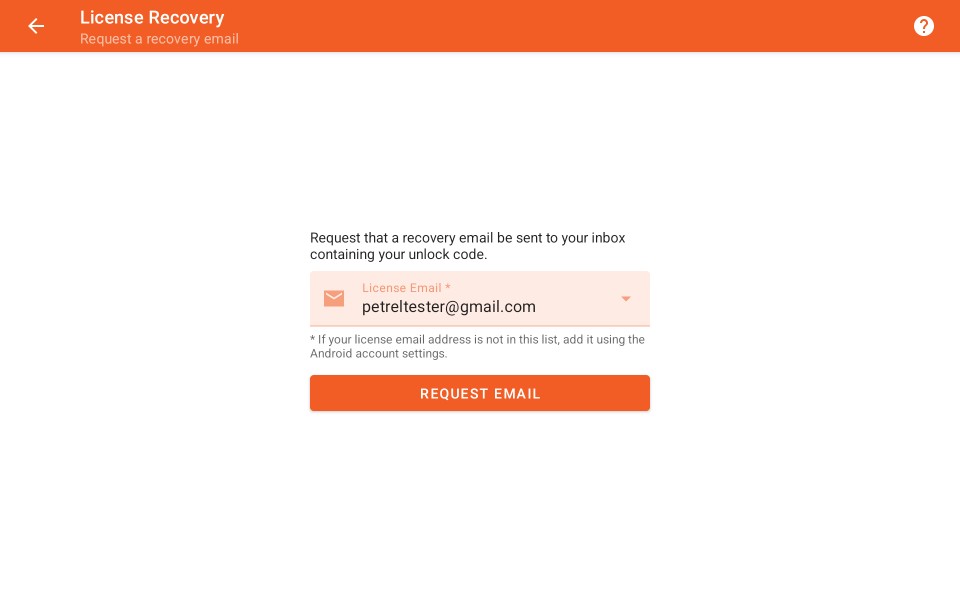
Select your license email address from the list, and tap 'Request Email'
Please note: You can also use the automated form located under the support menu at www.petreldata.com in order to have your unlock code and current download link re-sent to you.
Register and Unlock (CircuitStorm Only)
CircuitStorm is distributed via the Google Play store, however using the logger requires you to register a free account.
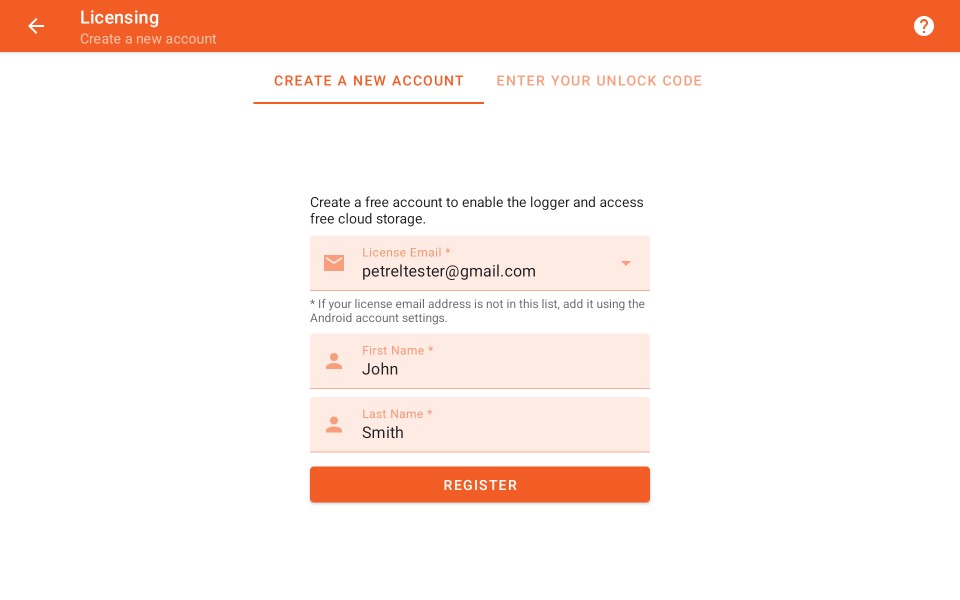
To create an account, you must select your license email address from a list of accounts registered on your mobile device. You must also enter your first and last name.
Your personal information will not be shared with anyone. If you choose to share logs via Petrel Cloud, then your name will be visible. You can prevent others from searching for your name via an option located under Petrel Cloud Settings the user menu.
Please note:
- The license email that you select must be the same one that is associated with the unlock code.
- The license email address must be registered as an account on your mobile devices. Google accounts seem to work best.
- You must grant this app permission to view the license email address on this device.
- If you need to change your license email, please contact support.
If you are experiencing difficulty registering your account, please contact support.
Unlocking the Logger
After creating an account, the logger will be unlocked.
The free tier of CircuitStorm is supported by ads displayed within the app. The app is still fully functional and not limited in any way.
In order to remove ads, or to access additional Petrel Cloud storage, you must purchase a subscription.
Google Play Subscriptions
Subscriptions can be purchased by opening the main app menu, expanding the user menu, and then tapping on Manage Subscription.
Previously Created Account
If you have previously created a CircuitStorm account and have an unlock code, then you can unlock the logger by tapping on the 'Enter Your Unlock Code' tab and directly entering it in the form that is provided.

Your unlock code can be found in the license email that was sent to you soon after you created your account.
License Recovery
If you have lost your unlock code, please tap on the 'Lost your unlock code?' link in order to have it sent to your license email address.
Predictive Lap Timer and Coach
The predictive lap timer and coach will be automatically be displayed once logging starts when using racing modes that support pre-defined circuits.
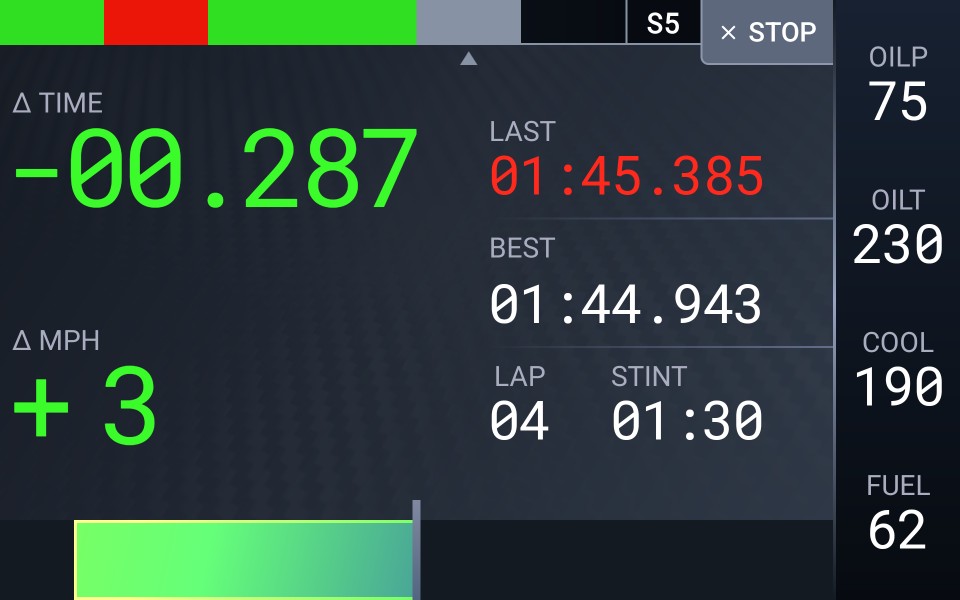
Several key pieces of information are displayed on this screen in order to help you make quick decisions while competing on a racing circuit.
Controls
Stop Button
Tap the stop button to end logging and return to the logger screen.
The current lap will be discarded, and any video cameras will be stopped.
Lap Timing
Important lap time values are displayed that allow you to determine how changes to your vehicle inputs or racing line are affecting your performance.
Last Lap Time
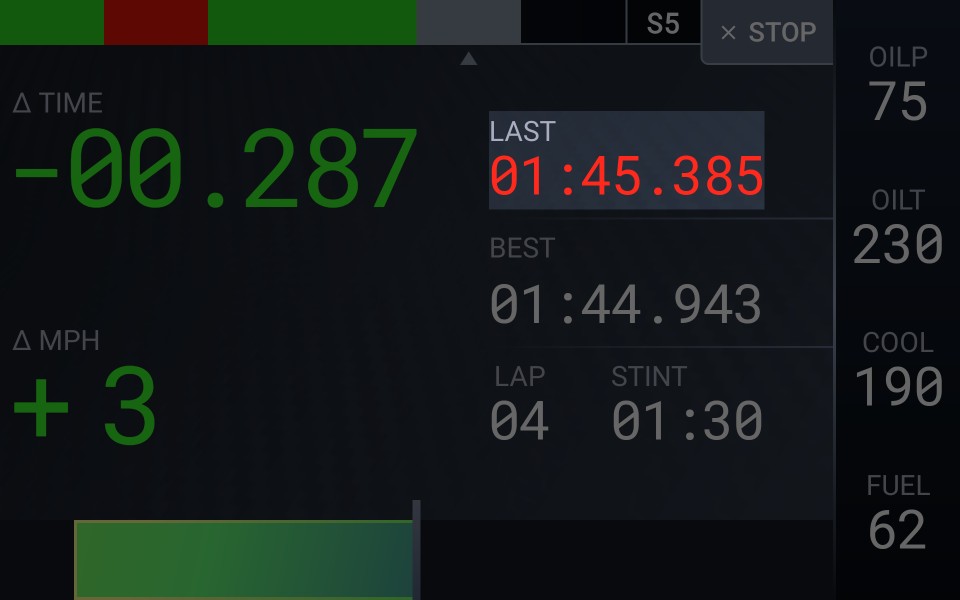
The time of the last completed lap is displayed.
The last lap time is displayed in green text if it was a new fast lap.
The last lap time is displayed in red text if it was slower than the best lap.
Best Lap Time
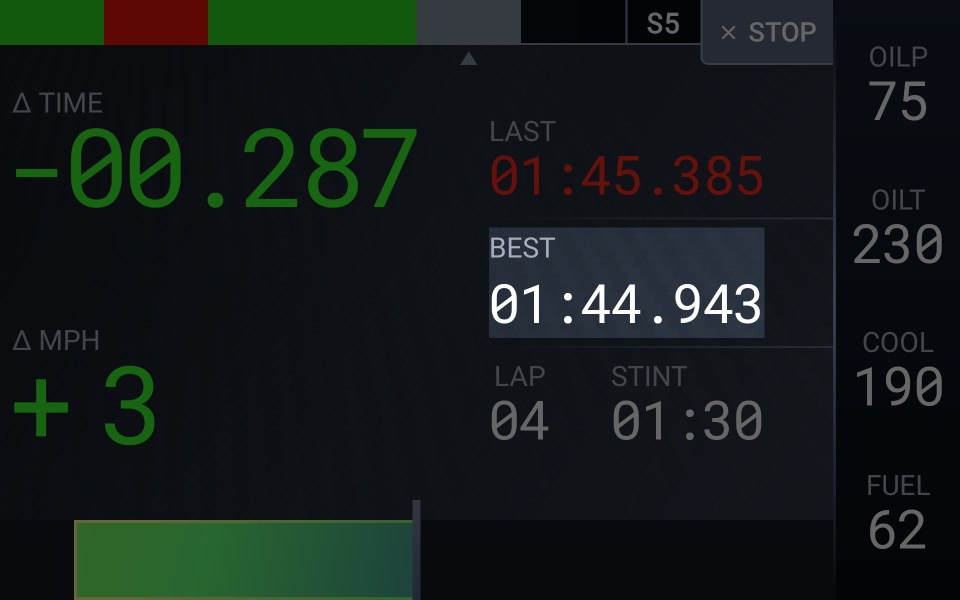
The best recorded lap time is displayed. This lap is used to calculate delta time and speed values.
The best lap can be optionally selected when configuring the event. It can be selected from either the current event or from another event. By default, the fastest lap from the current event is loaded.
Target Lap Time
The target lap time is displayed in place of the best lap time when the current is configured to target a specified lap time.
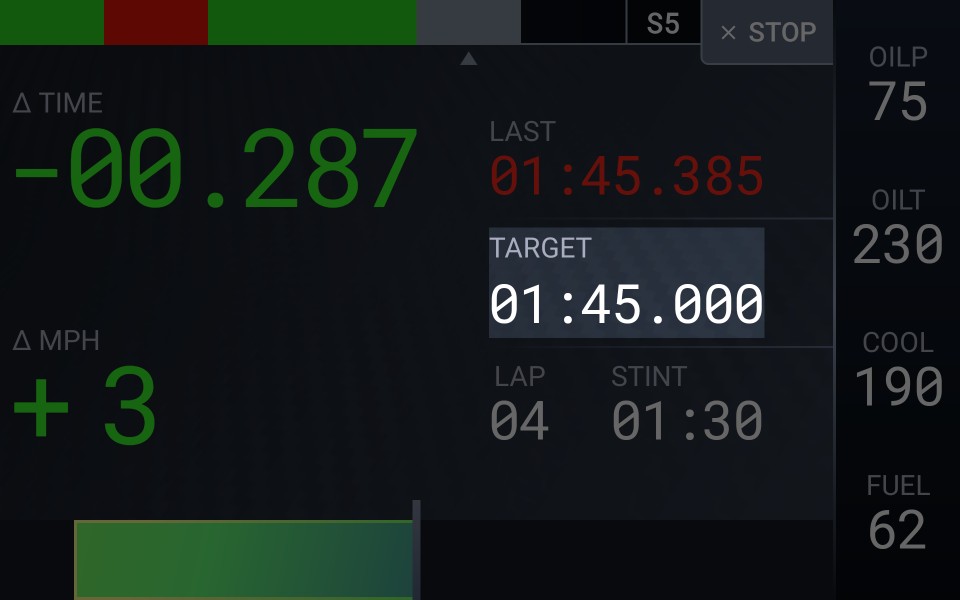
The lap timer uses the fastest log from the current event in order to calculate values based on the target lap time.
The target lap time is not displayed until a lap has been recorded for the current event.
Delta Time
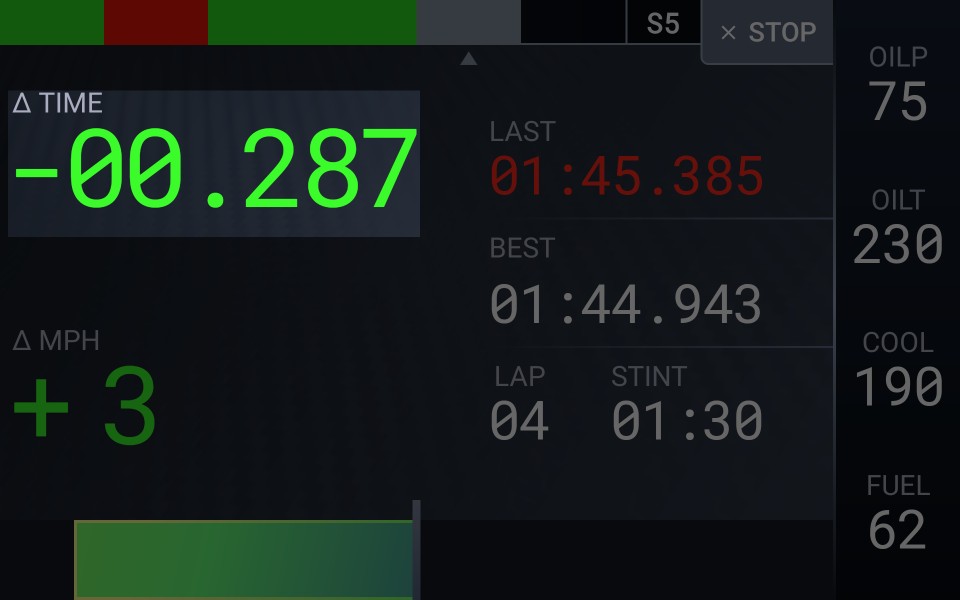
The current delta time relative to the best lap is displayed on the left side of the screen.
If the delta time is negative (the current lap is faster), the value will be displayed in green text.
If the delta time is positive (the current lap is slower), the value will be displayed in red text.
Delta Time Progress
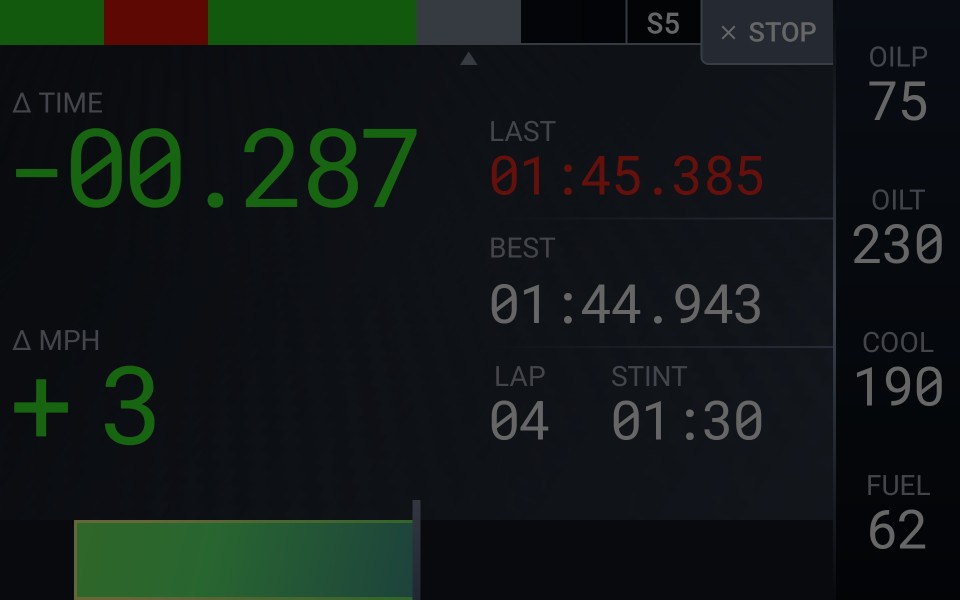
The time delta is visualized via a progress bar that resets with each lap.
For negative delta times, the bar expands from the center of the screen to the left side.
For positive delta times, the bar expands from the center of the screen to the right side.
Progress Bar Color
The time delta progress bar changes color based on the rate of delta time change.
If you are making up time on track, the bar will be colored green.
If you are losing time on track, the bar will be colored red.
If the delta time is not changing, the bar will be colored white.
The color will blend between green, red, and white as the rate of change varied.
Additional Fields
Lap Number
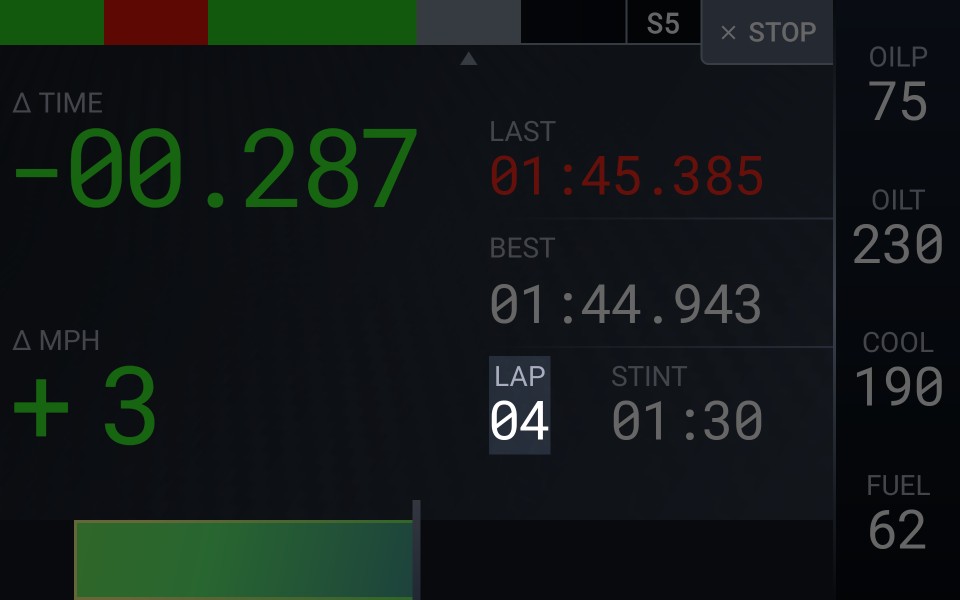
The current lap number is displayed and increments with each lap completed.
When recording starts, the lap count will resume from the last lap recorded for the current event.
Speed Delta
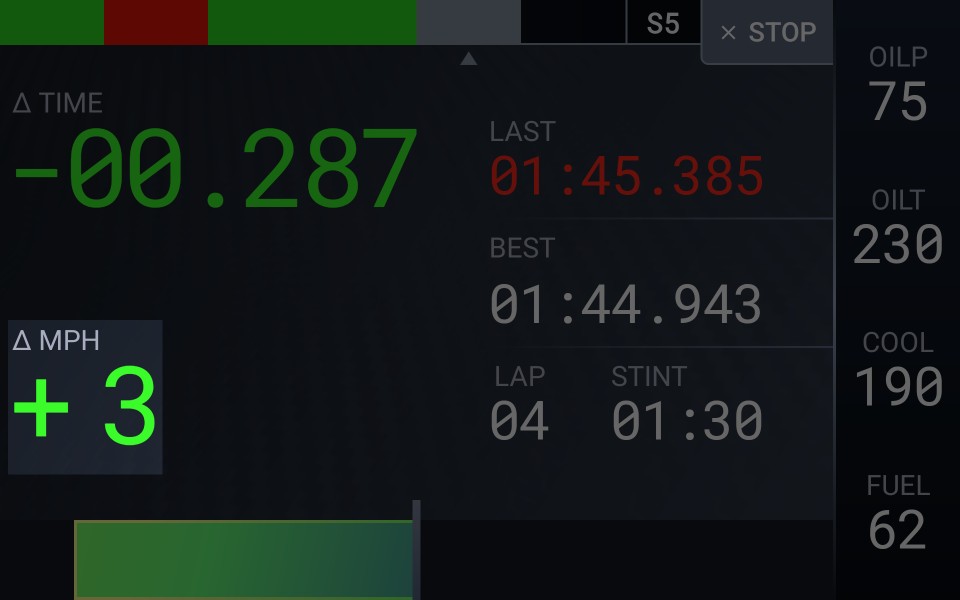
The speed delta is the vehicle speed relative to the best lap speed at the same position.
Speed delta is useful for picking braking markers, and judging your effectiveness at corner exit.
This field is only displayed once a best lap has been set.
Sector Completion
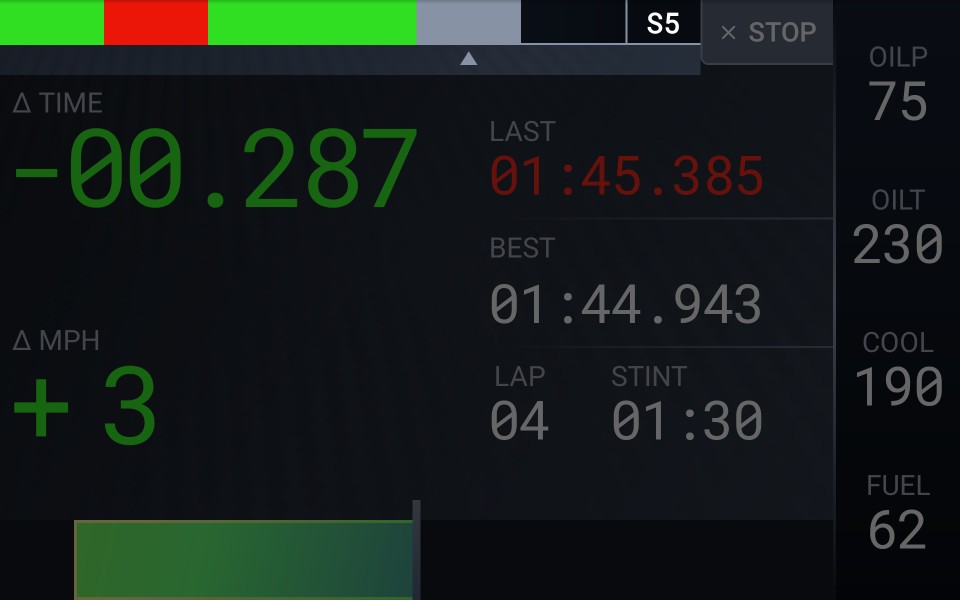
The status of each sector in the circuit is displayed in a progress bar.
The sector is colored green if it was faster than or equal to the best lap, red if it was slower, dark gray if it is the current sector, and black if it has not yet been entered.
The current sector number is displayed in the sector indicator.
Stint Time
The current stint time is displayed when using the Endurance racing mode, and is configured in the Event settings.
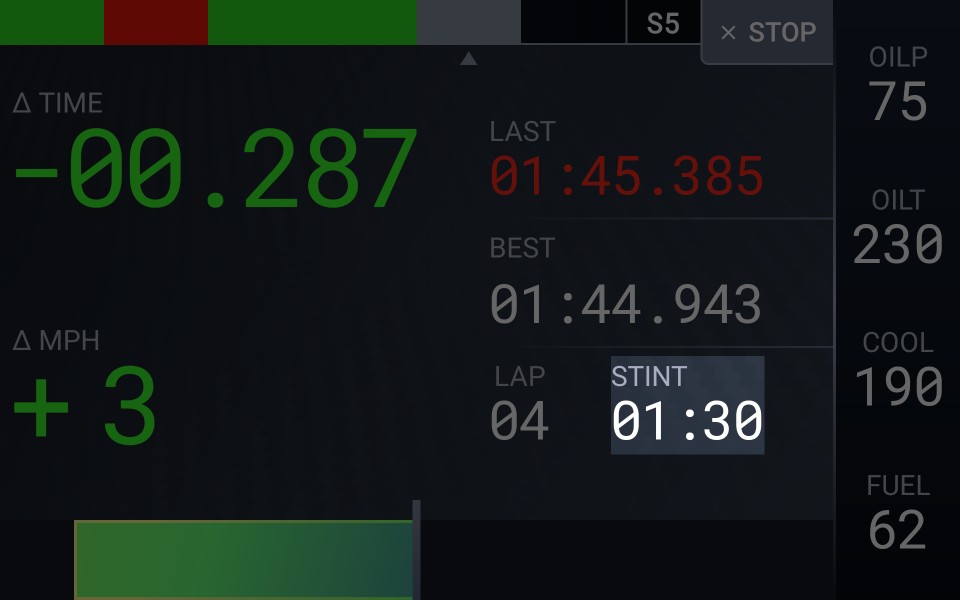
The stint timer displays the number of hours and minutes since the logger began recording. The value is displayed in orange when the remaining stint time is less than the configured warning threshold, or in red when the stint time has exceeded the configured maximum value.
The stint time is reset whenever the current driver is changed during a pit stop. This requires the pit location marker to have been set.
Off Course Indicator
If the logger determines that you are not close enough to the path of the currently selected best lap, then the message OFF COURSE will be displayed in the bottom half of the lap timer.
When off course, lap time delta, the progress indicator, and the delta speed will not be displayed.
Digital Gauges
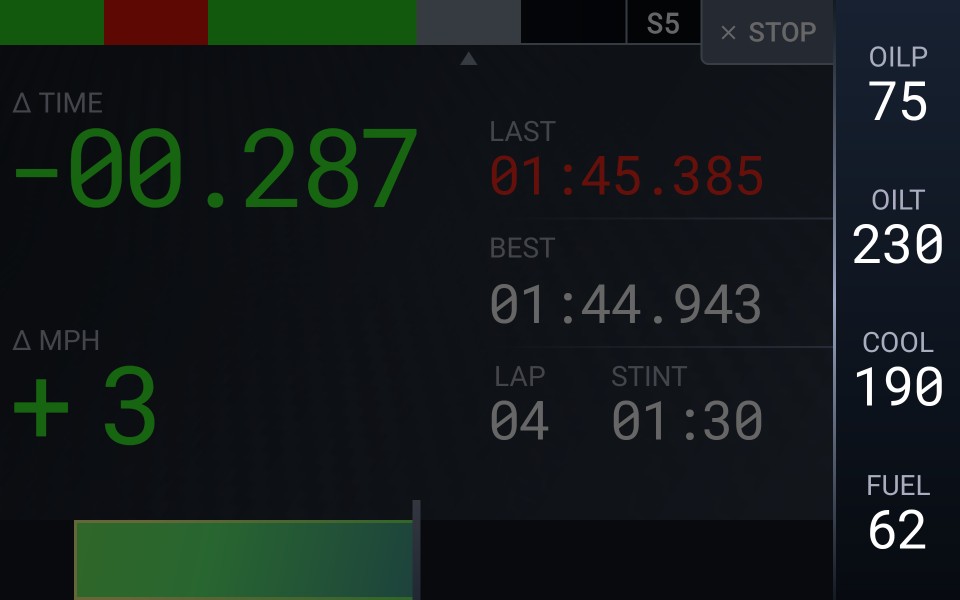
Digital gauges are displayed in the lap timer for the following logger channels:
- Oil Pressure
- Oil Temperature
- Coolant Temperature
- Fuel Temperature
Gauges are only displayed when their individual channels are configured under the Logger Channels settings.
Channel Alarms
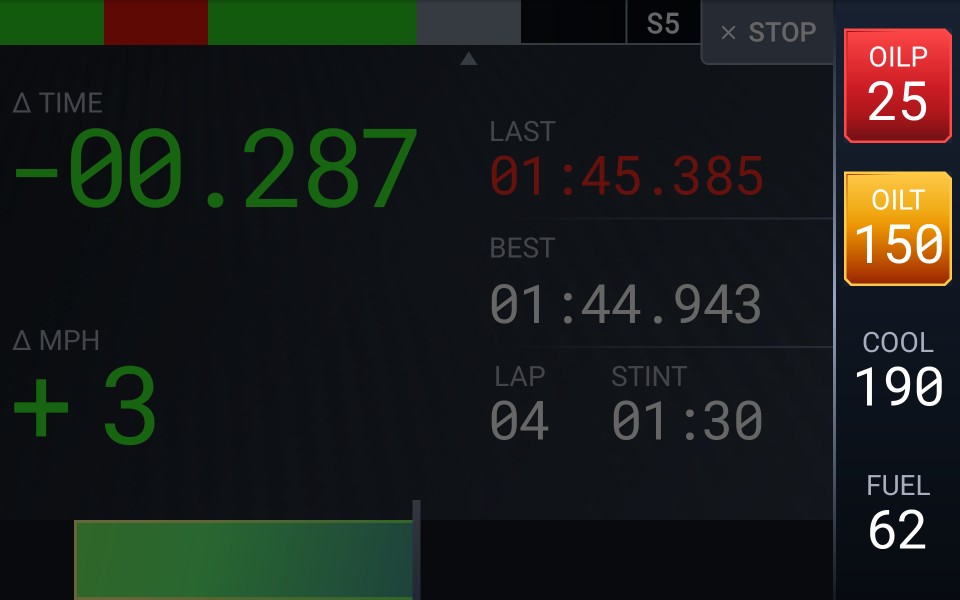
Alarm notifications are displayed for each gauge, and are configured for each logger channel.
Warnings are displayed with an ORANGE background.
Alerts are displayed with a RED background.
Notifications
Notifications may be displayed when a fast lap time or a fast sector time is set.
Pop-Up Notifications
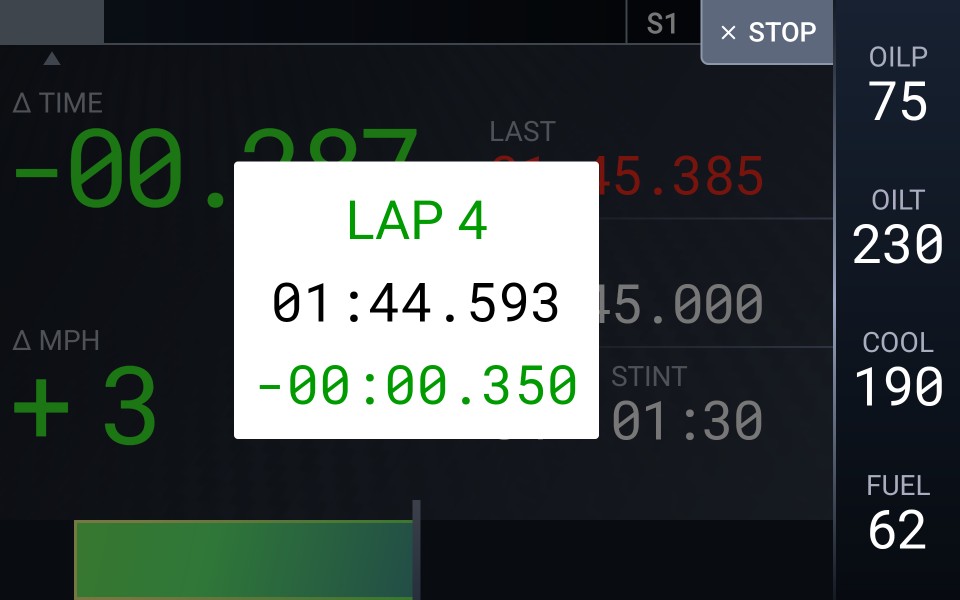
Pop-up windows will display new fast times if this option is enabled in the Display settings.
Voice Notifications
If voice notifications are enabled in the Display settings, then fast times will be announced via the current audio output device. This may be the vehicle Bluetooth stereo connection.
Pit Speed Window
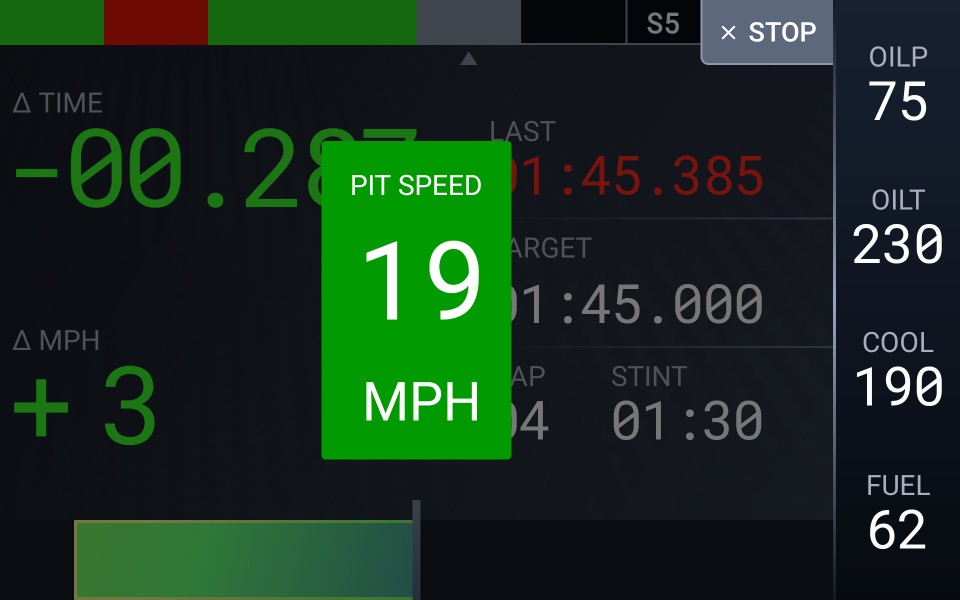
The pit speed window is enabled when using the Endurance racing mode and is displayed any time the vehicle is travelling below 10mph above the pit speed limit for 3 seconds.
The current vehicle speed is displayed in the pit speed window.
A green background is displayed when travelling at or below the pit speed limit. An orange background is displayed when travelling under 3mph above the pit speed limit. Any speed above this will be displayed with a red background.
Set the desired pit speed limit when configuring the event.
Pit Timer

The pit timer is enabled when using the Endurance racing mode (CircuitStorm only), and a Hot Pit marker has been set. The vehicle must come to a complete stop in the hot pit stall where the marker was set.
The elapsed pit time is displayed, as well as the next selected driver.
The pit timer will automatically close when the vehicle begins to move.
Next Driver Selection
The next driver can be manually selected at any time while the vehicle is stopped. Automatic driver rotation is not enabled in Endurance racing mode due to the nature of unexpected pit stops and last-minute driver lineup changes.
Changing the driver does not require the logger to be stopped, so that laps with pit stops will be logged.
Analysis Screen
The Analysis screen allows you to review recorded logs and videos.
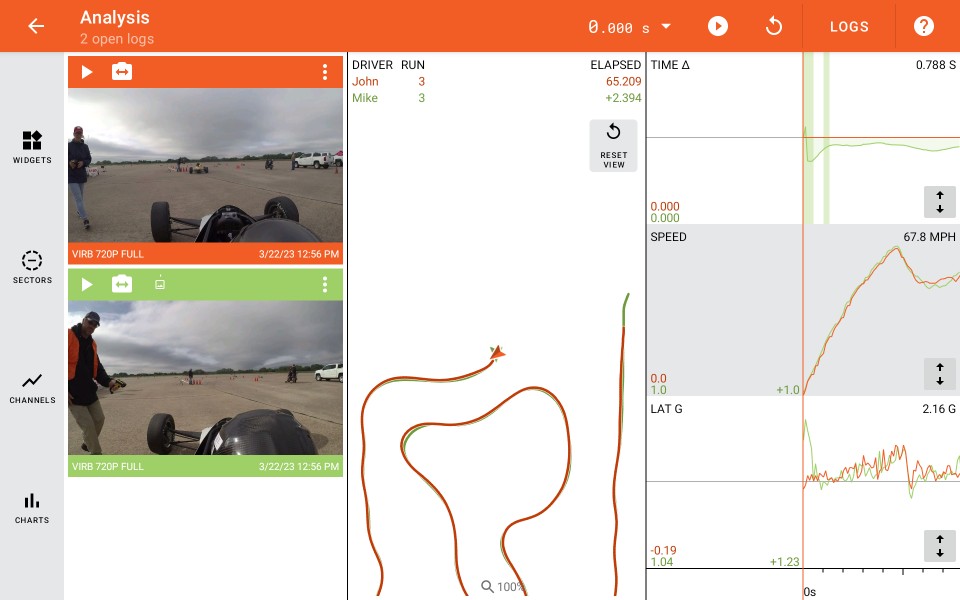
From here, you may access the storage browser in order to open logs, access and configure various analysis widgets, and review and manipulate video files.
Analysis Toolbar

The Analysis screen toolbar displays the current analysis position and provides access to the storage browser.
Toolbar Controls
Current Analysis Position

The current analysis position is displayed as either time or distance, depending on the selected analysis mode.
To change the analysis mode, tap on the current position to open the selection menu.

Playback Controls

You can start or pause playback of the current logs in real time by tapping on
 and
and
 .
.
Tap  to reset the current analysis position to the beginning of the logs.
Note that when a start marker is set, the current analysis position will display a negative value until the current position is at or past the marker.
Browse Logs and Storage

Tap to open the storage browser and select logs for analysis. You can have up to 6 logs open for analysis at any given time. By default, only 2 logs will be kept open after a new log is recorded. This value can be increased in the main analysis settings.
If no logs have been loaded when you first enter Analysis mode, you will be automatically prompted to browse events and select laps. If you currently have logs open for analysis, then you will be prompted with additional options to load logs:
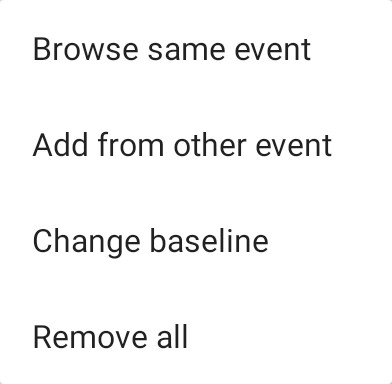
Log Selection Options
- Browse Same EventSelect and replace all logs currently loaded from the baseline log event.
- Add from other eventAdd laps from a different event than the current baseline log.
- Change baselineChange the baseline lap that other logs are referenced against from the current open laps. The default baseline lap is the top lap in the selection list.
- Remove allRemove all open laps from the analysis view, and open the storage browser.
Analysis Control Bar
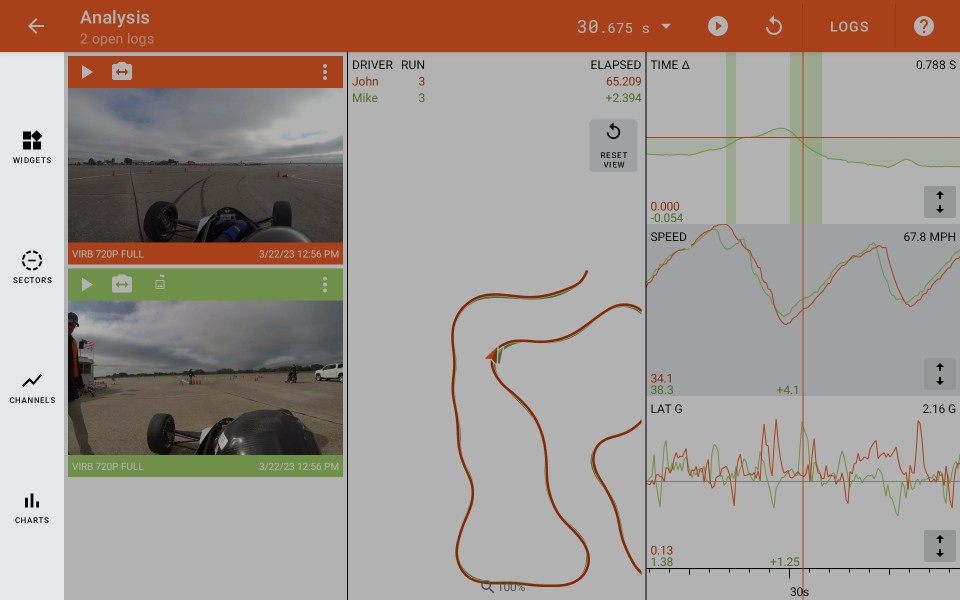
The analysis control bar provides controls for various analysis widgets.
Analysis Widgets
Tap  to select form the list of optional analysis widgets.
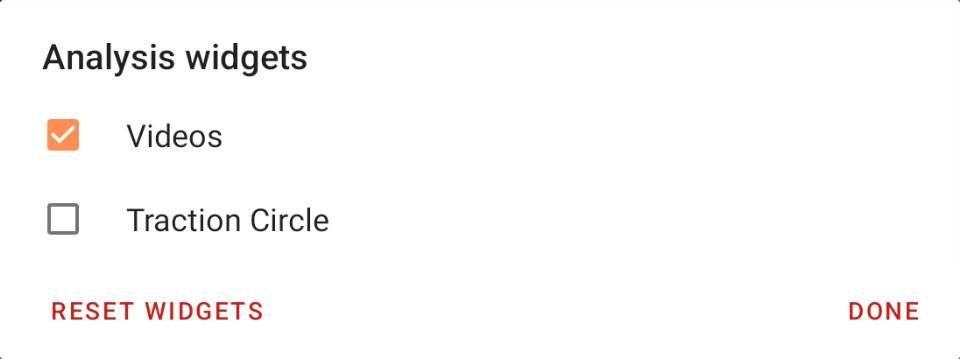
Tap to reset the widgets to their default sizes.
Toggle Sectors and Turns
Tap  to toggle sector markers, as well as sector and apex coach controls within the map view.
Configure Traces
Tap  to configure the channels that are displayed in the traces view.
Charts
Tap  to view a set of pre-configured charts and histograms compiled from the currently open logs.
Analysis Widgets
The analysis screen is composed of several widgets. Some of them can be toggled or configured to customize the view to your needs.
Each open log is assigned a unique color that is consistent across all widgets. A color-blind option is available under the main display settings.
Log Analytics

Information for each open log is displayed, including the driver, lap/run number and elapsed time. Depending on the race mode and sector visibility, sector times and 60ft times are also displayed.
Traces and Position Scale
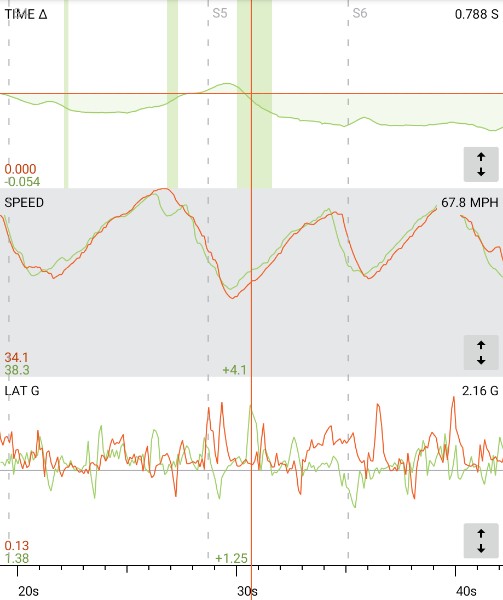
The traces widget displays a graph for each of the selected channels. Individual channels will be expanded to consume all of the available height. If additional space is required, you can scroll up/down to view all of the available channels.
Drag left/right in order to change the current analysis position. Pinch to zoom to increase the analysis resolution. The position scale at the bottom indicates the current analysis position and resolution.
Trace Channels
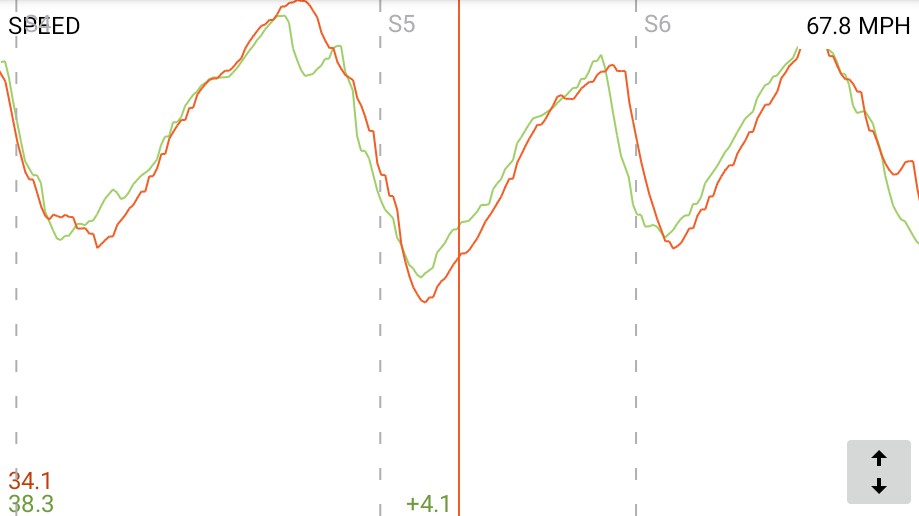
Graphed values for each open log are displayed on a per-channel basis. If sector analysis is enabled, the sectors and markers are demarcated as well.
Channel Legend

|
Channel LabelDisplays the name of the channel. |

|
Channel ValuesDisplays the channel value for each open log at the current analysis position. |

|
Delta ValuesDisplays the delta value compared to the baseline log for each subsequent log at the current analysis position. |

|
Peak ValueDisplays a single peak value attained for all open logs over the total duration. |
Tap  to expand an individual channel to the full available height.
Tap
  to restore the channel height.
Map View
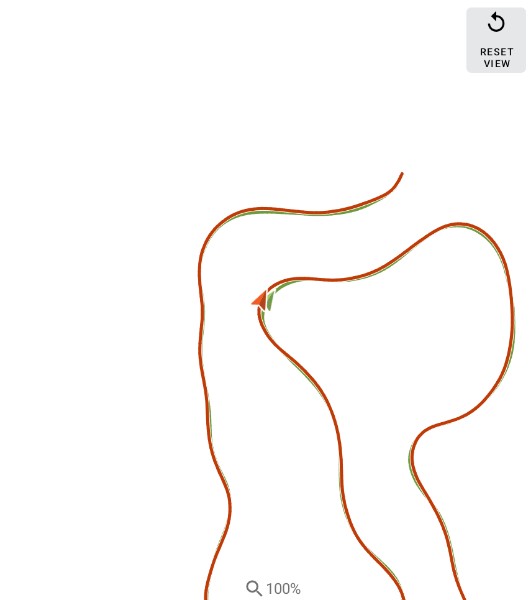
The map view displays the route for each open log, as well as the current analysis position.
Map Controls
Pinch to zoom in/out on the map. The current analysis position markers will always be centered in the view.
Depending on the racing mode, swipe up/down or left/right to change the map rotation and elevation.
Tap  to reset the current zoom, rotation and elevation back to the default values.
Tap a position marker to align all logs to the same position.
Map Sectors
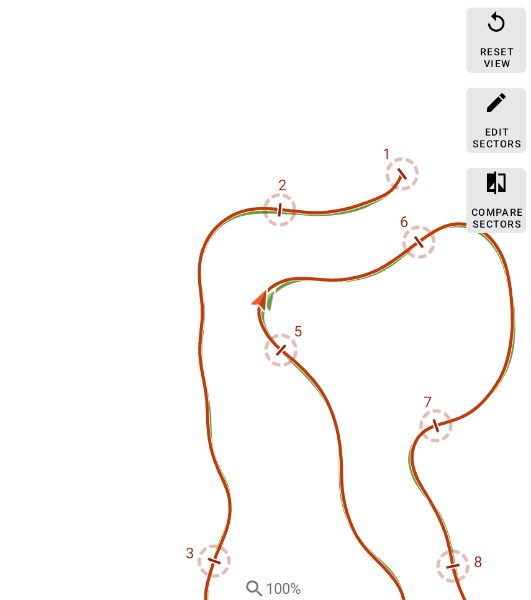
When you toggle the map sectors in the analysis toolbar, individual sectors are demarcated on the map.
Please note: Start / Finish sectors are always displayed on the map, but they only respond to tap gestures when all sectors are toggled for display.
Tap an individual sector indicator to view it in the Sector Analysis screen.
Optionally, you can tap  to view the current sector for the baseline log in the Sectors Analysis screen.
Tap  to enable the sector edit controls:
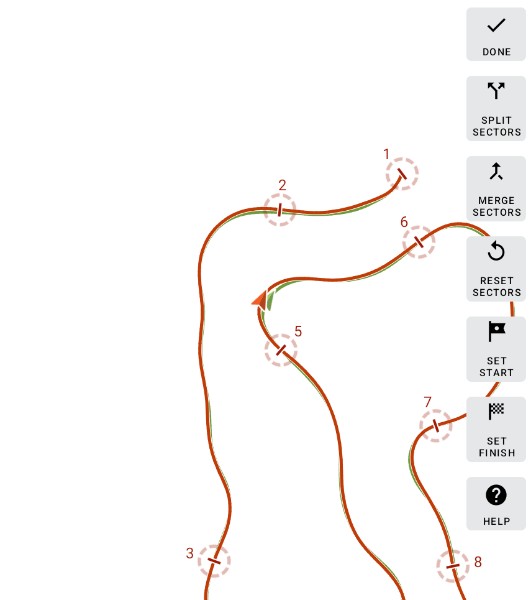
Tap  to open contextual help for section editing.
Videos
Video frames are displayed for each open log that has at lease one captured video file. Swipe up/down to view videos for all available logs.
Log Video View
Each video view displays the video frame corresponding to the current analysis position of its open log.
Video Menu
Tap  to open a context menu with choices to add, remove, share, and overlay videos.
Tap 'Help' at the bottom of the menu for video contextual help.
Traction Circle
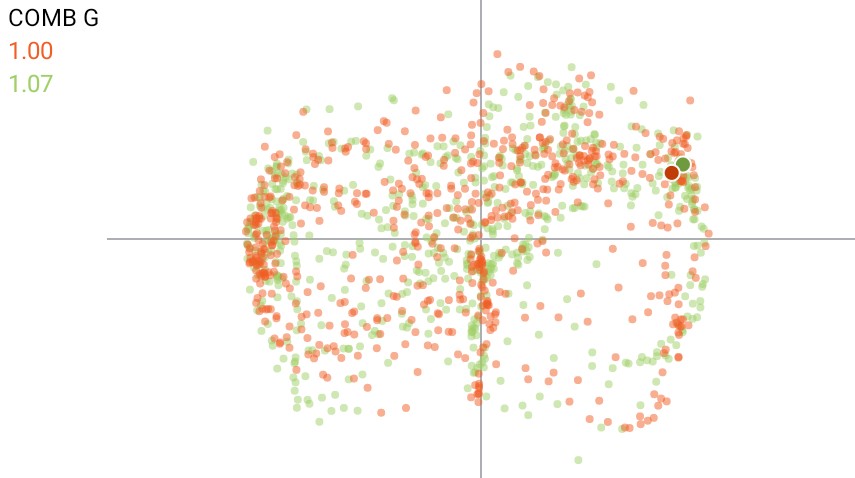
Displays a plot of lateral and longitudinal acceleration for each open log, in order to compare which log made better use of available traction.
The current analysis position of each open log is indicated along with the combined 2D acceleration value.
Resizing Widgets
Analysis widgets can be resized by long tapping and dragging on the border area between the video widget and the map widget, or the border area between the traces widget and the map widget.
When the resizing control is active, an overlay scrim will be visible. You may then drag the border in the direction that you wish to reposition it.
Video Analysis
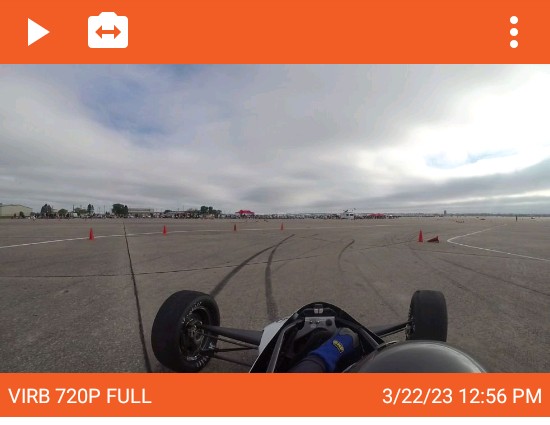
The video frame corresponding to the current analysis position is displayed, along with tools to playback and manipulate the video.
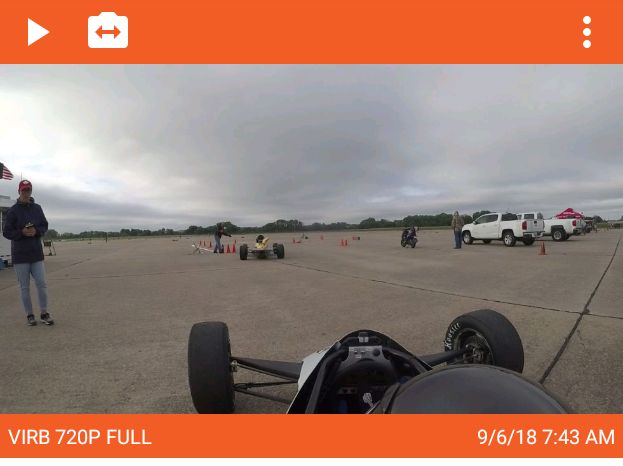
The video source, resolution and timestamp are displayed along the bottom:
Video Toolbar

Each video view has its own toolbar that allows playback, selection, and manipulation of video. If a video file is beinng downloaded from an external camera, download progress will also be displayed.
Video Playback
Tap  to playback video files. If multiple files are available for a log, then you will be prompted to select one.
Video Source
Tap  to select the video source from a list. This can be an internal camera, an external camera, or an auxiliary source.
Video Menu
Tap  to open a context menu with choices to add, remove, share, and overlay videos:
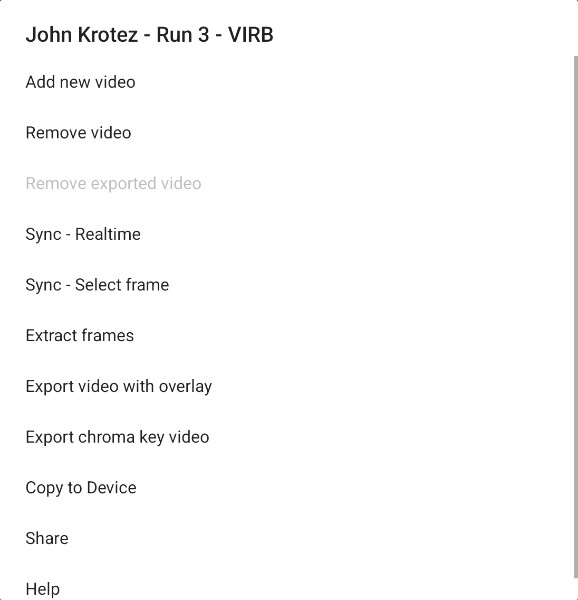
Basic Operations
These options are available even when no video files are associated with the current log.
| Add new video |
Allows you to select a video on your device to associate with the open log as an auxiliary video. Only 2 auxiliary videos may be attached to a log. If the current log is already associated with 2 auxiliary videos, then this option is disabled |
| Add from other log |
Use this to associate a video file from another open log with this log. This is used when an auxiliary video has been added that spans multiple laps around a circuit, and you wish to associate additional open logs with the video. This option is only available for logs recorded using a circuit-based racing mode such as Time Attack. |
| Export chroma key video |
Overlay log data over a chroma key background for use with a third-party video editor. |
Video Operations
These options are available only if a video is associated with the current log.
| Remove Video |
Removes the video from this log. If the video is not associated with any other logs, then is will be deleted from the device. |
| Remove Exported Video |
Select and remove a previously exported overlaid video file. Use to recover storage space. |
| Download File |
Download the video file from a remote camera. By default, low-resolution video files are downloaded immediately after logging stops. The full resolution file will need to be download manually in order to export an overlaid version. Note: For longer recording sessions, Wi-Fi cameras will split up captured video into individual chapter files. If this is the case, all of the recorded chapters will be downloaded and merged. This can take some time. Note: Due to limitations imposed by Android 10 and below, only video chapter files with a combined size under 4GB may be downloaded and merged. |
| Import File |
Import a video file from a location on the mobile device. The video file would have been copied from a remote camera SD card, since downloading files over a camera Wi-Fi connection can be very slow. Note: For longer recording sessions, Wi-Fi cameras will split up captured video into individual chapter files. If this is the case, all of the recorded chapters must be copied and will then be merged. This can take some time. Note: Due to limitations imposed by Android 10 and below, only video chapter files with a combined size under 4GB may be imported and merged. |
| Sync – Realtime |
Adjust video-data synchronization while playing the video back in realtime. |
| Sync – Select frame |
Adjust video-data synchronization to the current analysis position by selecting the individual video frame. It is common to adjust synchronization at the start of a log by selecting the frame where the vehicle begins to move (staged racing modes), or selecting the frame where the vehicle crosses the start/finish sensor (circuit racing modes). |
| Extract frames |
Extract video frames to display while analyzing logs. Frames are normally extracted after the logger stops, or after a video file is downloaded from a remote camera. If for some reason this does not occur, or you modify the video extraction frame rate in the video settings, then the process can be run again. |
| Export video with overlay |
Exports the current video with data overlaid from the log. If using a remote camera, this requires that the full resolution file be downloaded or imported. A 2nd video can be included in the overlay, from either the same log or another open log. There are several options used to configure the video overlay. This process has its own contextual help. |
| Copy to Device |
Copy a video file to a location on the mobile device of your choosing. Due to Android security restrictions, videos and other data are kept in a special directory structure that is not easy to find. In order to access specific video files, you must first copy them to a directory of your choosing. If multiple video files (low resolution, full resolution) or renditions (original, overlaid) are available, then you will be prompted so select the desired file. |
| Share |
Share a video file file via Android share prompts (YouTube, social media, etc) If multiple video files (low resolution, full resolution) or renditions (original, overlaid) are available, then you will be prompted so select the desired file. |
Trace Channels
This screen allows you to select which trace data channels are displayed in the Analysis screen.

Some channels are calculated or filtered, while others are raw recorded data.
Channel Selection
Scroll up/down the list of available channels, and tap each one to toggle its selection state.
Reset to Default Selection

Tap on the Reset button in the toolbar to reset to default selected channels.
Channels Types
Some of the available channels have unique attributes that will determine how you configure and best make use of them.
| Time Delta Channel |
The time delta channel is used to compare time gained/lost between 2 or more logs, compared to the current baseling log. Significant events that resulted in a sharp change in time delta are indicated with a background highlight. The area under the curve is shaded for improved visibility. |
| Vehicle Telemetry Channels |
These channels require a dedicated data logger, OBD/CAN scan tool, or wireless connection to the vehicle.
|
| Acceleration Channels |
Lateral, Longitudinal, Vertical and Combined 2D are available as either filtered, raw, or calculated versions. When using the internal accelerometer in a mobile device, select the filtered channels. When using a dedicated data logger with IMU, select the raw channels. If you were not able to properly configure the device orientation, use the calculated channels. |
| Calculated Channels |
Various calculated channels can be viewed during analysis, however they are mostly used as inputs for other functions. Some may still be useful during analysis. |
| GPS Diagnostic Channels |
These channels can help diagnose GPS/GNSS receiver issues.
|
| Maths Channels |
Maths channels require that you configure their formulas in the main analysis settings. |
Channel Sources
You can compare raw, filtered, and calculated channels in order to judge the quality of your data capture device and configuration. Ideally, no filter should be required if you have an appropriate sample rate, data source, and connection/mounting.
Channel sources can also be selected in the main Analysis Settings. The settings determine which channel versions are used in the traction circle as well as the video overlay.
- Raw ChannelsValues as caputed by the logger. If the sample rate is inadequate or there are device mounting issues, these traces may appear noisy. A properly configured external logger is required to use raw data.
- Filtered ChannelsValues have had filtering applied to reduce signal noise and increase readability.
- Calculated ChannelsValues are calculated based on other channels. Use these when the sources of the raw or filtered channels are not configured correctly or are not reliable.
Sectors and Markers
Modification Controls
Sector are automatically demarcation based on the configured event racing mode.
You may modify sectors to your liking, and adjust the position of GPS markers from within the Map view.
Changes will be automatically saved to the open event, and will affect all logs opened for the same event.
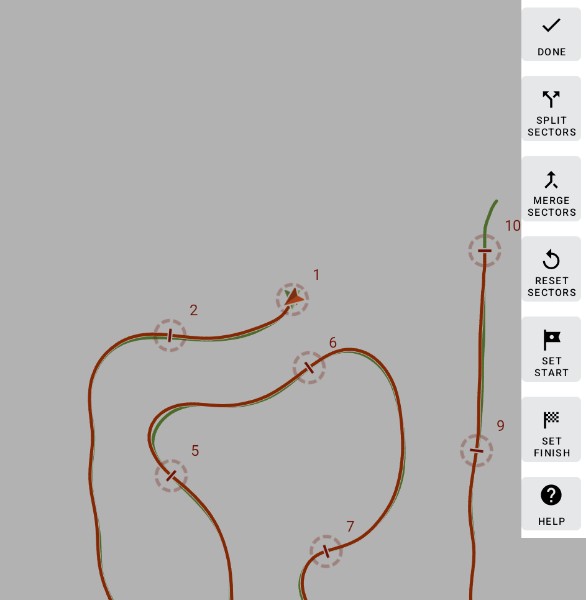
Editing Sectors
Split Sector
Tap
 to split the current sector in 2 at the current analysis position of the baseline log.
Merge Sectors
Tap
 to merge the current sector with the subsequent one.
Reset sectors
Tap
 to reset all sectors back to the auto-generated default values. Start and finish marker positions will not be changed.
Setting Markers
Set Start Marker
Tap
 to set the start marker to the current analysis position of the baseline log. This will change how lap time is calculated.
Set Finish Marker
Tap
 to set the finish marker to the current analysis position of the baseline log. This will change how lap time is calculated, and affect how
exported video is trimmed.
Exit
Tap
 to exit edit mode and return to the map controls.
Sector Analysis
The Sector Analysis screen allows you to compare sector times and values across all open logs.
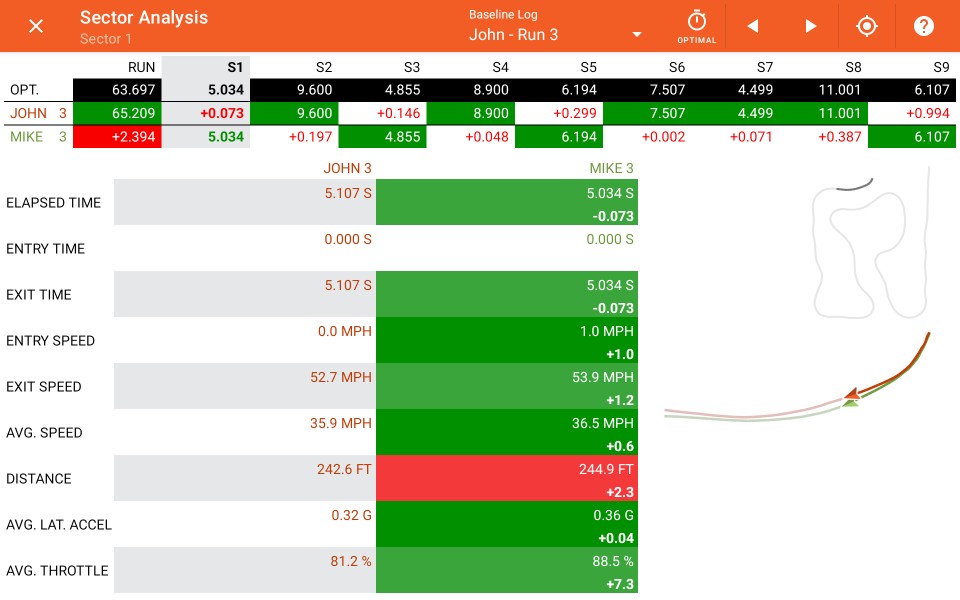
From here, you may select the sector you wish to analyze, configure the data display be changing the baseline log selection, or return to the analysis screen aligned at the start of a specified sector for a more comprehensive analysis.
Sectors Toolbar

The Sectors analysis toolbar displays the current baseline log and provides controls for navigating through the available sectors.
Baseline lap

Tap here to select the baseline log from a list of open logs. This will change the order that logs are listed in the sector times chart, and will also change the baseline values used in the sector channels chart.
If the log you want to use is not available, this is because it is not loaded as part of the existing analysis data set. Return to the main analysis screen and load the lap you desire from the storage browser.
Event Optimal Lap

Tap to open sector analysis for all logs belonging to the same event as the currently selected baseline lap.
Note: Only logs that contribute to the optimal lap time will be displayed.

Tap the left/right arrows move to the previous/next sector sequentially.
Optionally, you may tap on any sector listed in the sector times chart in order to immediately select that sector.
Sector Alignment

Tap to return to the main analysis screen and align all logs positions to the beginning of the currently selected sector.
Sector Analytics
Sector Times
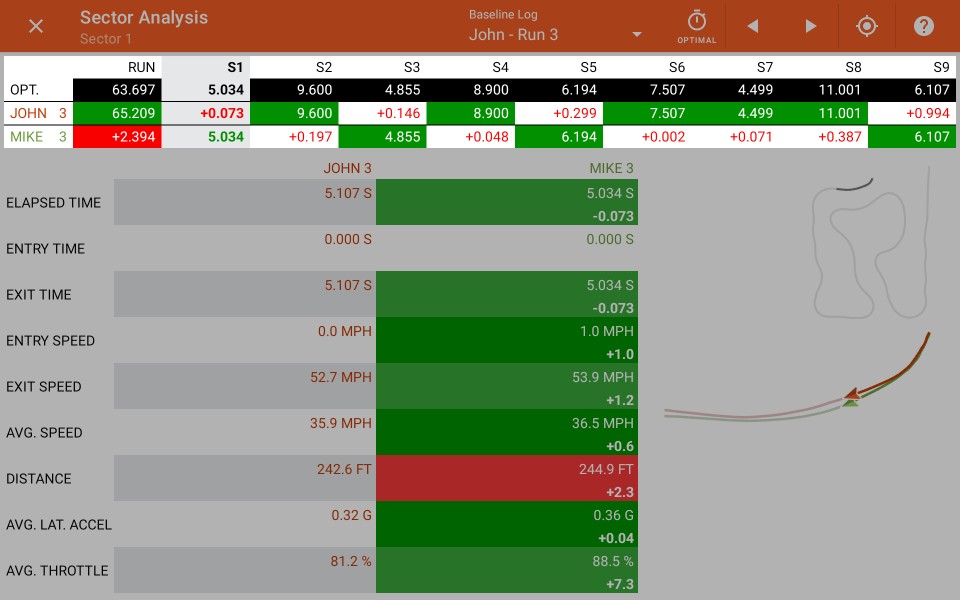
The elapsed time for each log is shown along with the elapsed time for the fastest sector, as well as delta times for slower sectors. You can compare sector times across logs to quickly identify the sectors that require investigation.
The theoretical best lap time, along with the best time for each sector, displayed at the top with a black background.
Fast sectors are displayed with a green background, slower with a red background. For the currently selected sector, the background is a neutral color and the text is displayed in the appropriate color.
Sector Channels
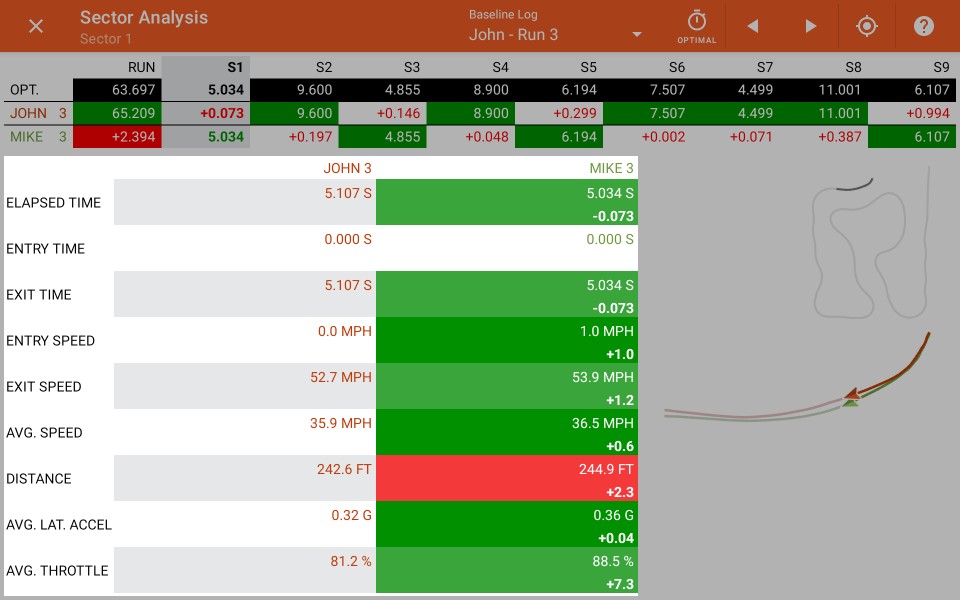
Sector channel values are compared to the baseline log. For each channel, a green background indicates a value that is better compared to the baseline, and a red background indicates a value that is worse compared to the baseline log.
The list of sector channels can be taller than the device screen, so you may drag up/down to see the complete list.
Available Channels
The following channels are available to compare across sectors:
- Elapsed Timetime to complete this sector
- Entry TimeTime arrived at start of sector relative to elapsed total lap time
- Exit TimeTime exited sector relative to total lap time
- Entry SpeedSpeed at entry to sector
- Exit SpeedSpeed at exit of sector
- Average SpeedAverage speed within sector
- DistanceDistance travelled in sector
- Average lateral AccelerationAverage lateral acceration sustained during sector
- Average Throttle %Average throttle application during sector (requires OBDII reader or other external data source)
Sector Map
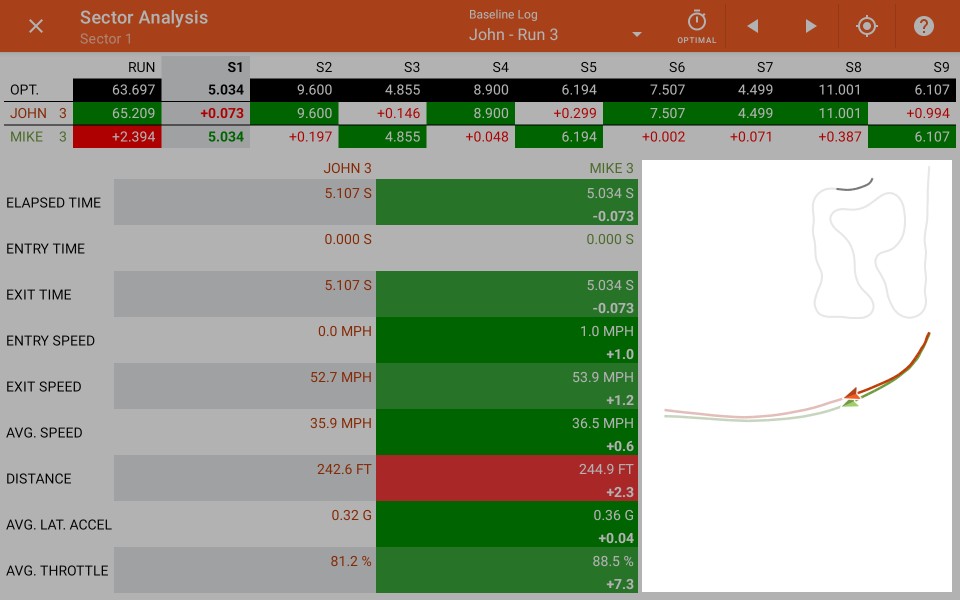
The currently selected sector is displayed for each log, using the same assigned analysis color as in the analysis screen.
The entire log is displayed in an inset map, with the currently selected sector highlighted.
Vehicle position markers are animated to repeatedly show realtime progress through the sector.
Event Optimal Lap
The Optimal Lap Analysis screen allows you to compare sector times and values across all logs for an event.
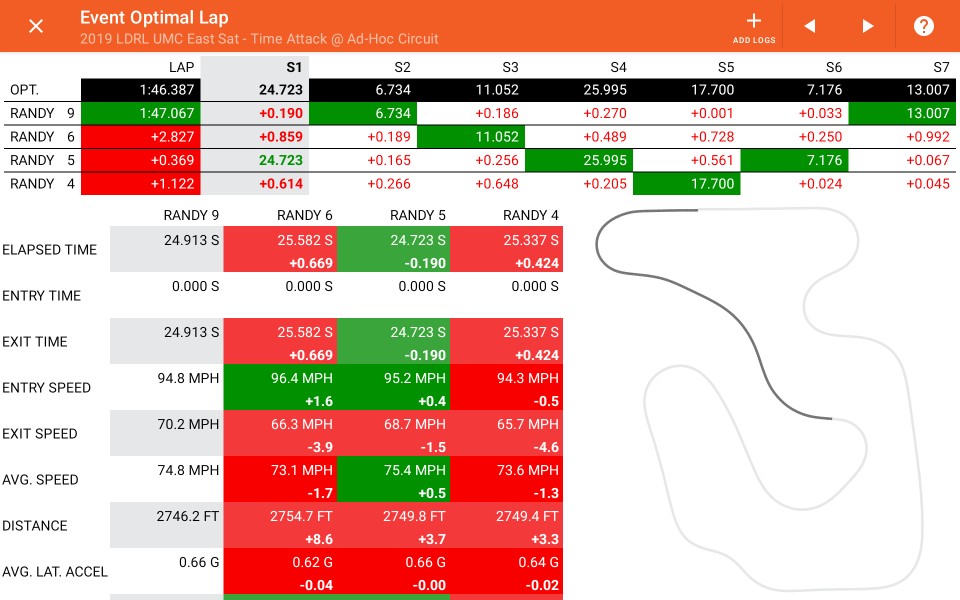
From here, you may select the sector you wish to analyze, as well as add additional logs from other events.
Note: Only the logs that contribute to the optimal lap time will be displayed.
Optimal Lap Sectors Toolbar

The Optimal Lap Sectors analysis toolbar provides controls for navigating through the available sectors, as well as loading additional logs.
Add Logs

Tap here to select the baseline log from a list of open logs. This will change the order that logs are listed in the sector times chart, and will also change the baseline values used in the sector channels chart.
If the log you want to use is not available, this is because it is not loaded as part of the existing analysis data set. Return to the main analysis screen and load the lap you desire from the storage browser.

Tap the left/right arrows move to the previous/next sector sequentially.
Optionally, you may tap on any sector listed in the sector times chart in order to immediately select that sector.
Sector Analytics
The same sector analytics are provided as when analyzing sectors for only the currently open logs.
Apex Coach
The Apex Coach is currently in beta release.
For use with circuit racing modes, you can analyze individual turns, focusing on braking, turn-in, apex and exit.
Automated analysis will provide feedback and suggestions for improving your performance.
Limited turn analysis functionality is currently available while we further develop this feature. Please let us know what you think!
Charts
Use the pre-configured charts in order to quickly spot patterns in your logs that can help you tune your vehicle or adjust your driving inputs.
Speed and Time Delta vs Distance
Use this line chart to find large changes in time delta, then zoom in to examine where differences in vehicle speed contributed to the changes.
Speed and Throttle vs Distance
Use this line chart to compare differences in vehicle speed, and examine the throttle inputs that contributed to those differences.
Lateral and Combined Accel vs Distance
Analyze how much lateral grip you are using, and compare that to the overall grip of the friction circle. Look for gaps that can be filled in with sustained cornering.
Note: The acceleration channels used (recorded or calculated) are configured in the analysis settings.
Vehicle Tuning
Test changes in vehicle setup by comparing major differences in speed through the corners and at the end of straightaways for the same vehicle and driver.
Driver Development
Pay close attention to throttle application and how it leads to differences in exit speeds.
Engine RPM vs Speed (Gearing)
View a scatter plot of engine speed vs GPS-based vehicle speed.
Vehicle Tuning
Use the gearing scatter plot to verify an adjust your gearing range in cars with custom transmission gears, final drives, sprockets, and differentials.
Driver Development
GPS speed vs engine RPM can show how much slip under acceleration and braking are being induced by the driver overall.
- A chart that shows tightly grouped lines indicates that the driver is consistently under-driving the tires.
- A chart that shows areas of poorly-grouped indicate a driver that is over-driving the tires in areas, most likely corner exit and braking.
- Some spread withing each gear range indicates that the driver is consistently optimizing the slip angles of the tires.
Lateral Accel and Speed Histogram
Turn Radius and Lateral Accel Histogram
Speed Histogram
Engine RPM and Throttle Histogram
Throttle and Speed Histogram
Video Playback
Play original video files with data overlaid in real-time.
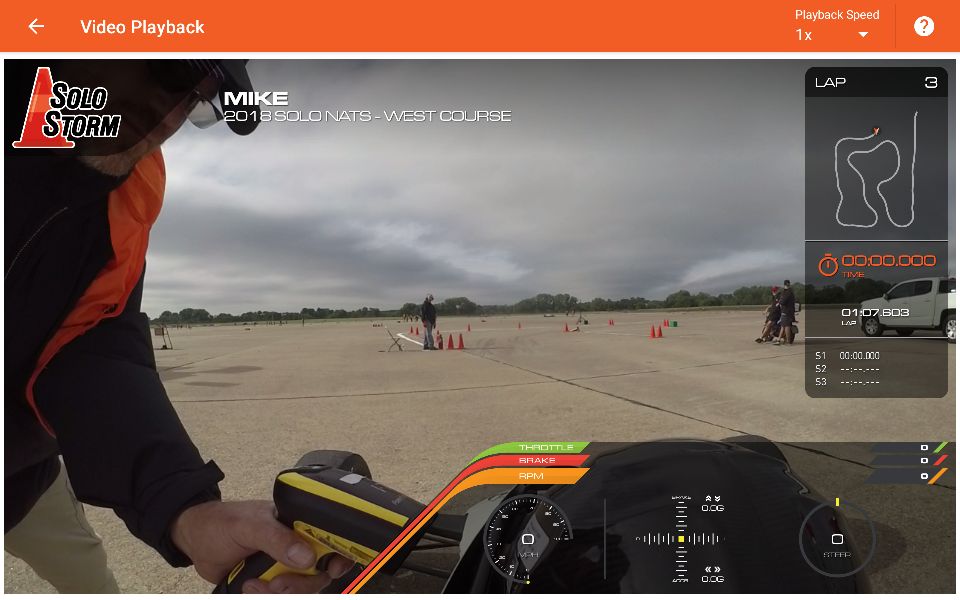
Video Playback Toolbar

On devices running Android 6 and higher, the playback speed can be selected from the provided dropdown.
Video Overlay
Create a new video with log data visualized and overlaid on top.
The resulting video file can be copied off of the device or shared via YouTube, social media, etc.
Video Overlay Toolbar

The toolbar displays the name of the currently selected log file, and allows you to launch the overlay background job.
Export

Tap to accept the current settings and begin exporting the video from within a background process.
Note: Before starting the export process, the app will check that your mobile device is capable of decoding the selected input video(s). It is common for devices to be unable to decode higher resolutions and frame rates, such as 4k 60fps. If your mobile device does not indicate that it supports the selected video files, then an error will be displayed.
Progress and completion is communicated via a system notification.
Output Types
The video overlay settings will differ depending on the type of video to be generated.
Overlay Over Existing Video File
The exported video will feature a main video image, and may feature a secondary video image.
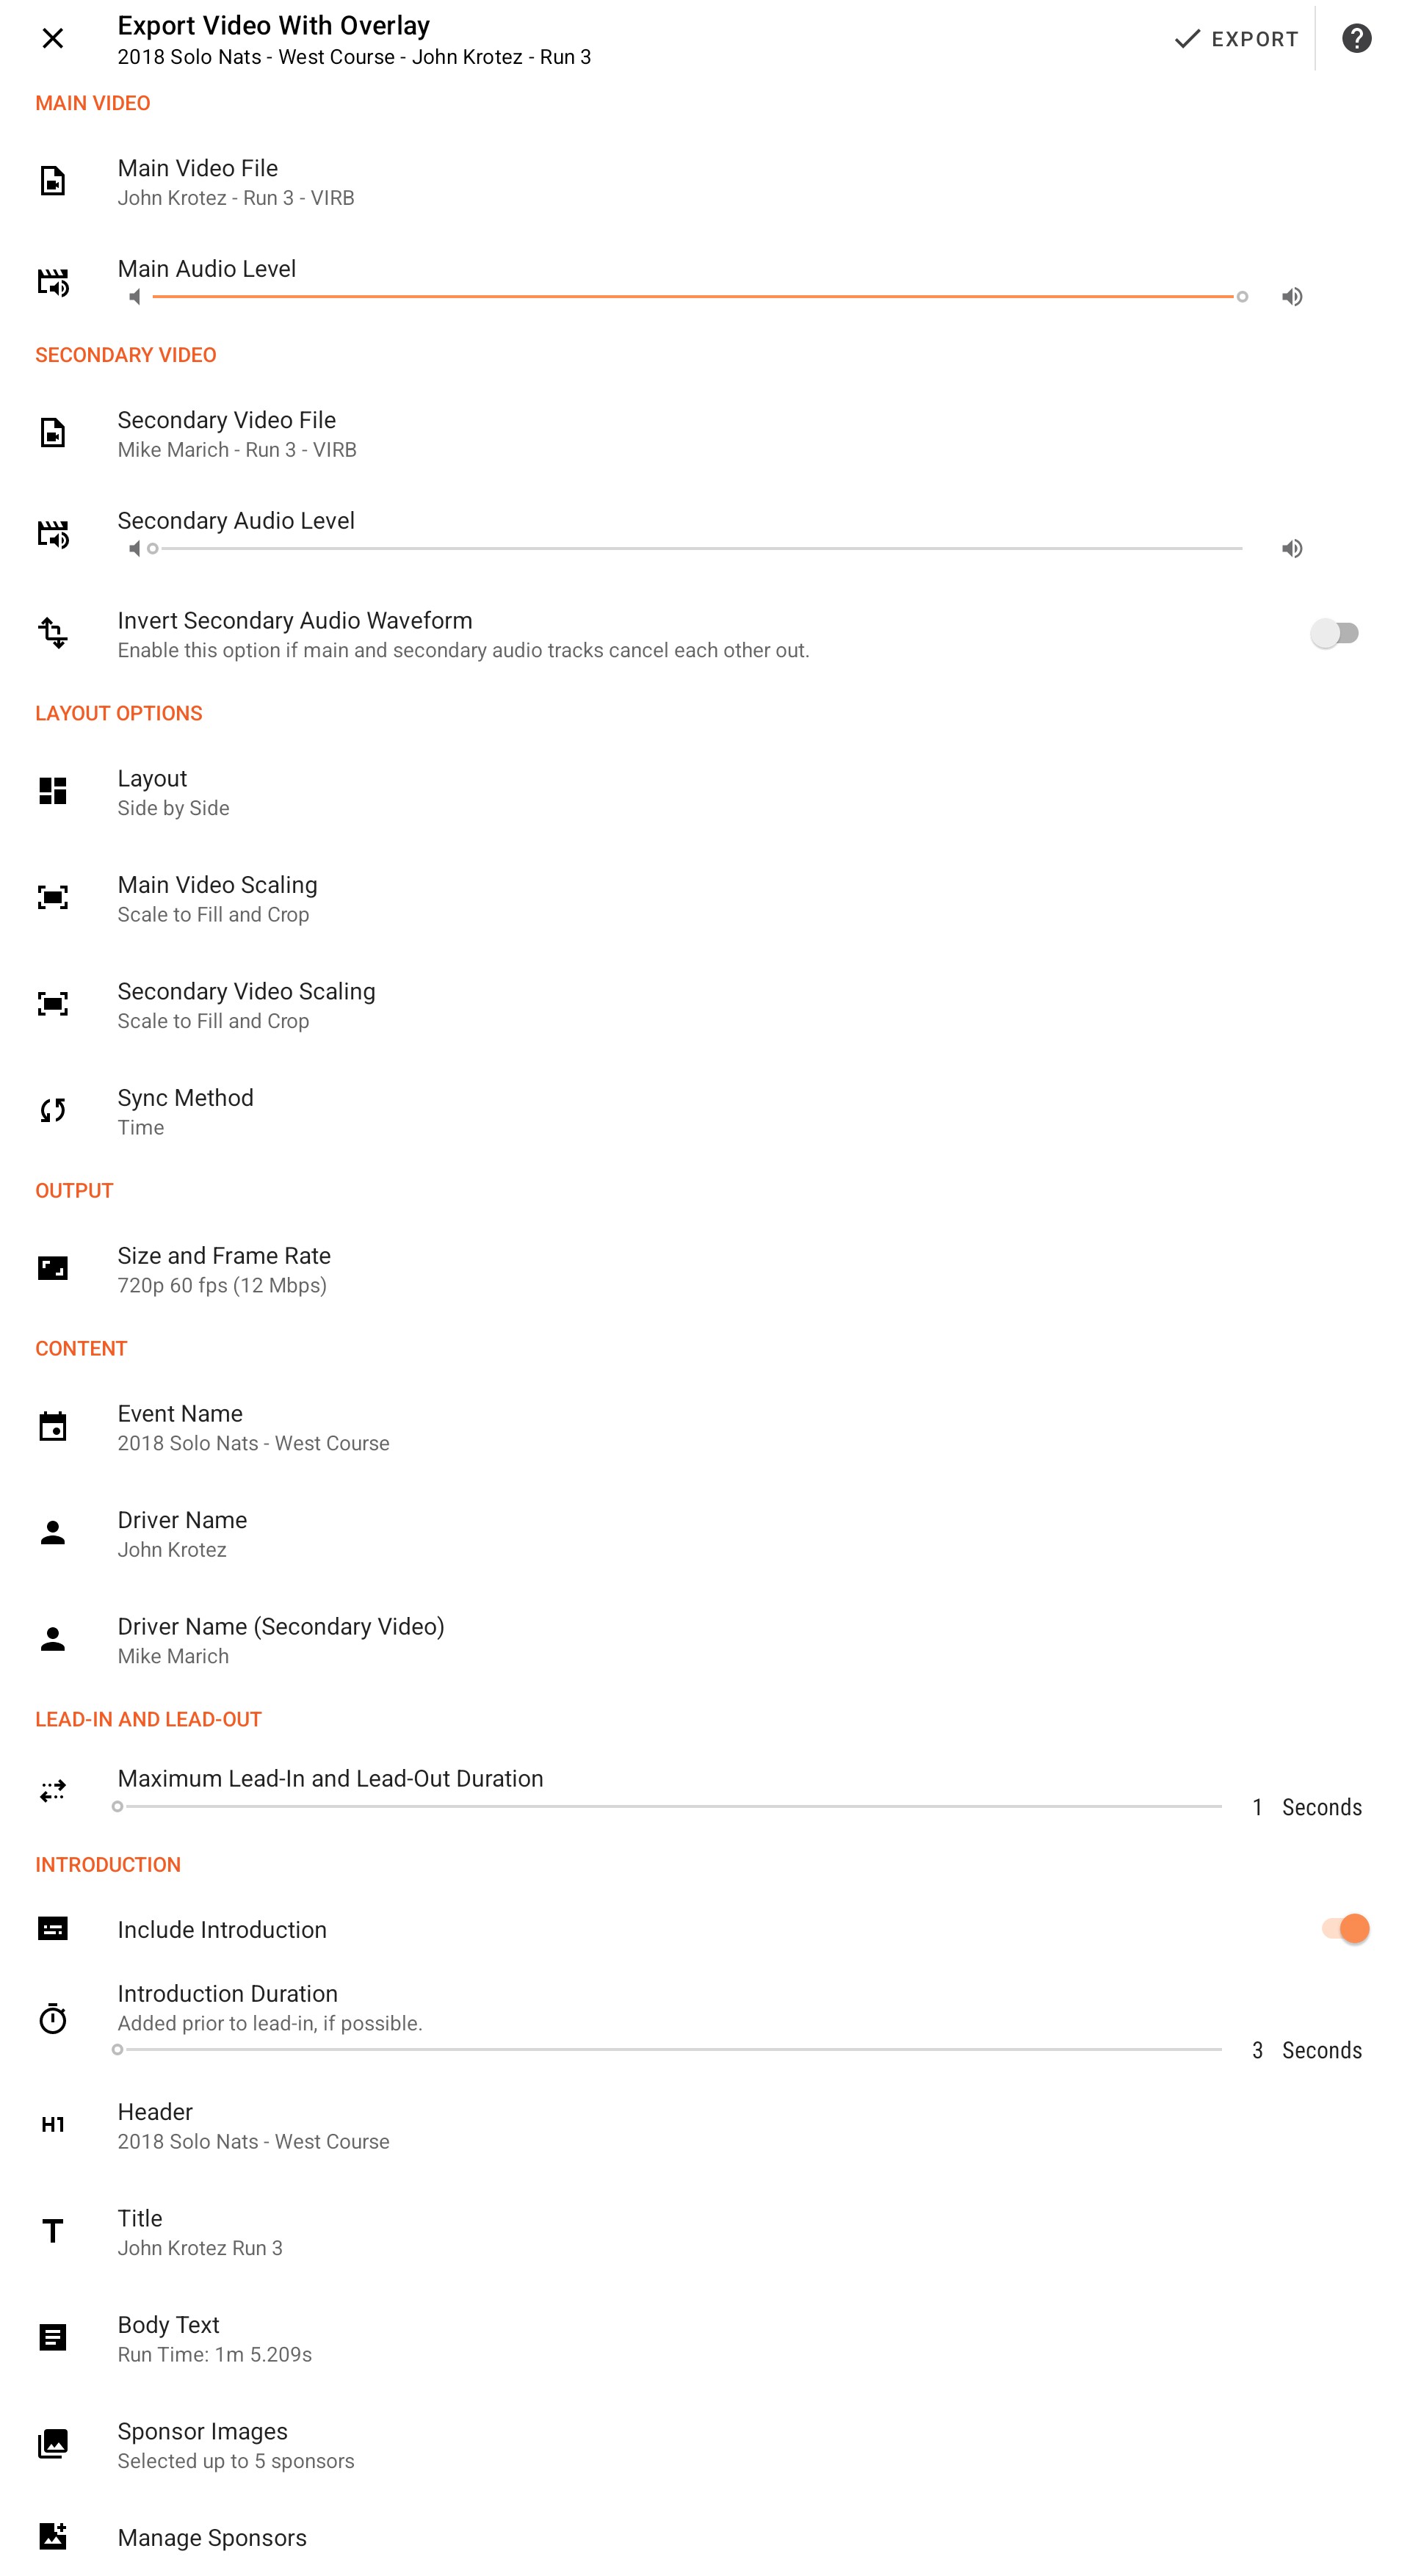
Note: Not all devices will support exporting higher-resolution video files, and not all devices will allow a secondary input video to be included. Please test your device with different video resolutions and frame rates.
Overlay Over Chroma Key Background
The exported video will feature a chroma key background, and may feature a secondary video image.
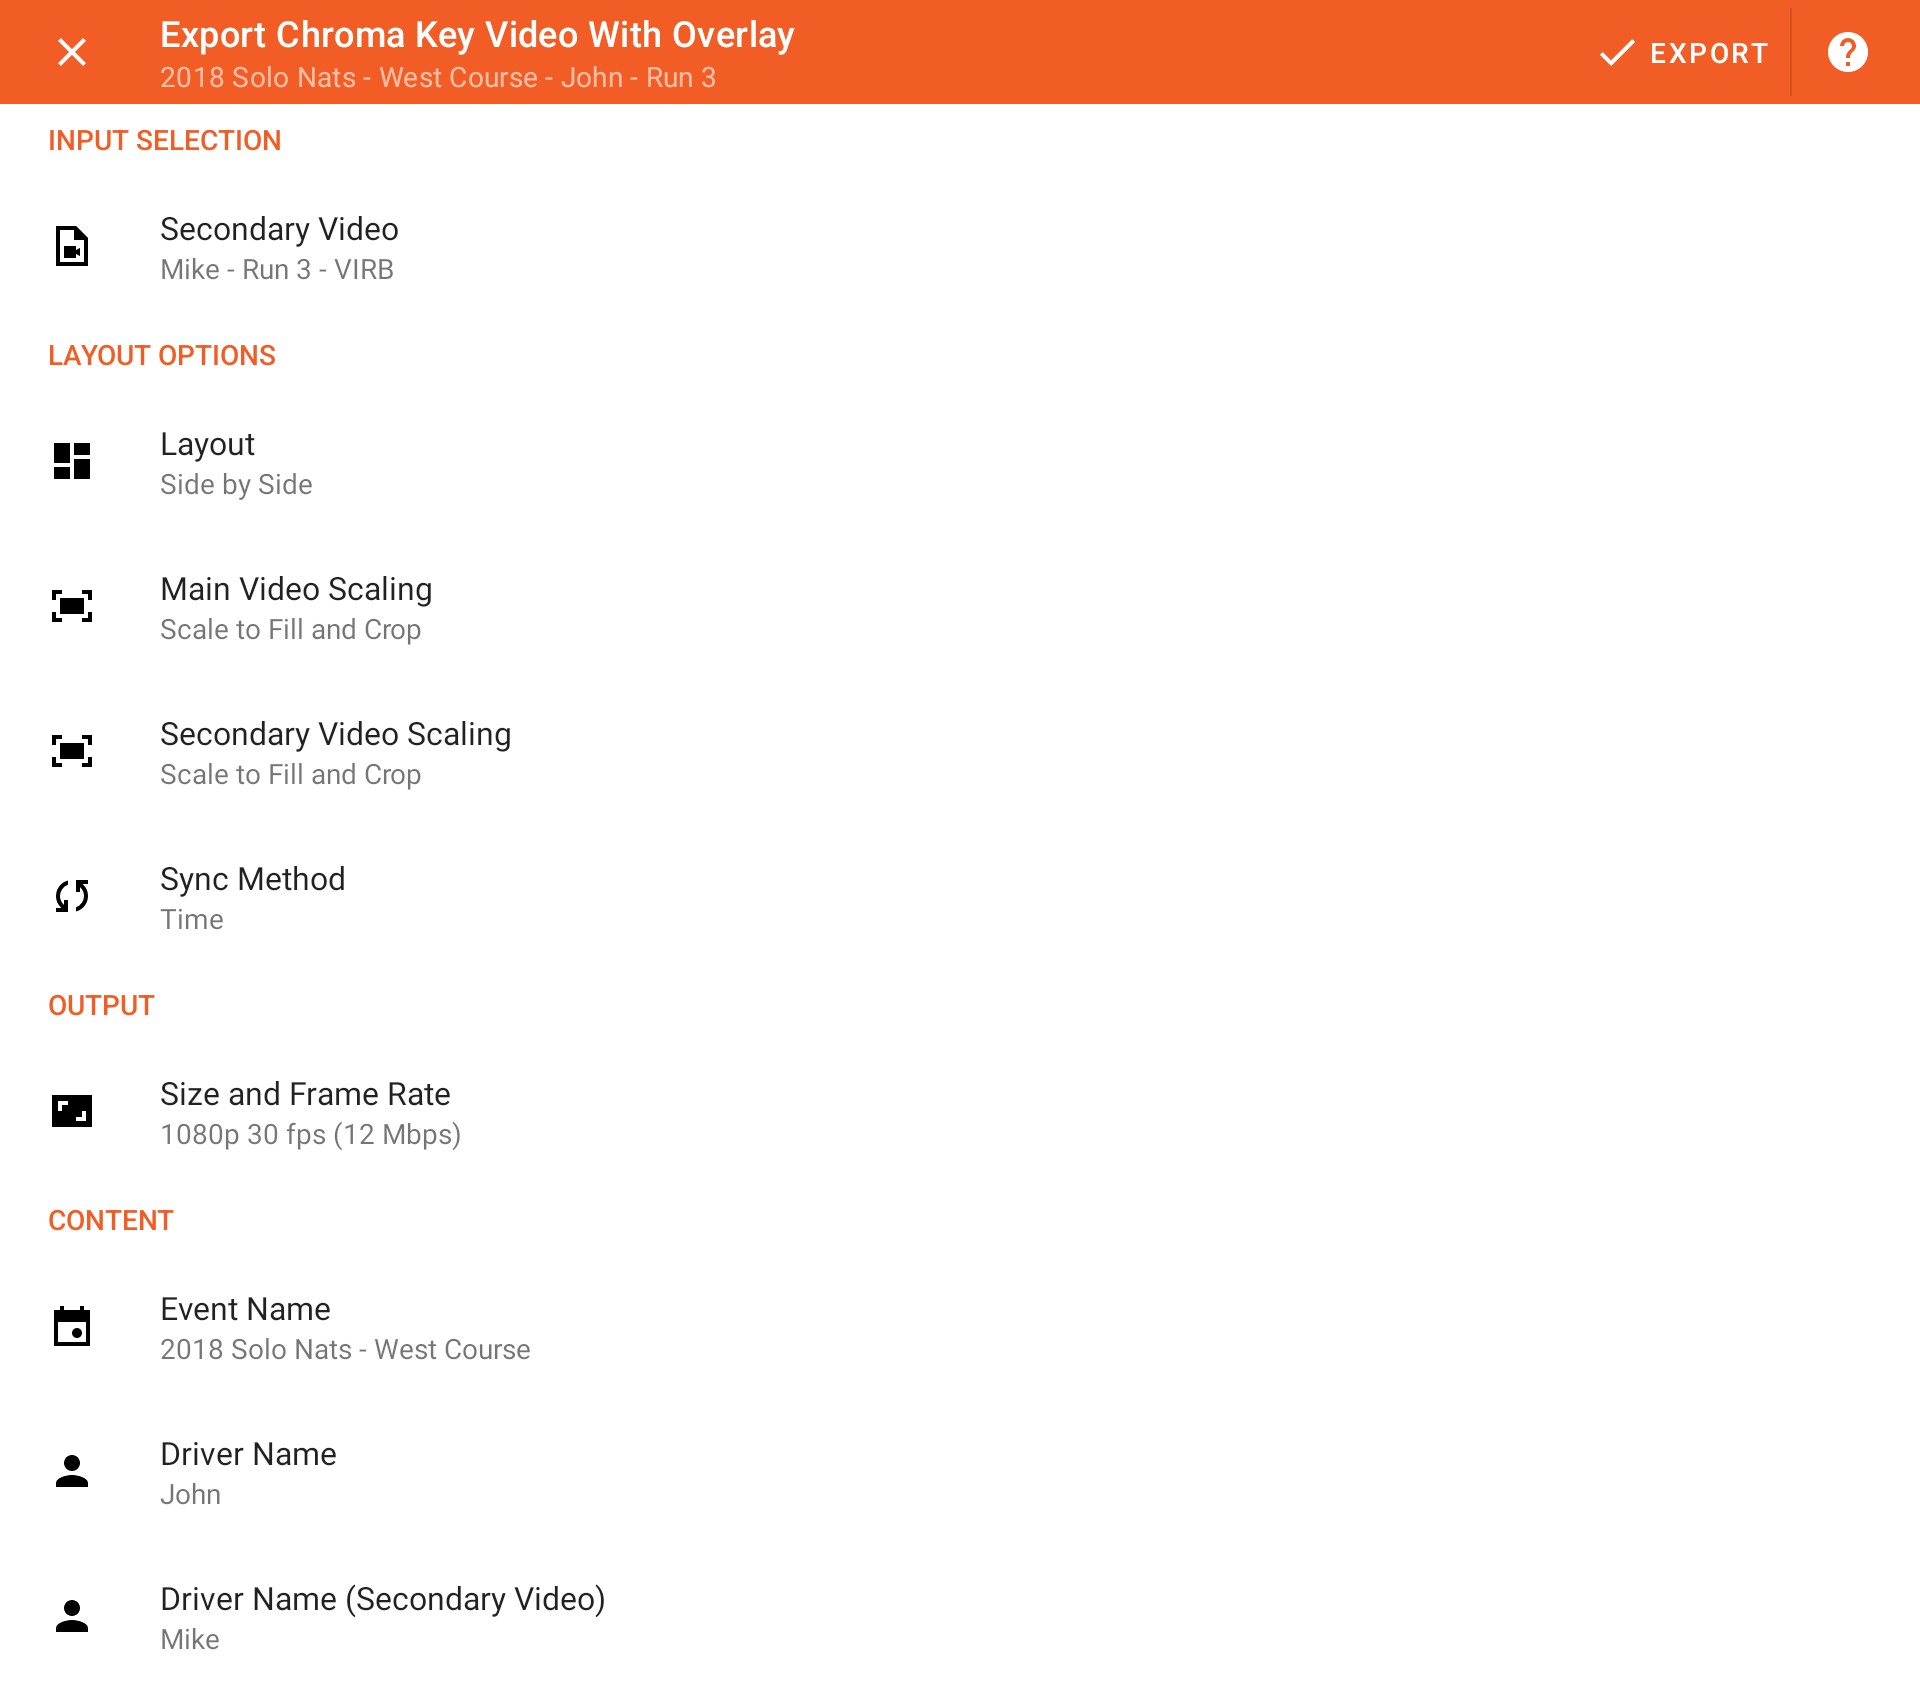
Note: If your mobile device does not appear to support encoding HD videos (16:9 aspect ratio), then an error will be displayed.
Overlay Settings
Input Selection
| Main Video |
Select the main video file to be overlaid. This can be any full resolution video file associated with the selected log. Note: This option is not available when exporting a chroma key video. |
| Secondary Video |
Select a 2nd video for comparison to the main video. This can be any full resolution video file associated with any open log, except for the currently selected main video. If a secondary video is selected, additional layout and synchronization settings are available. |
Layout Options
| Layout |
Select the video layout to use. Only the 'Standard' layout is available if no secondary video is selected. If a secondary video is selected, then additional layouts are available:
|
| Main and Secondary Video Alignment |
Determines how to position the video frame in the selected layout. This option is useful when working with input videos shot in the portrait orientation, or when scaling to fit the side-by-side layout. Available values are:
|
| Sync Method |
Determines how the main and secondary video images will be synchronized to each other, either via elapsed time or distance. This option is only available if a secondary video is selected from a log that is different than the log for the main video. |
Output
| Size and Frame Rate |
Determines the height, width, and framerate of the exported video. When transcoding a main video, only device-supported options matching or less than the main video will be available. This guarantees that the device can successfully export the video file. You may also choose to downgrade the output size or frame rate in order to reduce processing time. When exporting a chroma key video, all quality options supported by the device will be available. Note: If you are unable to select what you believe to be a size and frame rate that should be supported by your device, try enabling the option 'Enable Experimental Overlay Sizes and Frame Rates' under the main video settings. This will allow you to possibly select additional values that may not be officially supported by your device, but may still function correctly. |
Content
The content options allow you to customize the text that is displayed in the overlay.
| Event Name |
Customize the overlaid event name, up to 30 characters. |
| Driver Name |
Customize the overlaid driver name, up to 30 characters. |
| Event Name (Secondary Video) |
Available when the secondary video belongs to a different event than the main video. |
| Driver Name (Secondary Video) |
Available when the secondary video is associated with a different driver than the main video. |
Lead-In and Lead-Out
Lead-in and lead-out are not available for chroma key videos.
| Maximum Lead-In and Lead-Out Duration |
Slide to select the amount of time that is rendered before and after the log. The range is from 1 to 5 seconds. Note: The lead-in will be rendered after the introduction, if one is configured. |
Introduction
Introduction options are not available for chroma key videos.
| Include Introduction |
Toggle to include a customizable introduction window as the start of the video. |
| Introduction Duration |
Slide to select the amount of time that the introduction window is displayed before it is animated off-screen. The range is from 3 to 5 seconds. Note: The introduction will be rendered before the lead-in. |
| Header |
Provide up to 40 characters of text to be displayed using a small font. |
| Title |
Provide up to 25 characters of text to be displayed using a large font. |
| Body Text |
Provide up to 4 lines of text to be displayed, up to 35 characters each. |
| Sponsor Images |
Select up to 5 sponsor images to be displayed in the introduction window. |
| Manage Sponsors |
Tap to manage a list of sponsors. Each one can be assigned a name and an image. Sponsor information is stored in the database along with logs and videos. |
Manage Sponsors
Manage the list of sponsors that are used when generating video overlays.
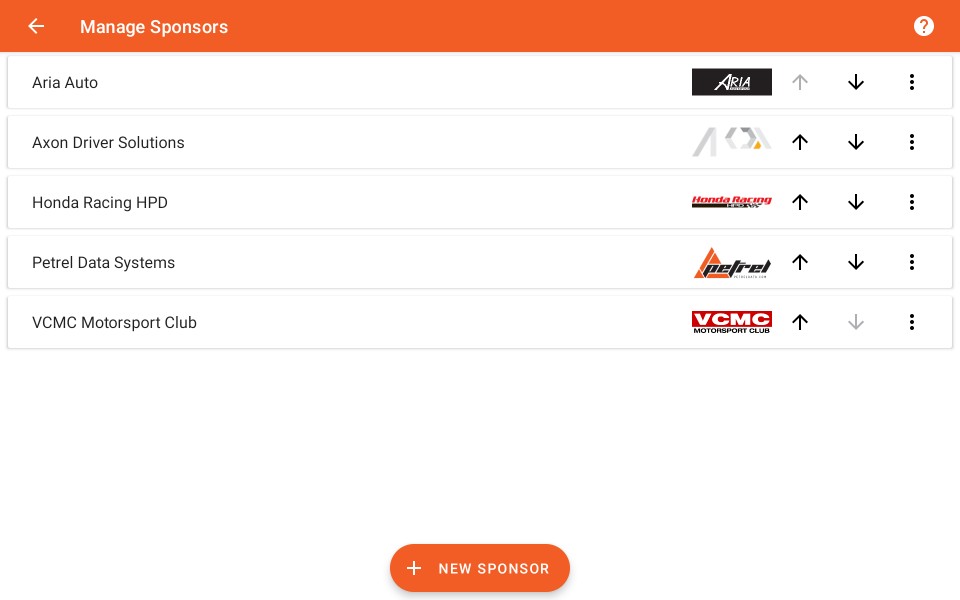
Add Sponsor
Tap  to add a new sponsor to the list.
You will be prompted to enter the sponsor name, and to select a sponsor logo from your mobile device storage.
Manage Entries
Sponsors are displayed as list items with their own controls:

Modification Controls
The sponsor can be moved up/down in the list, modified, or deleted

Tap  to move a sponsor lower in the list.
Tap  to move a sponsor higher in the list.
Tap  to open the sponsor context menu:

Edit Sponsor
Tap to open an edit dialog and change the sponsor name and logo.
Delete sponsor
Tap to delete the sponsor from the list.
Video Sync – Real Time
Play a video file with log data overlaid in realtime so that the synchronization between the two can be adjusted.
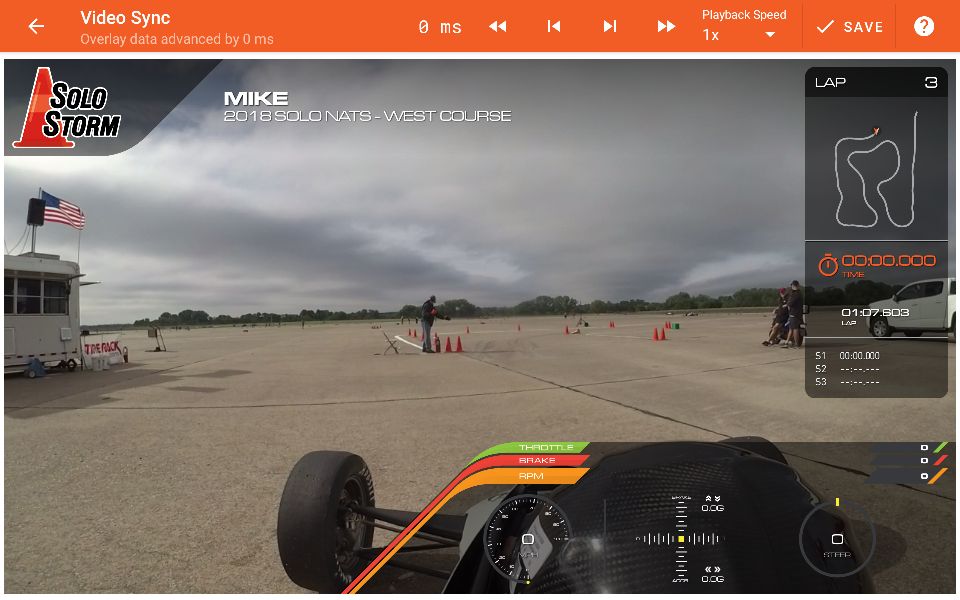
This is best used to make small adjustments in order to fine-tune the synchronization. For coarse adjustments, use the 'Sync – Select Frame' option instead.
Video Sync Toolbar

The toolbar allows you to make adjustments to the video synchronization, and displays the current adjustment amount.
Adjustment Description

The current adjustment time is described in terms of either advancing or delaying the log data by the current adjustment time.
Adjustment Value

This is the current adjustment time used to render the data overlay on the video as it plays back.
A negative value means that the data is delayed by the given adjustment time, and a positive value means that the data is advanced by the given adjustment time.
Adjustment Controls

Use the controls to modify the sync adjustment time.
The inner buttons adjust by 10ms per tap while the outer buttons adjust by 100ms per tap.
Tap  to decrease the sync adjustment by -100ms.
Tap  to decrease the sync adjustment by -10ms.
Tap  to increase the sync adjustment by 10ms.
Tap  to increase the sync adjustment by 100ms.
Playback Speed

On devices running Android 6 and higher, the playback speed can be selected from the provided dropdown. Slowing the playback speed can make it easier to fine-tune the sync time.
Save

Tap the to save your sync adjustment for this video.
When viewed in the analysis screen, the video frame that is displayed will take into account the adjustment value.
Note: If the current video in not an auxiliary video and the current log was recorded on the local device, then you will be given the option to also update the camera calibration for the corresponding video source.
Video Playback Controls
Tap the video player to enable the playback controls.
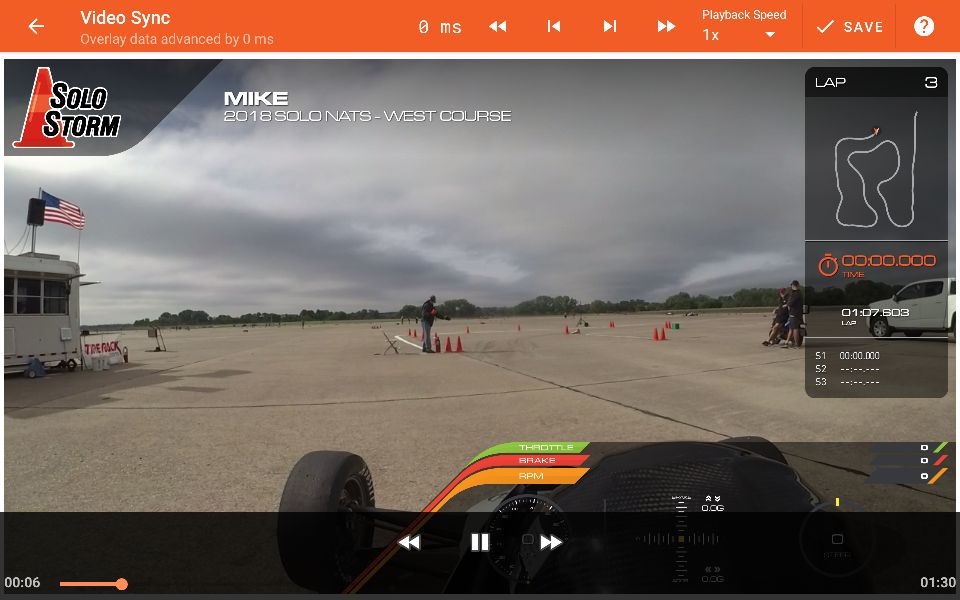
Playback can be paused or resumed, and the current time an be adjusted by dragging on the seek bar. The video will play in an infinite loop once it reaches the end of the file.
Note: Overlaid data values will only be displayed for the period that the logger recorded. If the video file was started or stopped before or after the logger, then no data will be available for these periods.
Video Sync – Select Frame
Display log data at the current analysis time and allow a specific video frame to be selected that matches it.
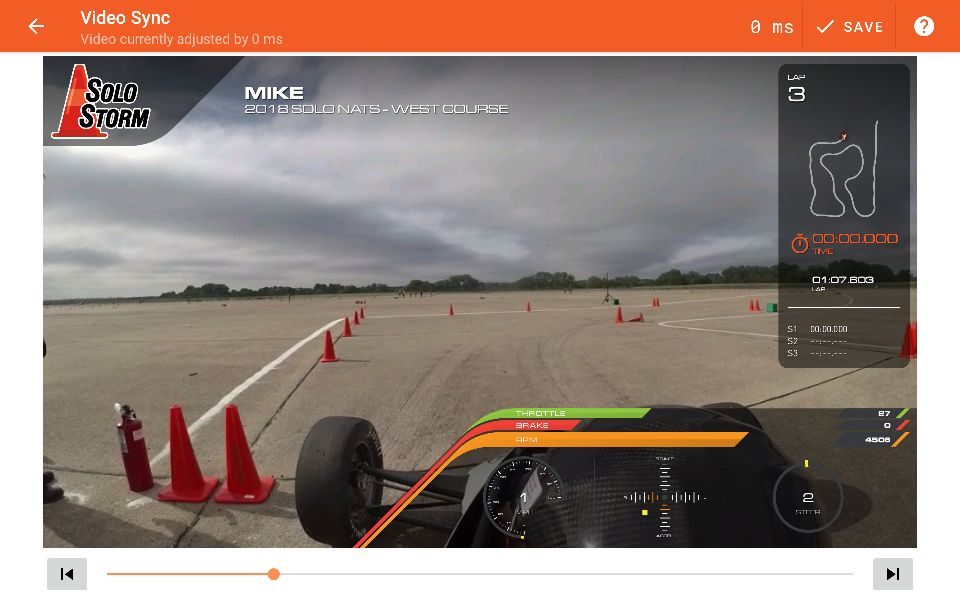
This is best used to make coarse adjustments in order to set up initial video synchronization. For fine adjustments, use the 'Sync – Realtime Playback' option instead.
If using an internal or remote camera that is controlled by the logger, and it was calibrated correctly in order to detect the recording delay, then this step should not be necessary.
If using a manually controlled camera and importing auxiliary video, use this step to establish the basic synchronization time value.
This feature is best used differently in staged and non-staged (circuit) racing modes:
| Staged Racing Modes (Autocross, Pro Solo, etc.) |
In the analysis screen, set the analysis position to be at the start of the log. Open this screen, and select the video frame where the vehicle has just started to move. |
| Circuit Racing Modes (Time Attack, Endurance, etc.) |
In the analysis screen, set the analysis position to be at the start of the log. Open this screen, and select the video frame where the vehicle has just crossed the start/finish line. |
Video Sync Toolbar

The toolbar displays the current sync adjustment amount.
Adjustment Description

The current video adjustment time is described here.
Adjustment Value

This is the current adjustment time used to render the video frame at the current analysis position.
A negative value means that the video is advanced by the given adjustment time, and a positive value means that the video is delayed by the given adjustment time.
Save

Tap the to save your sync adjustment for this video.
When viewed in the analysis screen, the video frame that is displayed will take into account the adjustment value.
Note: If the current video in not an auxiliary video and the current log was recorded on the local device, then you will be given the option to also update the camera calibration for the corresponding video source.
Frame Selection
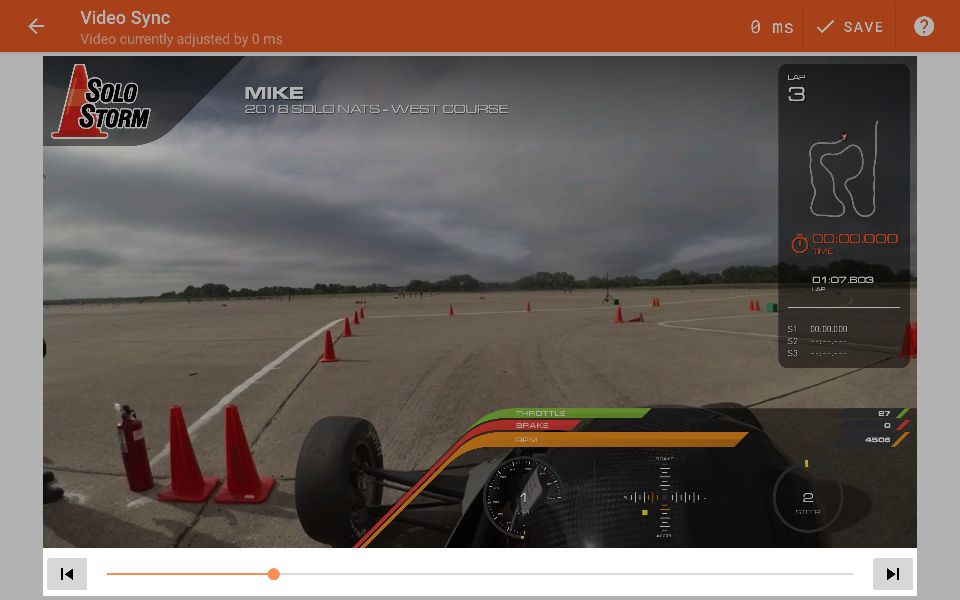
Drag the seek bar for coarse frame selection, and tap
 or
or
 to step over individual frames.
Storage – Browse Events
The storage browser lists the events available on the mobile device, and provides access the Petrel Cloud in order to search for and download logs and videos.
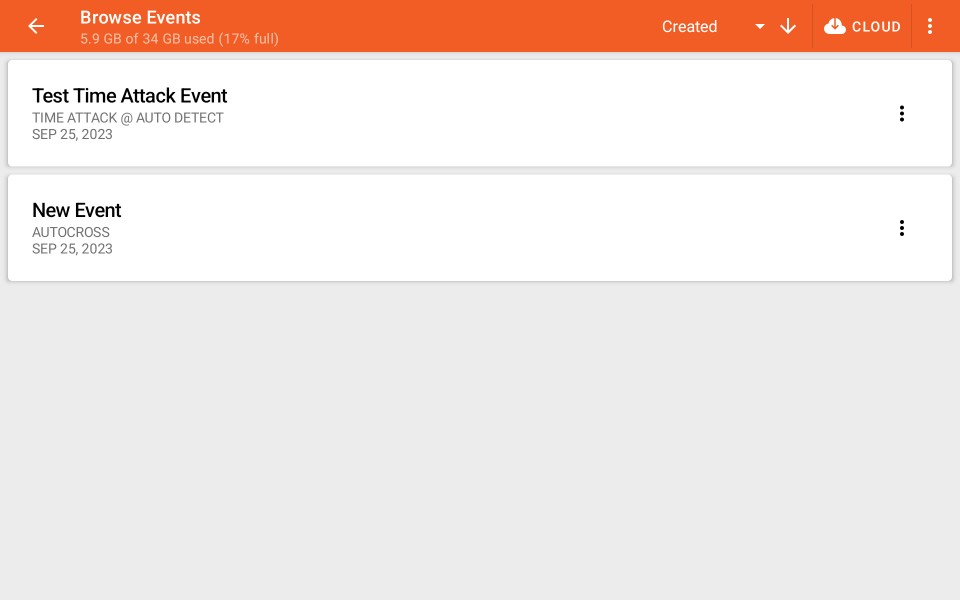
You can select an event to browse logs and open them for analysis.
Download Sample Logs
You will be prompted to download sample logs and videos if you have not yet created a new event.
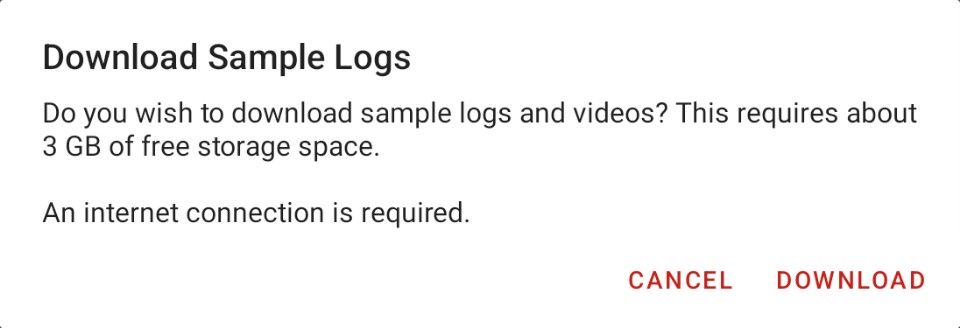
An internet connection is required. This can take several minutes and requires about 3GB of storage space.
Browse Events Toolbar

Storage Usage

The amount of used storage space on the selected file system is displayed.
Note: The app requires a minimum of 50MB of unused storage space in order to operate.
Sort Criteria and Direction

Tap the sort criteria dropdown to specify the field to sort events by:
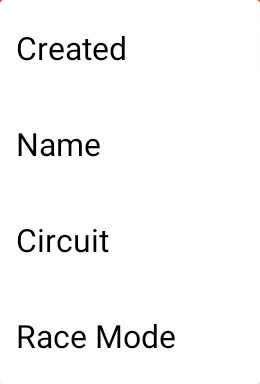
The event sort criteria options are:
| Created |
Sort events by the date that they were created. |
| Name |
Sort events by name. |
| Circuit |
Sort events by the name of the configured circuit. Applies only to events using a circuit-based racing mode. |
| Race Mode |
Sort events by racing mode. |
Tap  or
or  to toggle between sorting in ascending or descending order.
Petrel Cloud

Tap to open the Petrel Cloud search view where you can find and download logs and videos to your mobile device.
Toolbar Menu

Tap the toolbar overflow menu icon in order to access additional functions:
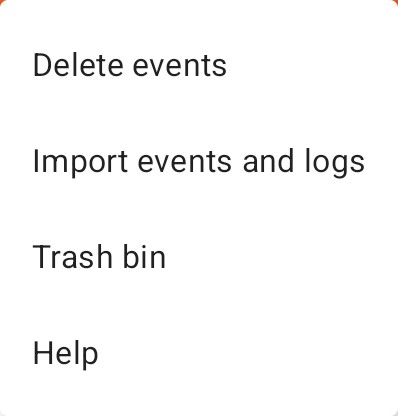
Delete Events
Tap to toggle each event that you wish to delete.
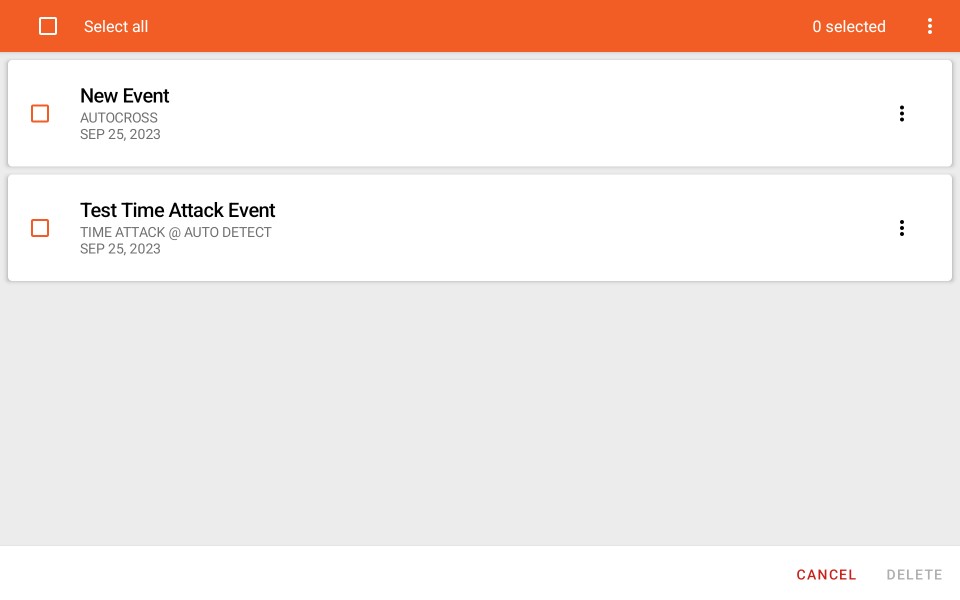
Tap to proceed. If you make a mistake, events can be recovered from the trash bin.
To permanently remove an event from the mobile device, you must also empty the trash bin.
Import Events and Logs
Tap to import data files from supported 3rd party data loggers.
Trash bin
Open the trash bin to recover deleted events and logs, or to empty the bin and permanently delete the contents.
Event Listings
Each events is presented as a card in a vertical list:

Tap on an an event to browse its associated logs.
Event Info
Each event card shows the event name, circuit (for events configured with circuit-based racing modes), creation date, and racing mode.
Event Menu
Tap  to open the event context menu that allows you to perform event-specific functions:

Modify Event
The event name and course location (if supported by the event racing mode) can be changed:
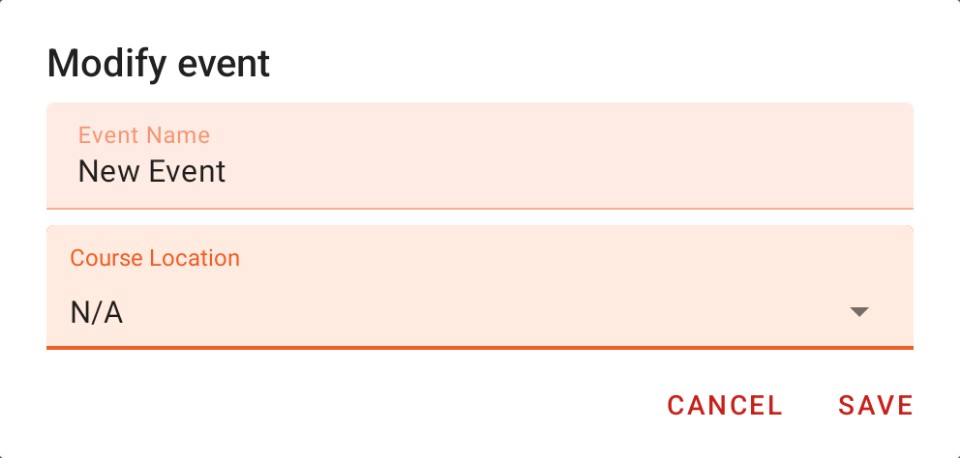
Tap when you are done.
The racing mode and circuit of an event can not be changed.
Storage – Import Events and Logs
It is possible to import session and log files exported from supported 3rd party data loggers.
To do so, open the event browser context menu and tap on Import Events and Logs.
Copy and Select Import File
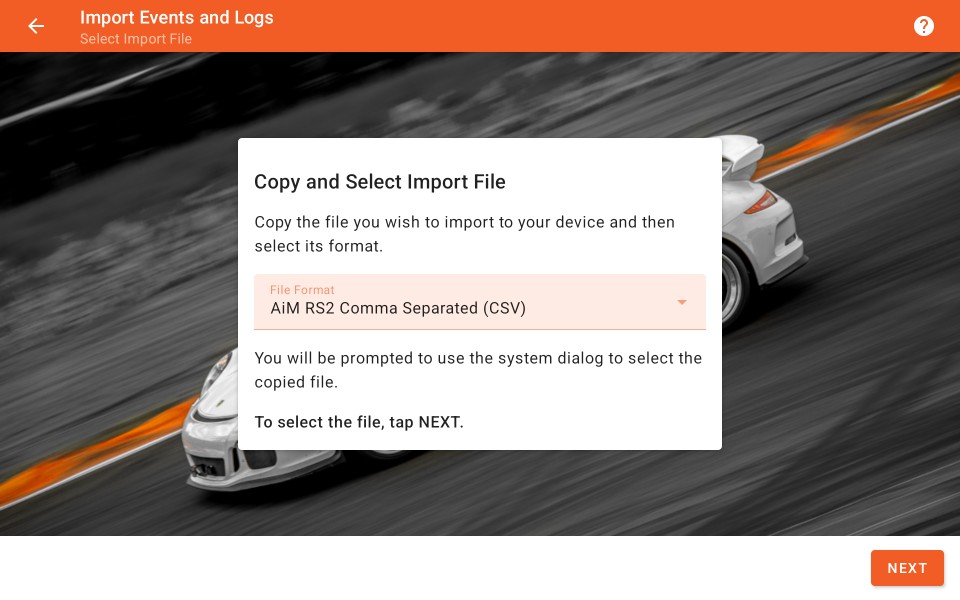
First, copy the file that you wish to import to an accessible folder on your mobile device. You will then need to select a file format.
The following formats are supported:
- AiM RS2Analysis CSV
Tap NEXT to open the system file picker and select your file.
Analyzing File
The selected log will be analyzed to determine if it may be imported.
This step may take some time. You may tap CANCEL to cancel this process and close this screen.
Required Fields
If source fields for the minimum required channels are not present, then an error message will be displayed.
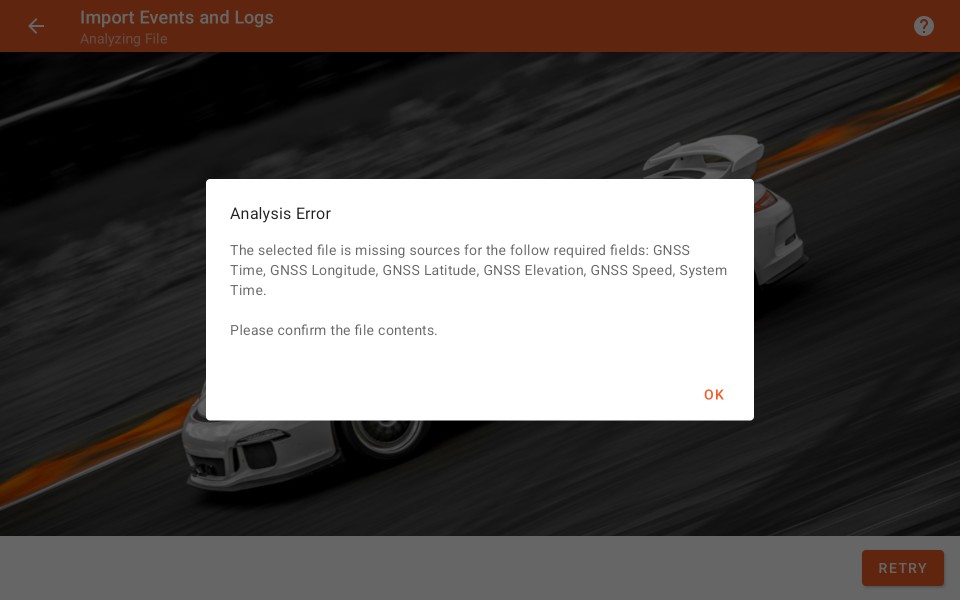
Fields must be detected that can populate the following channels:
- GNSS Time
- GNSS Longitude
- GNSS Latitude
- GNSS Elevation
- GNSS Speed
- System Time
Select Mapping Options
In some cases, multiple fields may be present for some channels. In this case, the correct field needs to be selected.
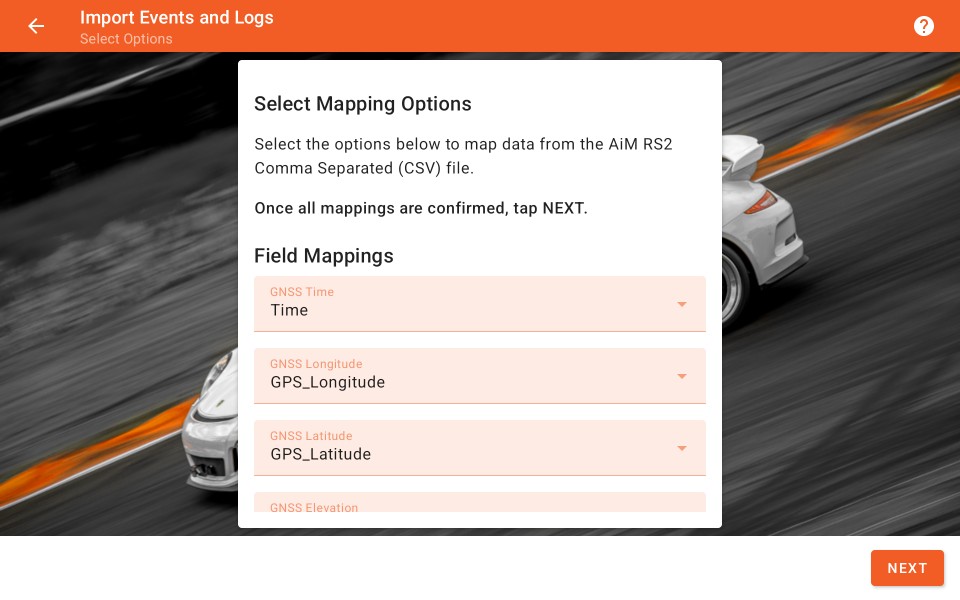
If multiple fields are not detected, then channel mappings will be automatically configured and this screen will be skipped.
Confirm the mapping choices and tap NEXT.
Transforming Data
Using the selected mappings, the data will be transformed into a format that can be used by the app.
Configure Event Options
Before saving the new logs to the database, you must select the driver to assign to the logs, the appropriate Racing Mode, and the target event.
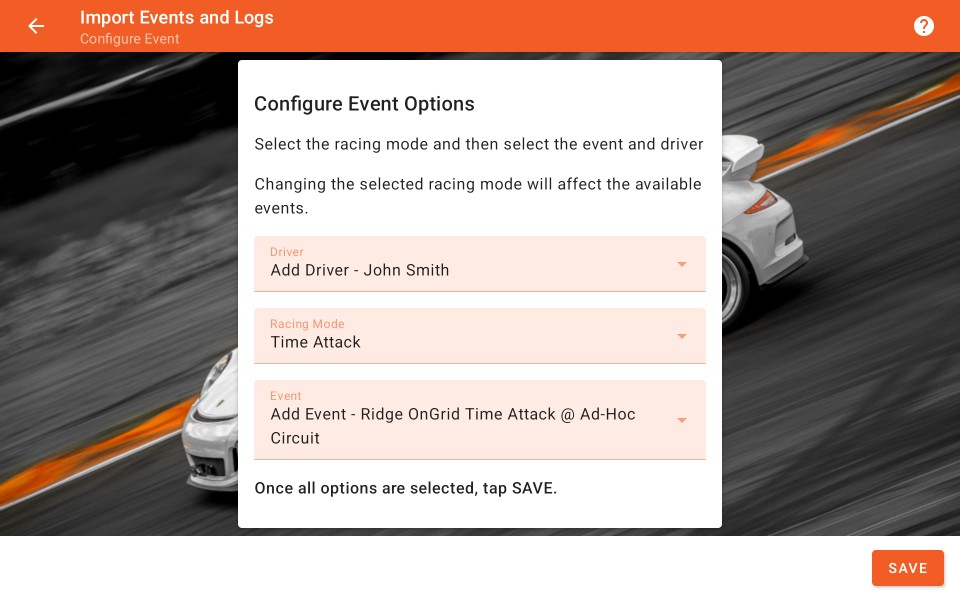
Based on metadata present in the import file, the app will attempt to find matching drivers and events to select. You may also be presented with options to create new drivers and events depending on the log metadata and the selected racing mode.
Note: Changing the racing mode selection will change the available event options.
Tap SAVE to complete the import process.
Logs Saved to Database
You can review the results of the import after the results have been saved to the database
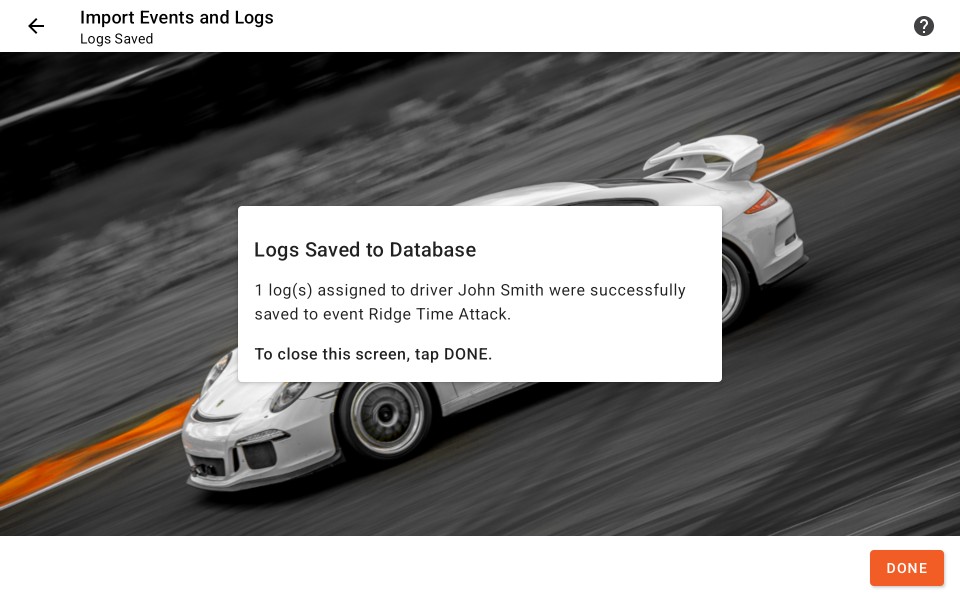
You can confirm how many logs were saved, which driver they were assigned to, and which session they were saved under.
Tap DONE to close this screen.
Supported Channels
Supported import formats are configured to parse a known list of channels. If your source file contains channels that are not supported, please contact support so we can add them.
AiM RS2Analysis CSV
The following AiM channels are supported:
- Time
- Time
- GPS_Latitude
- GPS_Longitude
- GPS_Speed
- GPS_Elevation
- GPS_Nsat
- GPS_PosAccuracy
- LateralAcc
- InlineAcc
- VerticalAcc
- RollRate
- PitchRate
- YawRate
- LoggerTemp
- Water Temp
- ECU ECT
- Oil Temp
- ECU OILT
- Oil Press
- ECU POIL
- Fuel Press
- ECU RPM
- ECU GEAR
- ECU IAT
- ECU TPS
- ECU MAP
Trash Bin – Browse Events
The trash bin allows you to restore events and logs that you have previously deleted from the database.
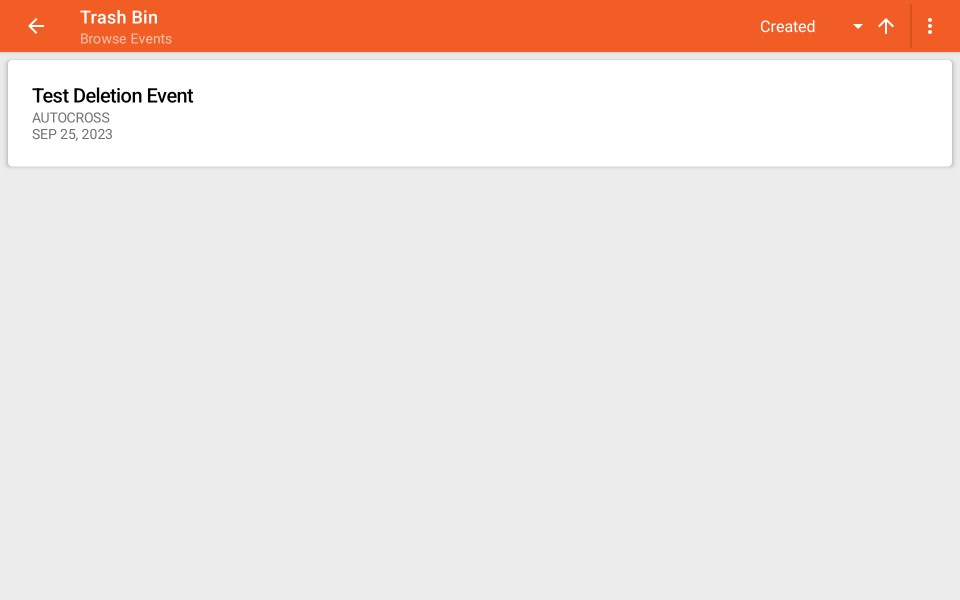
You can also empty the trash bin, permanently deleting the contents.
Trash Bin Toolbar

Sort Criteria and Direction

Sort criteria and direction function the same as when browsing events.
Toolbar Menu

Tap the toolbar overflow menu icon in order to access functions:

Restore Events
Tap to toggle each event that you wish to restore.
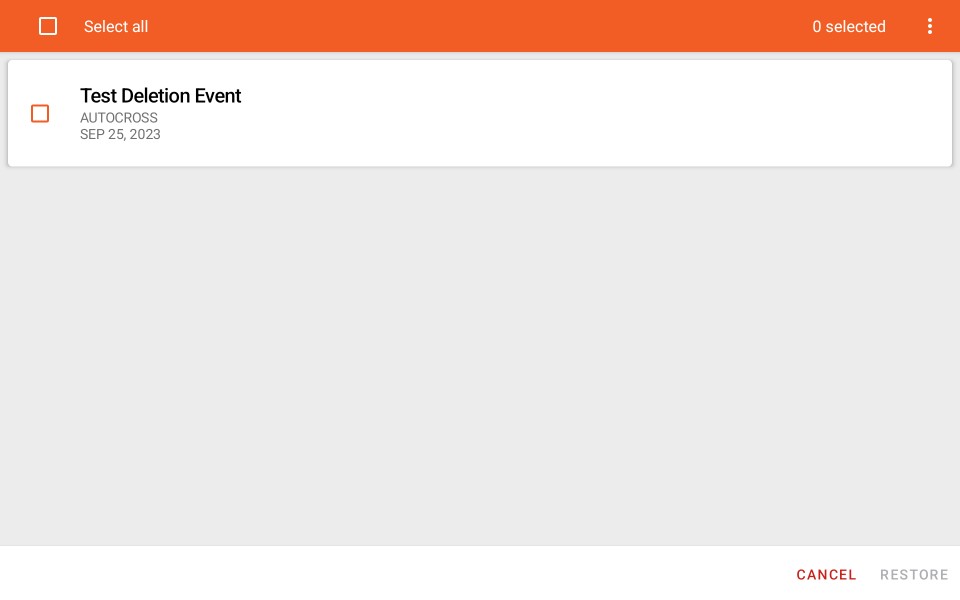
Tap to proceed.
Empty Trash
Permanently delete the contents of the trash bin. This can not be undone.
Deleted Events
Each deleted event is presented as a card in a vertical list:

Tap on an event to begin the selection process for restoration. This has the same effect as selecting 'Restore Events' from the toolbar overflow menu.
Storage – Browse Logs
The log browser lists the logs belonging to the selected event, and provides access the Petrel Cloud in order to upload, share, search and download logs and videos.
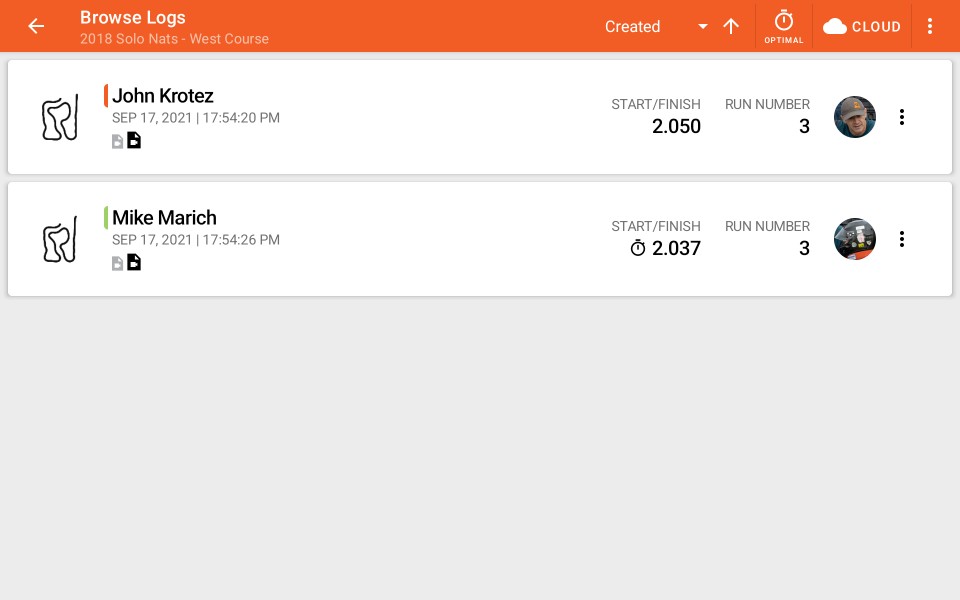
You can select log to open for analysis, as well as perform other functions.
Browse Logs Toolbar

Sort Criteria and Direction

Tap the sort criteria dropdown to specify the field to sort logs by:
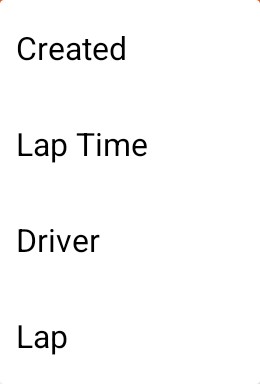
The log sort criteria options are:
| Created |
Sort logs by the date that they were created. |
| Lap Time |
Sort logs by lap time. |
| Driver |
Sort logs by the name of the assigned driver. |
| Lap |
Sort logs by lap / run number. |
Tap  or
or  to toggle between sorting in ascending or descending order.
Petrel Cloud

Tap to open the Petrel Cloud menu:
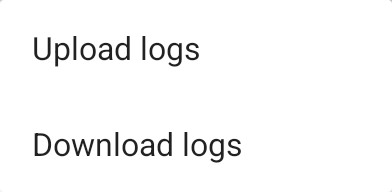
Please note: Failed attempts to transfer content to/from Petrel Cloud will be retried up to 5 times using an exponential delay.
Upload logs
Select and upload logs and videos to your Petrel Cloud account, and configure sharing options.
Download logs
Open the Petrel Cloud search view where you can find and download logs and videos to your mobile device.
Toolbar Menu

Tap the toolbar overflow menu icon in order to access additional functions:
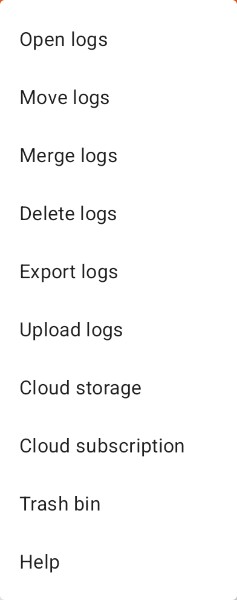
Open Logs
Tap to select up to 6 logs that you wish to open for analysis.
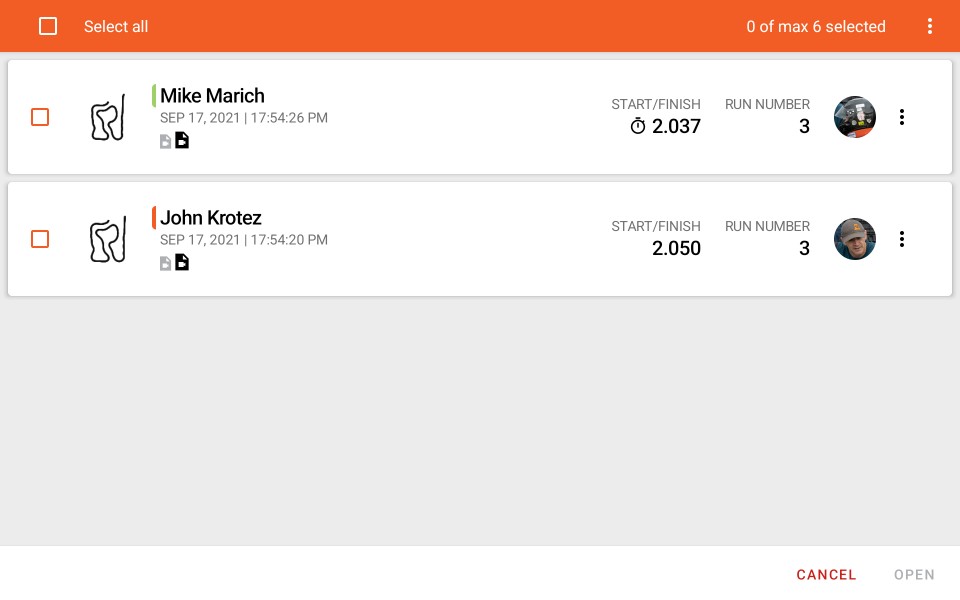
Tap to open the logs and return to the analysis screen.
Selecting this option has the same effect as tapping a log while not in a selection mode.
Move Logs
Tap to select each log that you wish to move to another event configured with the same racing mode.
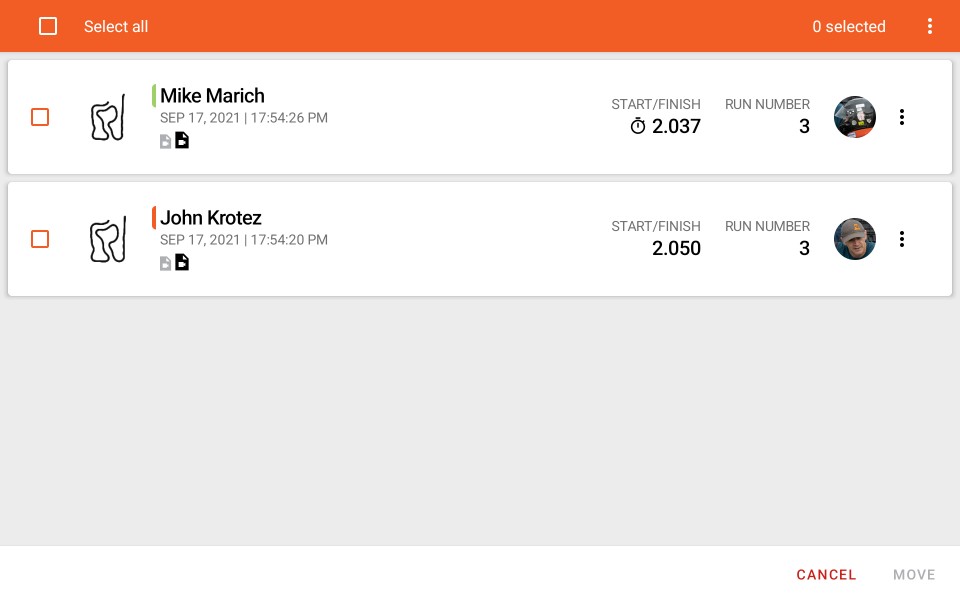
Tap to proceed. You can select the destination event from a dropdown:
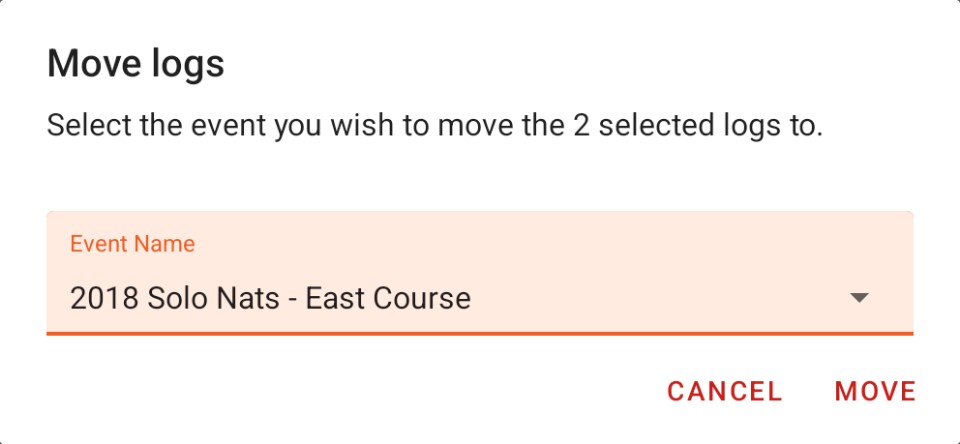
Change Driver
Tap to assign a different driver to the selected logs for events using non-staged race modes.
This is useful when a large number of laps have been attributed to the incorrect driver, such as when the current driver was not changed during an endurance race pit stop.
Merge Logs
In case logging was stopped due to a spin on course or incorrect trigger settings, you can merge logs together to make a new, single log file.
Delete Logs
Tap to toggle each log that you wish to delete.
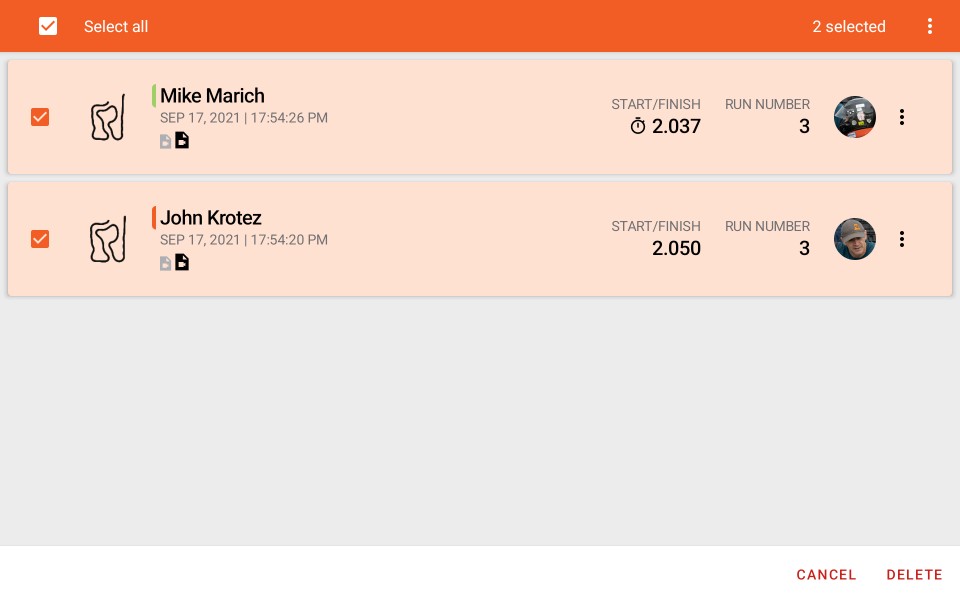
Tap to proceed. If you make a mistake, logs can be recovered from the trash bin.
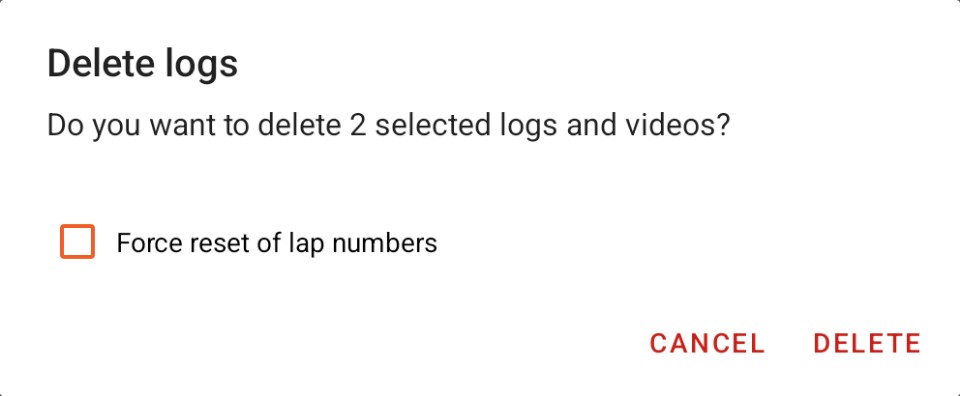
Enable Force reset of lap numbers to remove any resulting gaps in the lap number sequence for each driver's logs.
To permanently remove a log from the mobile device, you must also empty the trash bin.
Export Logs
Tap to select each log that you wish to export in a portable file format, archived in a single ZIP file.
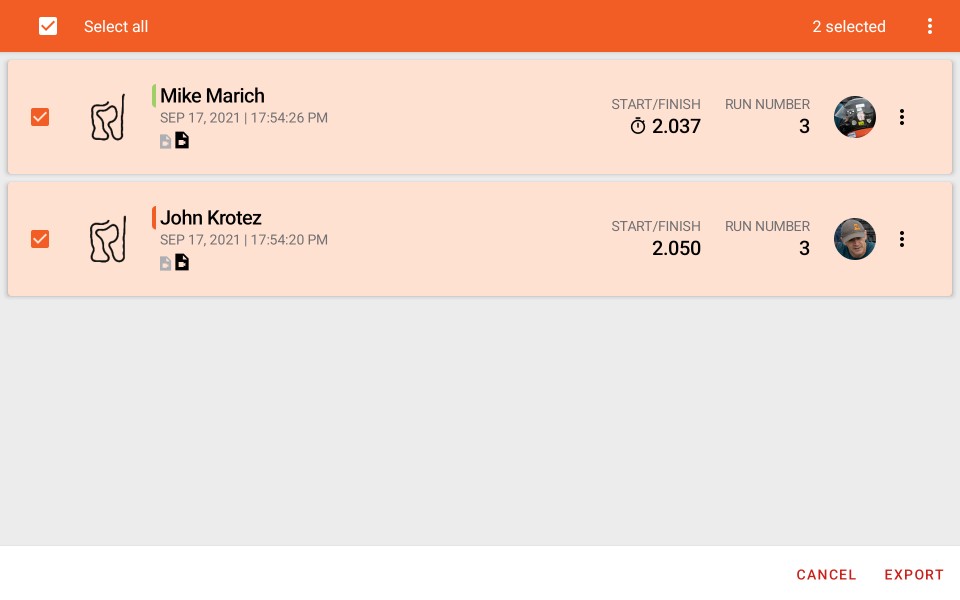
Tap to proceed. You can then select the export format from a dropdown:
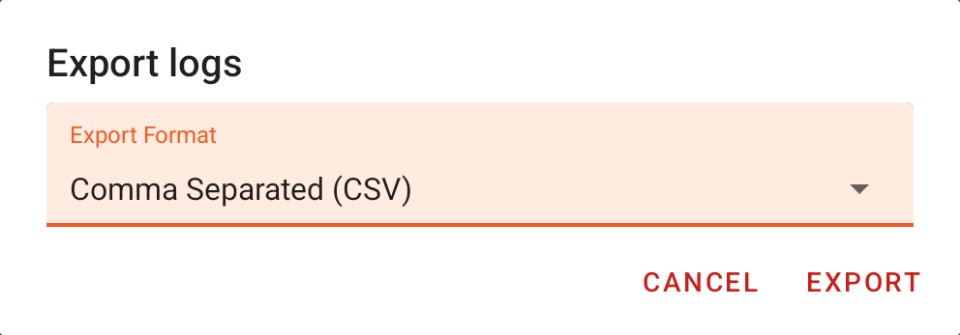
The export formats are defined as follows:
| Comma Separated Value (CSV) |
Each log is stored in a text file comprised of a heading row and a list of sample rows. |
| JavaScript Object Notation (JSON) |
Useful for manipulation with custom scripts and applications. |
| Keyhole Markup Language (KML) |
Can be imported into Google Maps and other GIS applications. |
| Autosport Labs RaceCapture |
Use the same format as logs saved by an Autosport Labs RaceCapture logger for use with the RaceCapture app. |
| RaceLogic VBOX |
For use with VBOX Motorsports Circuit Tools software. |
| Race Technology DL1 |
Use the same format as logs saved by a Race Technology logger for use with Race Technology analysis software. |
Please note: Logs belonging to events configured with a staged racing mode (Autocross, Hill Climb, ProSolo) will be exported as a separate file for each individual log. Logs for circuit racing modes (Time Attack, Endurance) will be exported as a single collated file in the case where this is supported by the output format (CSV, RaceCapture).
Upload Logs
Tap to select logs and videos to upload to the cloud. This performs the same function as the upload option under the Cloud button in the toolbar.
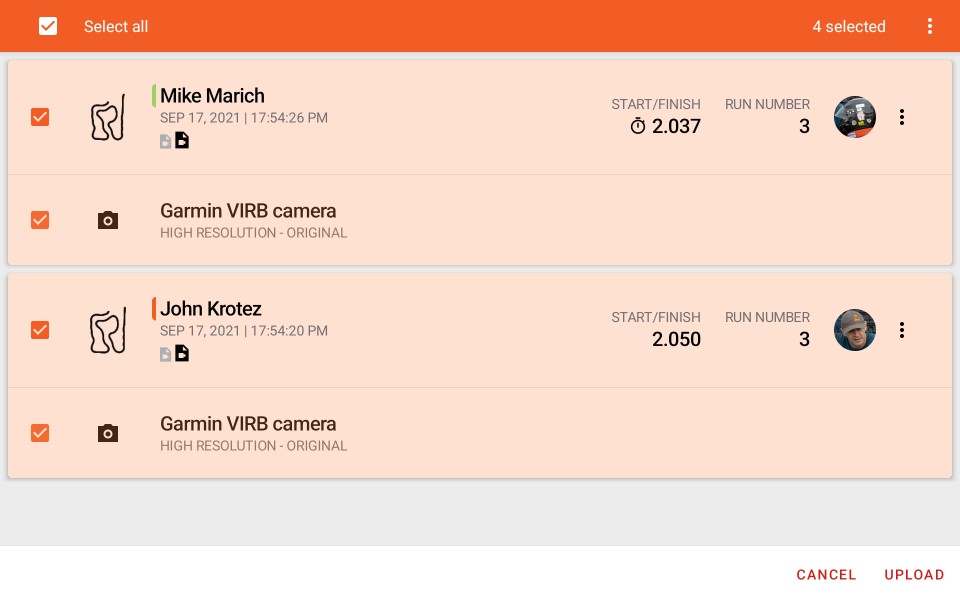
After tapping , you are prompted to select visibility and sharing options, and to confirm your choices.
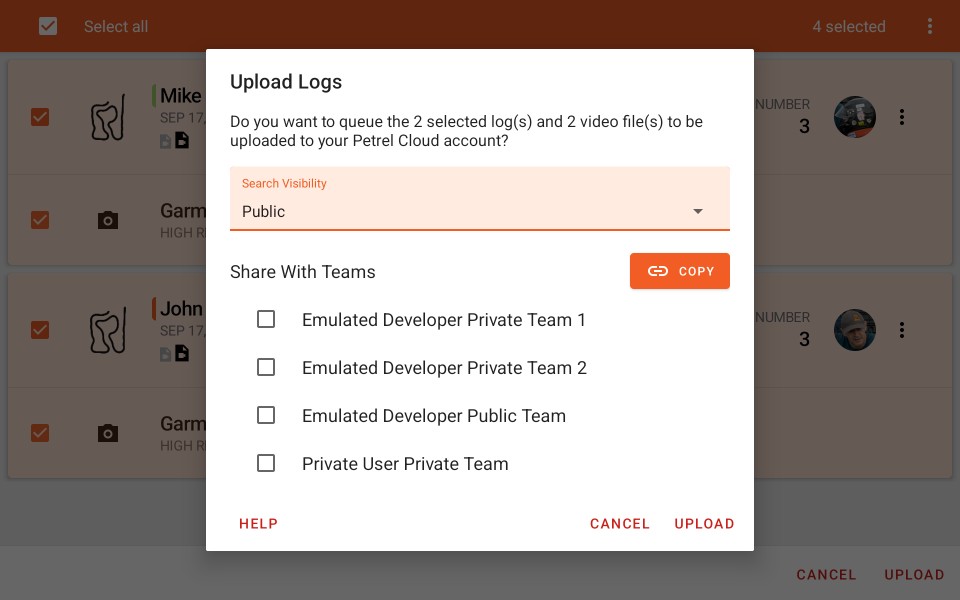
Upload progress is displayed for each item. Items that are not yet in progress are marked as queued. Video uploads are only started after all of the selected logs have been uploaded.
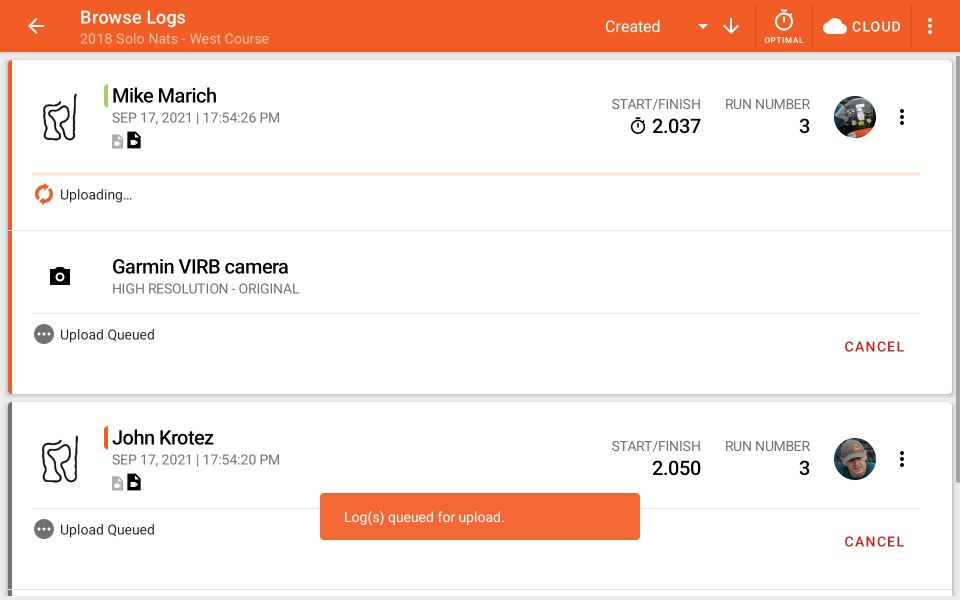
You can tap to remove an item from the upload queue.
Cloud Storage
Tap to manage your cloud storage contents. This performs the same function as the option under the main user menu in the logger screen.
Cloud Subscription
Tap to manage your cloud subscription. This performs the same function as the option under the main user menu in the logger screen.
Trash bin
Open the trash bin to recover deleted logs for the selected event, or to empty the bin and permanently delete the contents.
Log Listings
Each logs is presented as a card in a vertical list:

Tap on an an log to browse its associated logs.
Log Info
Each log card shows the driver, lap/run number, status of associated video files, and the creation date. The lap time is also displayed, along with the lap time precision:
| Estimated |
The lap time is estimated based off of start and finish markers, if set. |
| Start/Finish |
The lap time was calculated based off of a start/finish location. |
| User Defined |
A specific lap time was supplied by the user by modifying the log. |
The lowest lap time for the current session is indicated by a stopwatch icon that is displayed next to it.
Video Status
Associated video files are displayed as either a small or large icon. A large video icon indicates that a full-resolution video file is associated with the log. A small video icon indicates that t low-resolution video file is associated with the log.
If a video icon is black, then the video file is present on the mobile device. If it is grey, then the file has not yet been downloaded or imported from the external camera.
Cloud Status
A cloud download icon is displayed if the log was downloaded from the Petrel Cloud service.
Log Menu
Tap  to open the log context menu that allows you to perform log-specific functions:

Modify Log
The log name and course location (if supported by the log racing mode) can be changed:
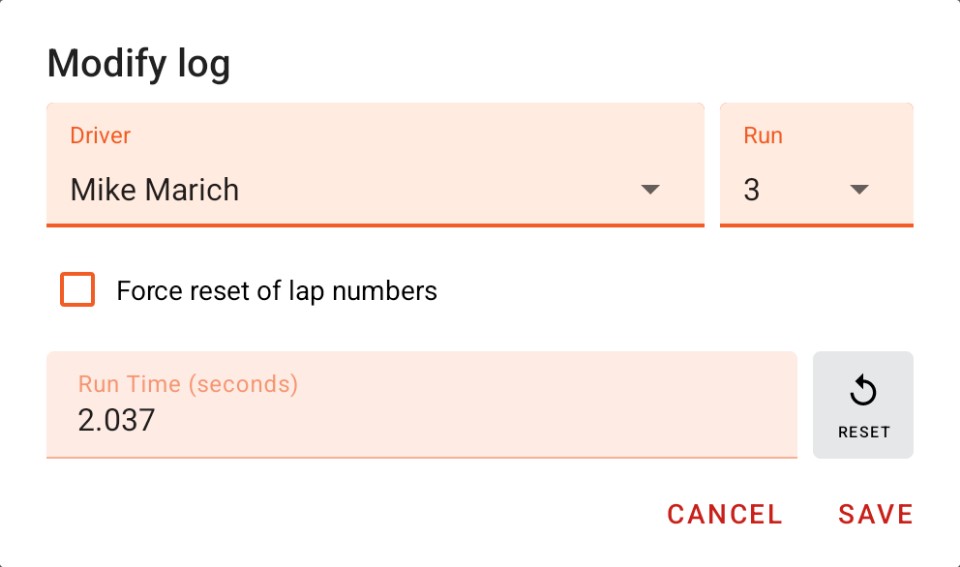
Tap when you are done.
The racing mode and circuit of an log can not be changed, however the following attributes can be set:
| Driver |
Select the correct driver for the lap in the case of a configuration error or if the driver driver was rotated by mistake due to spin, red flag, etc. |
| Lap / Run Number |
Use this to correct for deleted laps that were recorded in error,or laps moved to another event. |
| Lap / Run Time |
This updates the displayed lap time by overriding the calculated value. |
Enable Force reset of lap numbers to correct for any gaps in the lap number sequence for the driver's logs.
Trash Bin – Browse Logs
The event trash bin allows you to restore logs that you have previously deleted from the database for a specific event.
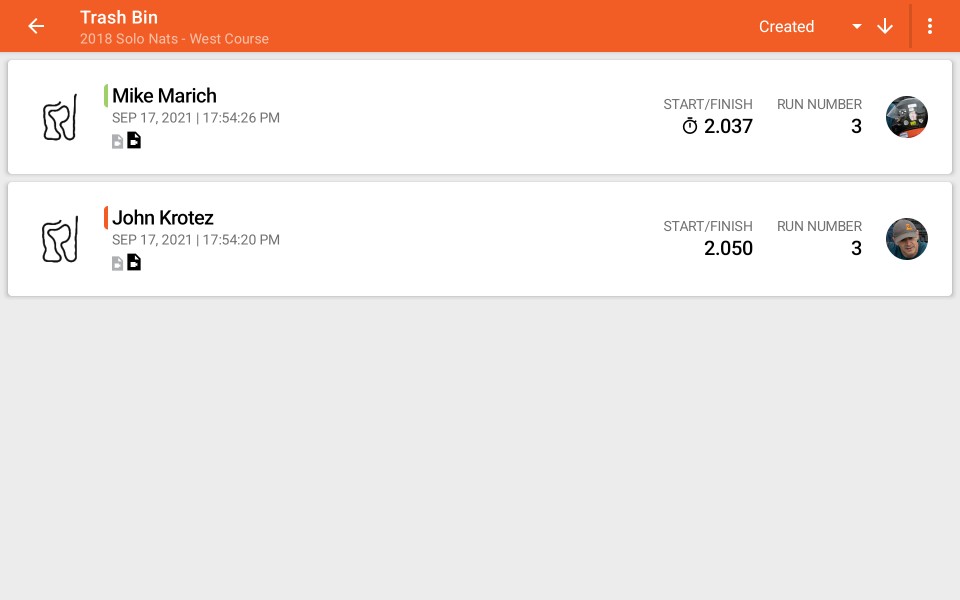
You can also empty the trash bin, permanently deleting the contents.
Trash Bin Toolbar

Sort Criteria and Direction

Sort criteria and direction function the same as when browsing logs.
Toolbar Menu

Tap the toolbar overflow menu icon in order to access functions:
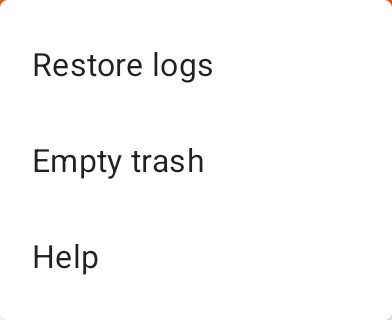
Restore Logs
Tap to toggle each log that you wish to restore.
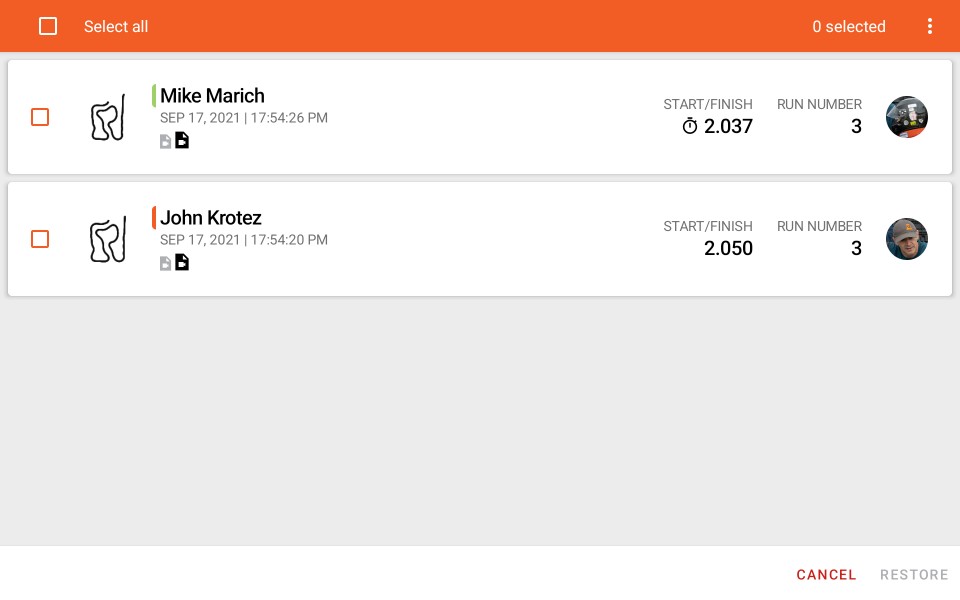
Tap to proceed.
Empty Trash
Permanently delete the contents of the trash bin. This can not be undone.
Deleted Logs
Each deleted log is presented as a card in a vertical list:

Tap on a log to begin the selection process for restoration. This has the same effect as selecting 'Restore Logs' from the toolbar overflow menu.
All videos associated with the restored logs will also be restored if they were not previously deleted by themselves.
Log Info
All log information displayed in the trash browser is the same as in the logs browser.
Configure Event
Display and configure the currently selected event used by the logger.
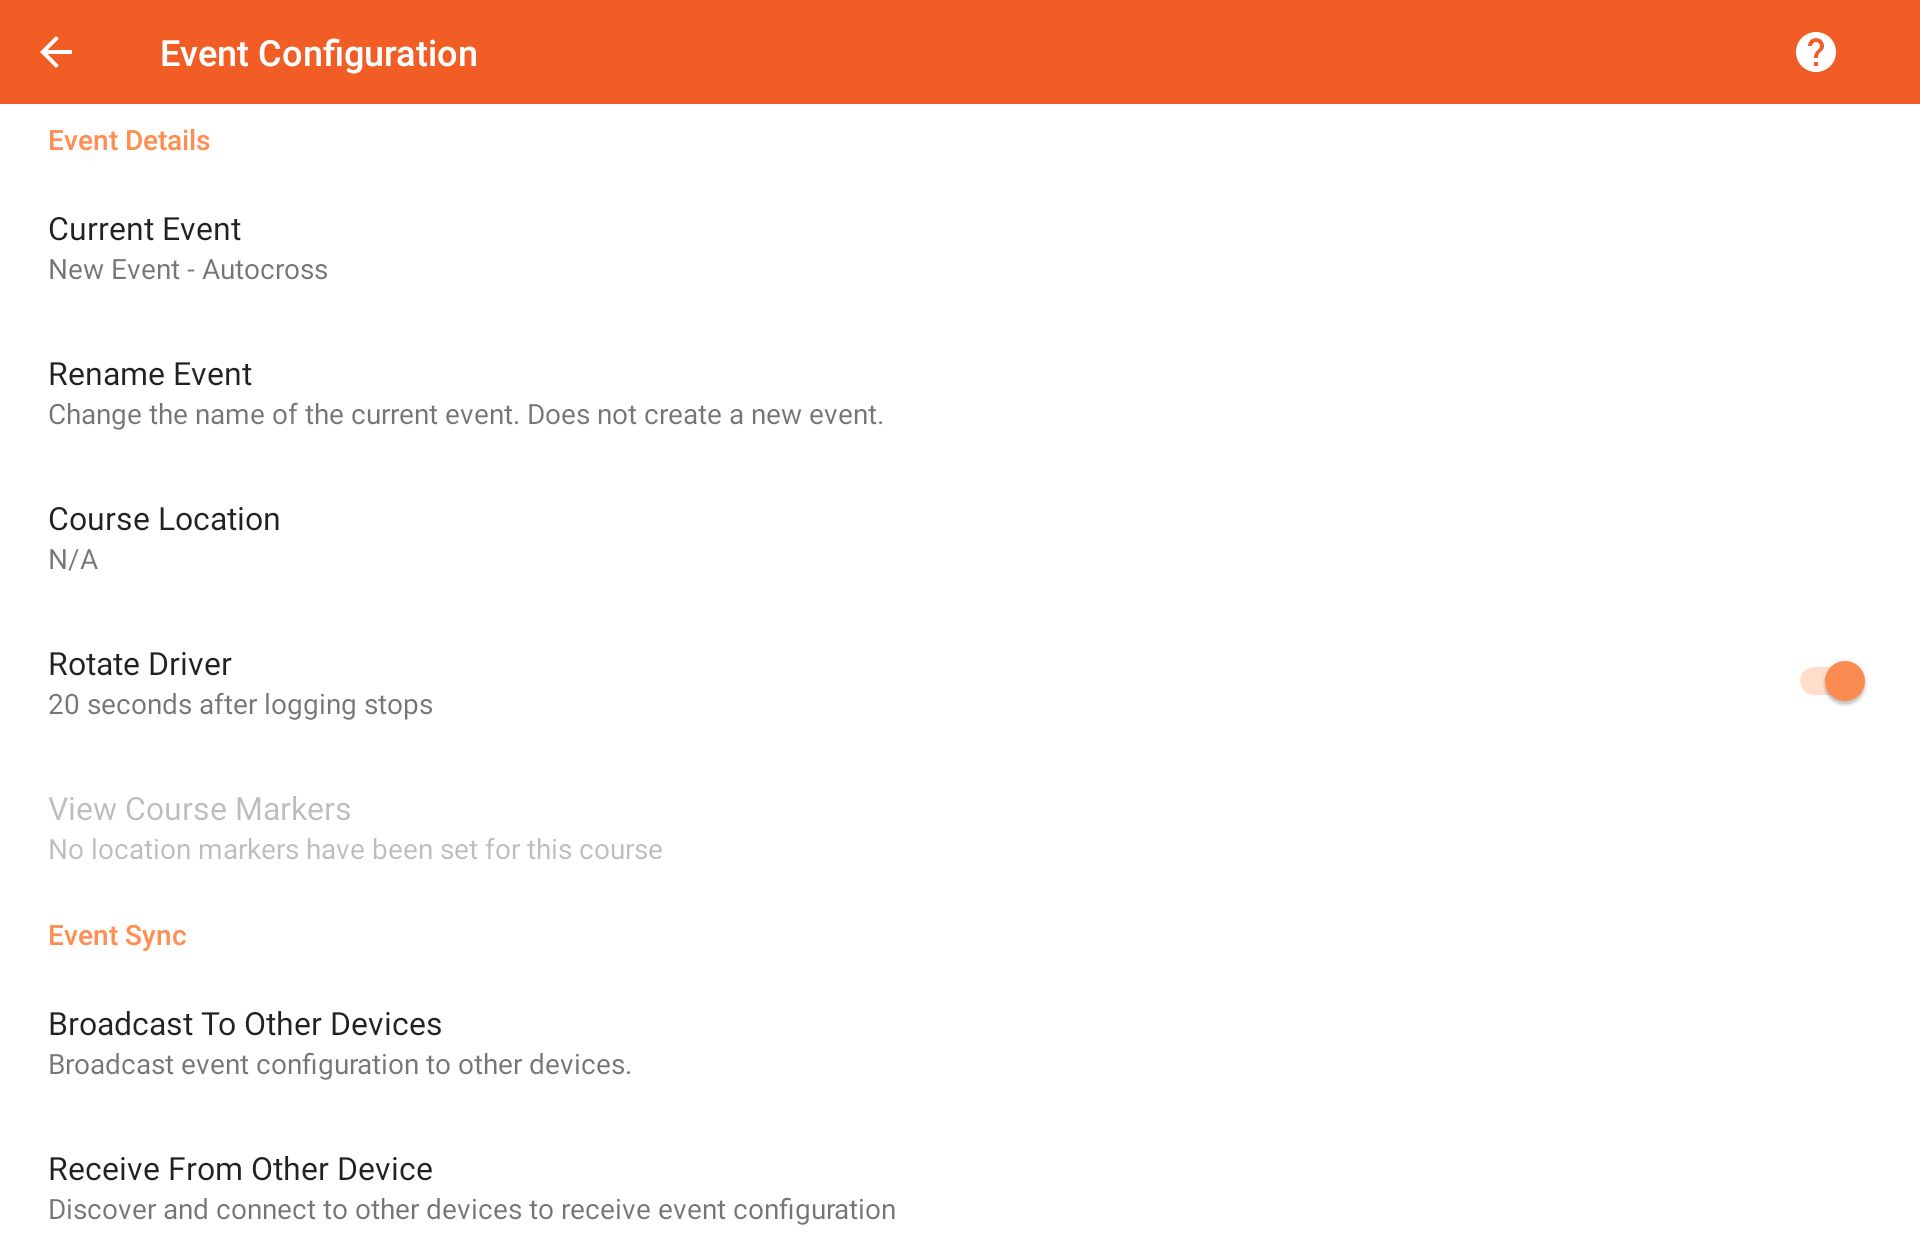
Also configure the baseline lap used by the lap timer if the current event uses a circuit racing mode.
Event Management
Current Event
Tap to open a dialog listing the available events.

Select the desired event from the list of those available:
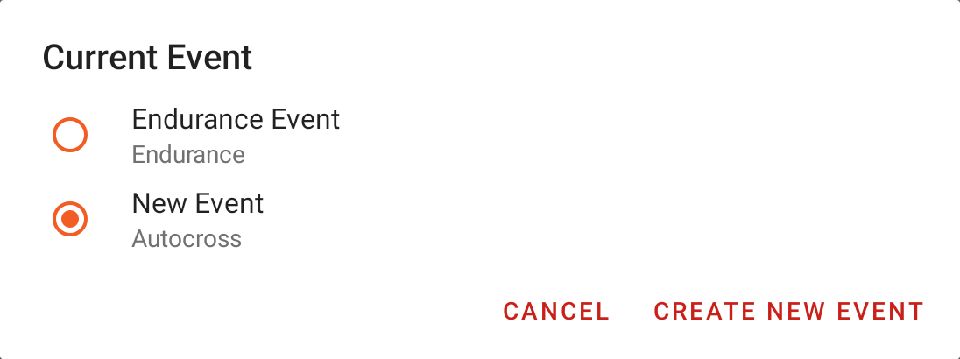
To create a new event, tap .
Rename Event
Tap to change the name of the current event.

Course Location
Tap to select a course location if supported by the selected event racing mode.

Use this option to differentiate courses run during the same event (East/West, AM/PM, etc):
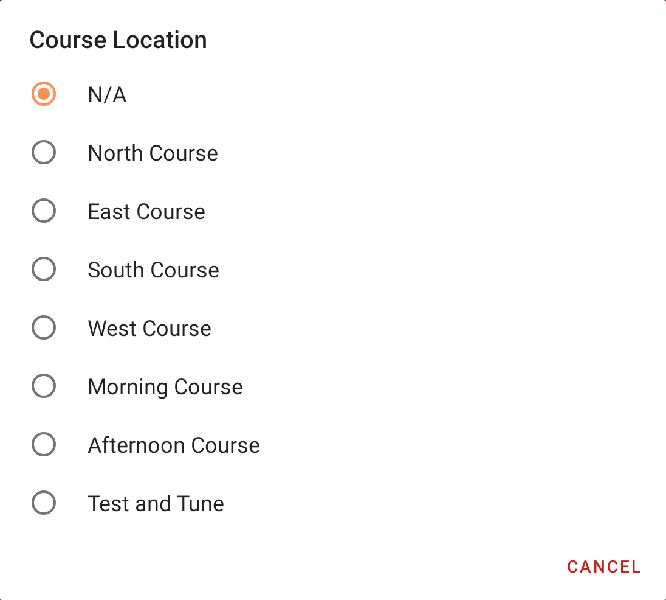
Rotate Driver
Enable to automatically change assigned driver after stop trigger or pit stop is detected.

For staged racing modes, driver rotation will only occur 20 seconds after the stop trigger has been activated, and only if the logger is not currently recording.
For endurance racing modes, driver rotation will occur immediately when the hot pit marker is set and a pit stop is detected.
This option is only available if the current racing mode supports driver rotation or hot pit detection.
View Course Markers
View the location markers that have been set for this event. Requires an internet connection.

You may set or update course markers from the logger screen when the logger is enabled and receiving GPS updates.
This option is only visible if the current racing mode supports staged courses, or if an ad-hoc racing circuit is selected.
This option is only clickable if the current event has location markers set.
Lap Timer
If the current event racing mode support the lap timer, you can select which baseline lap is used to compare lap and sector times.
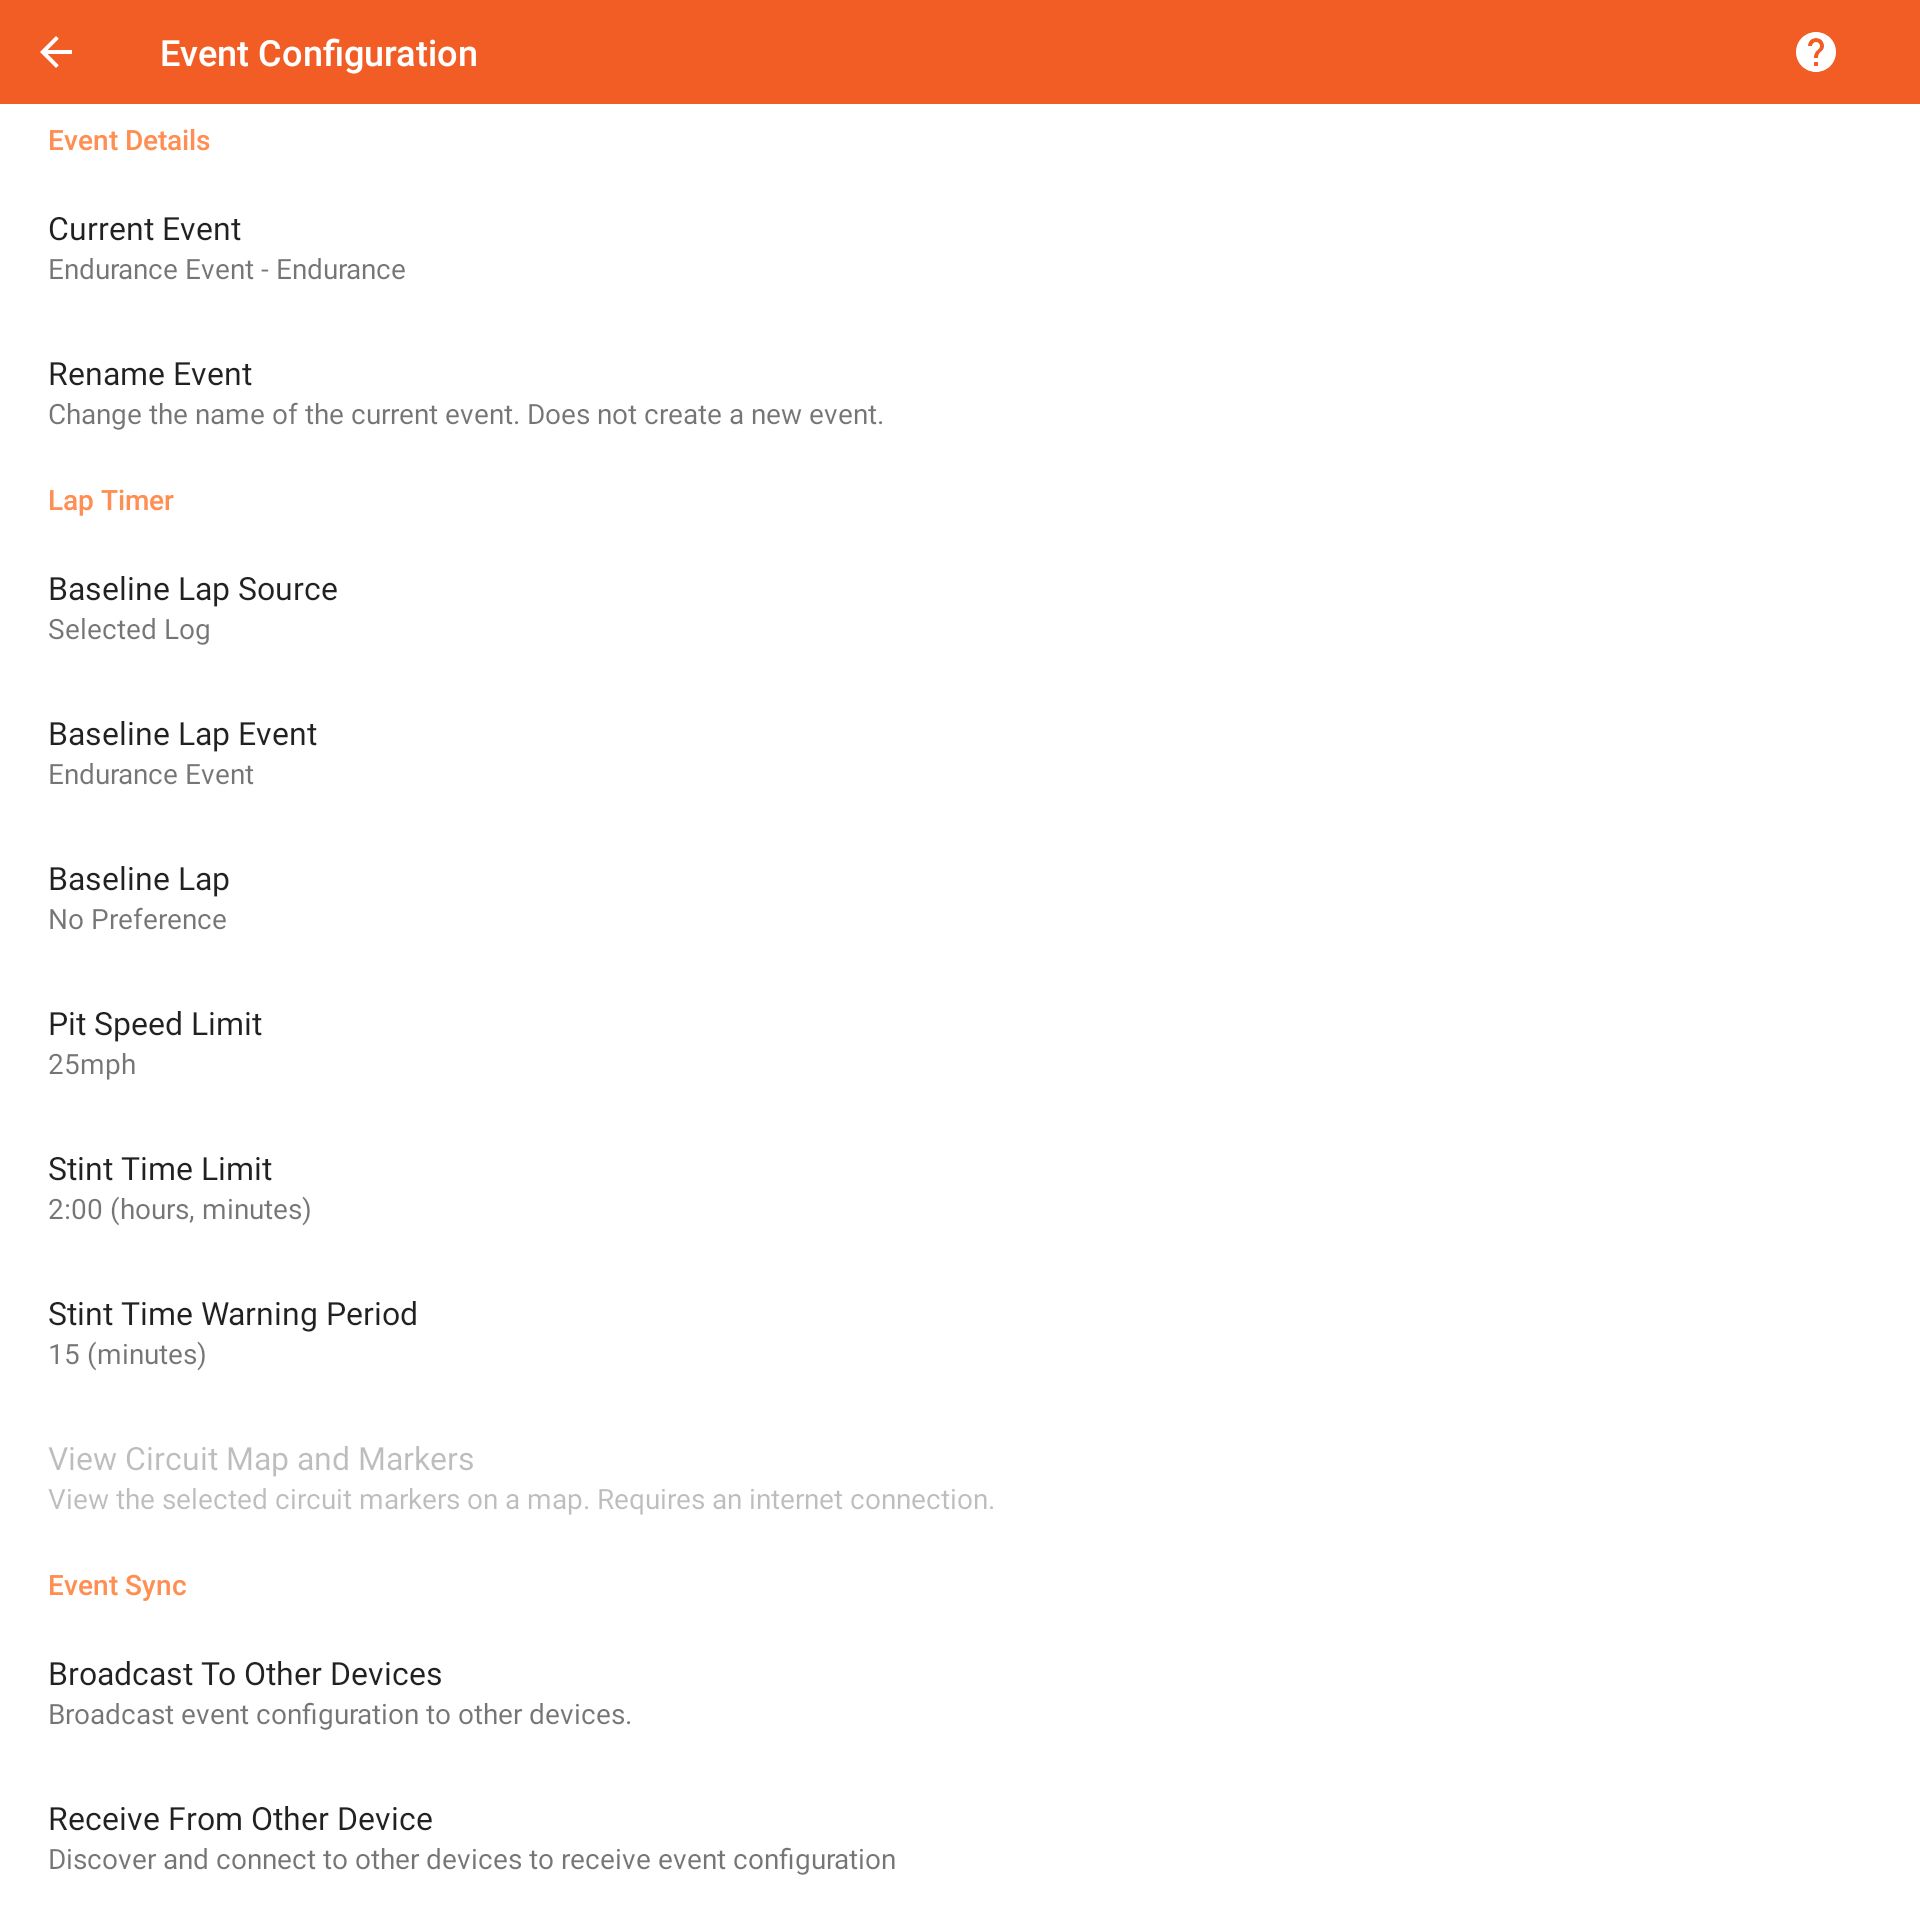
If a new fast lap is set, then it will be configured as the new baseline lap.
Baseline Lap Source
Tap to select the source of the baseline lap for the lap timer.

The default value is 'Fastest from Current Event'.
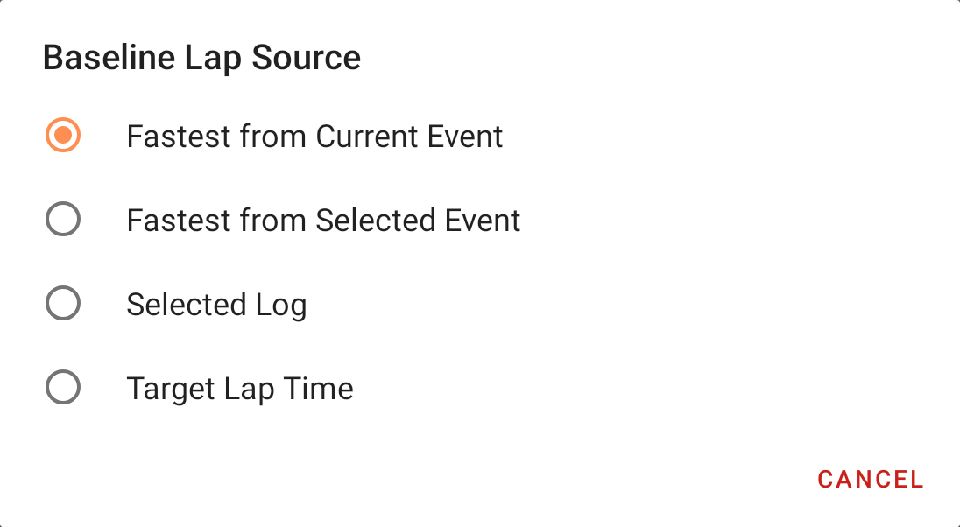
The available sources work as follows:
| Fastest from Current Event |
The lap timer will use the fastest lap from the currently configured event. |
| Fastest from Selected Event |
The lap timer will use the fastest lap from a specified. |
| Selected Log |
The lap timer will use a specified log. |
| Target Lap Time |
Specify a targeted lap time. Bases target calculations on the fastest lap from the currently configured even. |
Baseline Lap Event
Select from a list of events that us the same race mode as the currently configured event.

This option is only enabled if the baseline lap source requires an event to be selected.
Baseline Lap
Select a specific log from the selected

This option is only enabled if the baseline lap source is set to 'Selected Log'.
Target Lap Time
Specify a targeted lap time in minutes, seconds, and milliseconds.

This option is only enabled if the baseline lap source is set to 'Target Lap Time'.
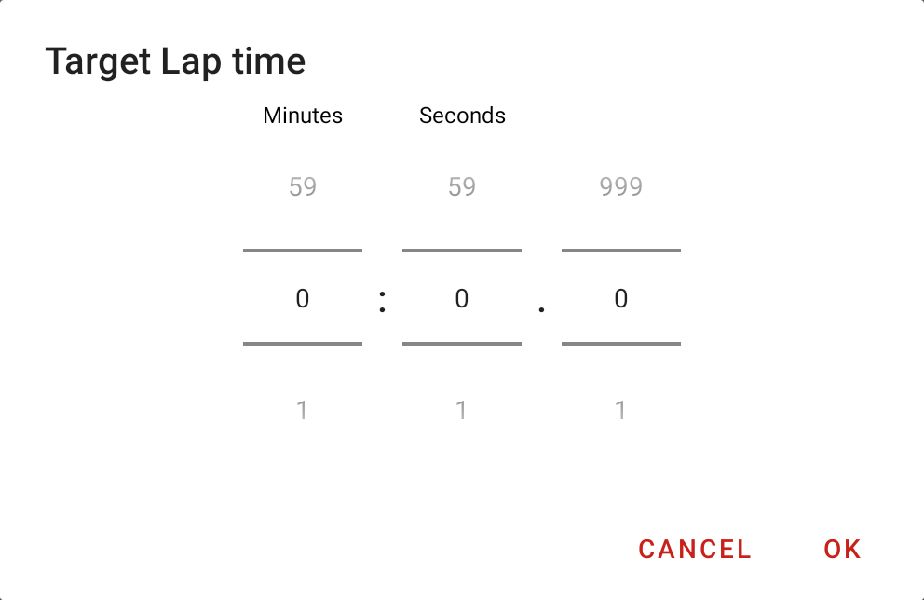
If no value is set, then the fastest lap from the currently configured event is used.
Pit Speed Limit (Endurance Racing Mode)
Select a pit speed limit for the event.

The pit speed indicator will be displayed when the vehicle speed drops below a pre-determined value. A warning will be displayed when the limit is close to or exceeds the speed limit.
Stint Time Limit (Endurance Racing Mode)
Enter the maximum stint time limit for each driver.

Select the hours and minutes from rotating pickers. The current stint time is displayed on the lap timer screen. It is reset when the logger is restarted or when the current driver has been changed (requires the pit marker to be set).
The stint time will be displayed in red when it has exceeded the configured limit.
Stint Time Warning Period (Endurance Racing Mode)
Enter the remaining time period when the driver should be notified that their stint will soon be ending.

Select the number of minutes. We recommend 15 minutes as the default.
The stint time will be displayed in orange during this period at the end of a stint.
View Circuit Map and Markers
View the map and location markers for the currently selected circuit. Requires an internet connection.

This option is only enabled if a specific circuit has been selected for this event.
Event Sync
It is possible sync event configuration between devices, which is commonly done among friends, team-mates, and driving school instructors at the beginning of the day.
This feature makes use of the Android Nearby Communications API, and uses a combination of Bluetooth and Wi-Fi to radios to communicate with other devices.
Broadcast to Other Devices
Tap to broadcast the current event configuration to other nearby devices.

A dialog will be displayed while broadcasting. Closing the dialog will stop the broadcast.
Receive from Other Device
Tap to scan for nearby devices that are broadcasting events.

A dialog will display a list of broadcasting devices. Select one from the list, and confirm the name of the event to be synced.
Create New Event
Create a new event for recording data and videos.
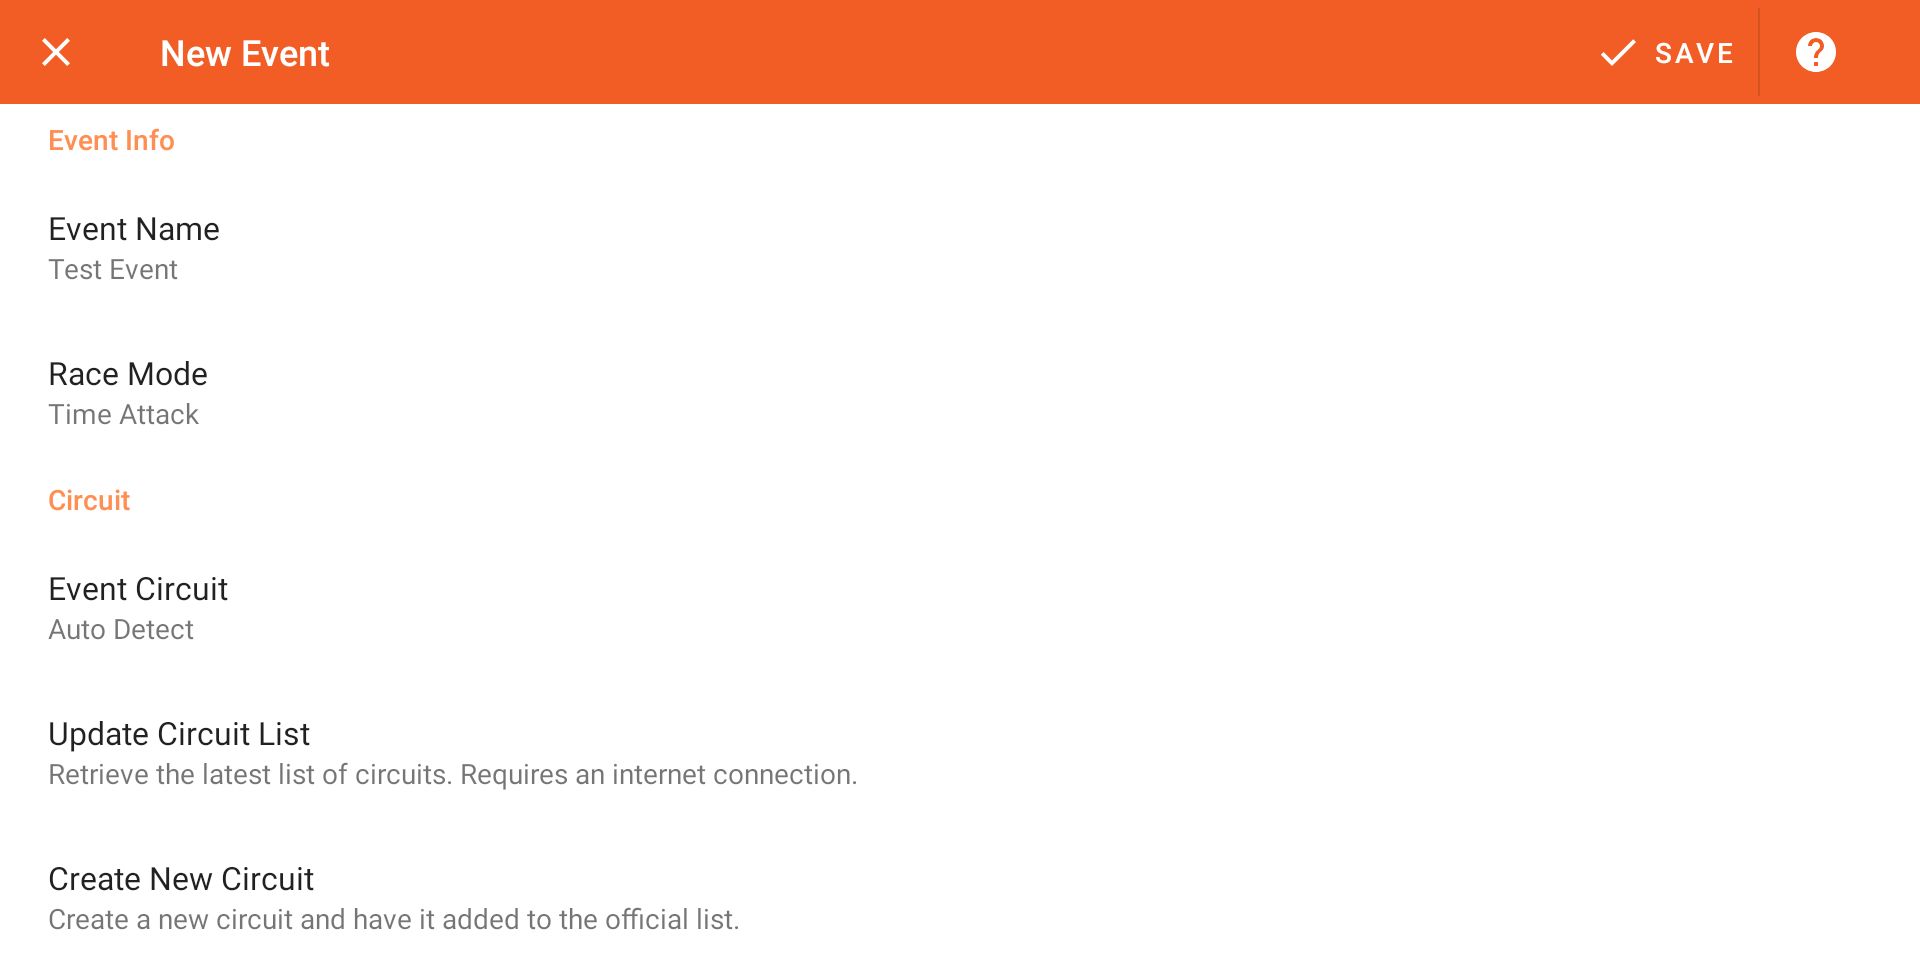
Event Info
Event Name
Tap to set the name of the event.

The event name editor is open by default when creating a new event:
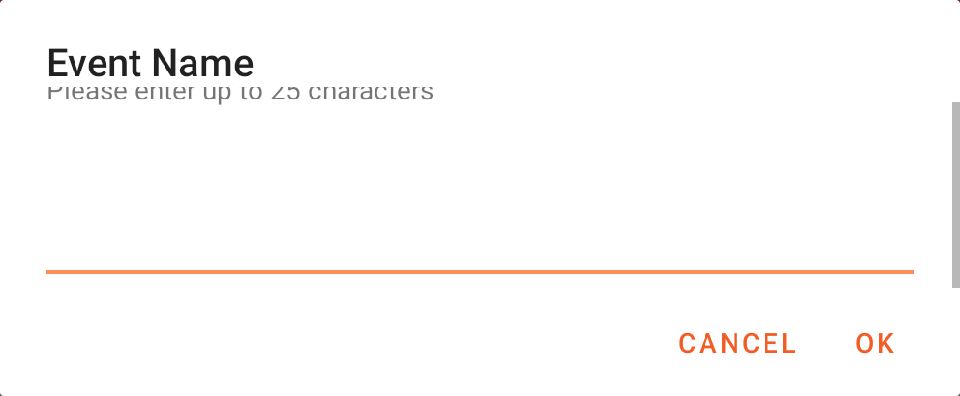
Race Mode
Tap to select the event racing mode.

The available race modes depend on your app license:
| Autocross |
A staged race mode that allows a course location to be selected and drivers to be rotated through a list after each run is completed. |
| ProSolo |
Similar to Autocross, however a left/right course side is selectable in the logger screen toolbar. After a run is completed, the course side is automatically rotated. Drivers must be manually selected. 60ft times are displayed during analysis. |
| Hill Climb |
A staged race mode that displays a lap timer when recording. A circuit can be selected for the event. The analysis map view can be manipulated in 3D. |
| Time Attack |
A circuit-based race mode that displays a lap timer when recording. A circuit can be selected for the event. Drivers are not rotated after the logger is stopped. |
| Endurance |
Similar to time attack, however the logger will automatically stop and rotate the driver if stopped nearby a set pit stall GPS marker. |
If selecting a race more that supports circuit timing, additional settings are available.
Circuit
Event Circuit
Select the desired event circuit from the list.

The first time you select a circuit, you must tap 'Update Circuit list' to download the list of available circuits from the cloud.
There are some additional selection values in this list:
| Ad-Hoc Circuit |
Select this option when the circuit is not present in the list. You must set GPS markers for start/finish location(s) in the logger screen. |
| Auto Detect |
Use the current GPS position to select the current circuit after the logger becomes ready. If multiple circuits are detected nearby, then you will be prompted to select one. This option is only available if you have downloaded circuits from the cloud service. |
Update Circuit List
Tap to update the list of circuits stored in the device database from the cloud service.

An internet connection is required.
Create New Circuit
Tap to view instructions on how to define a new circuit using the Podium service by Autosport Labs.

Manage Drivers
Manage the list of active drivers used by the logger during recording.
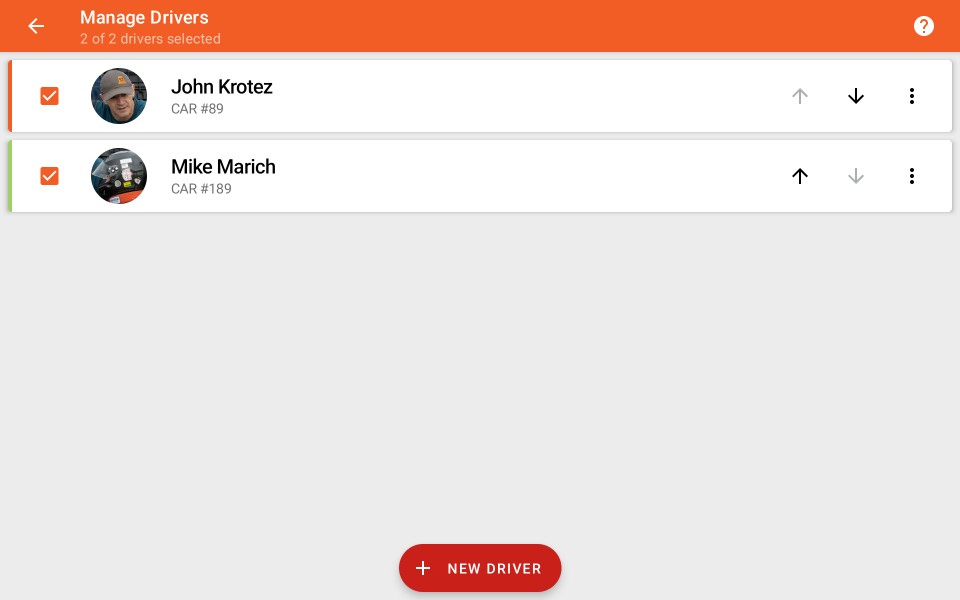
Add New Driver
Tap  to add a new driver to the list.
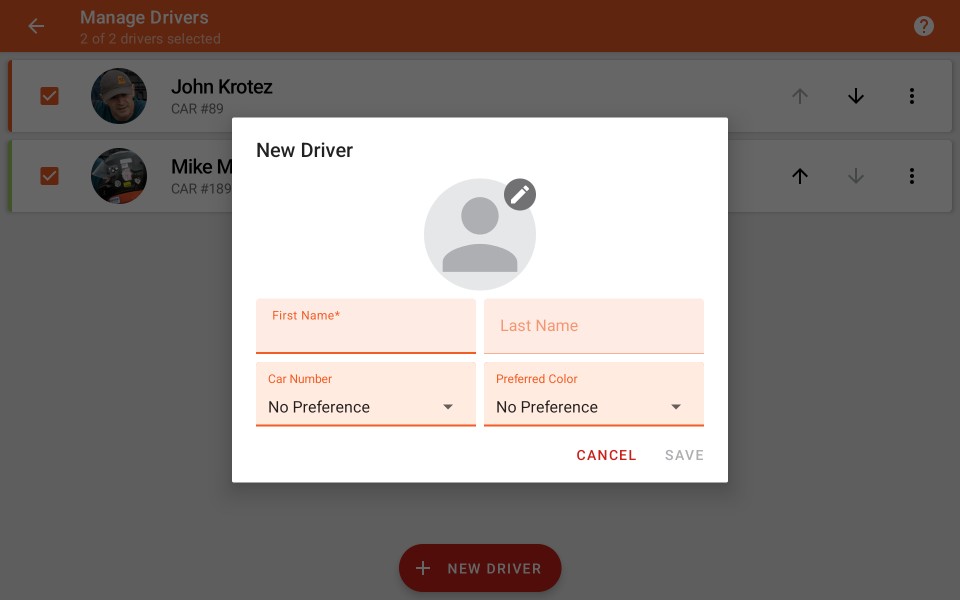
The following fields are available:
| Profile Photo | The profile photo is optional and will be displayed in the storage browser, in overlaid videos, and with logs that have been downloaded from Petrel Cloud. |
| First Name | The driver's first name is a required field. |
| Last Name | The driver's last name is an optional field. |
| Car Number | If provided, the car number will be displayed in overlaid videos. Choose from #1 to #999. |
| Preferred Color | If provided, the selected color may be used to represent the driver's first open log in the analysis screen. If the same color is already assigned to an open log, then a default color may be used instead. |
Manage Entries
Drivers are displayed as list items with their own controls:

Select Active Drivers
Tap each driver to toggle the checkbox that flags it as an active driver.

Only active drivers are displayed in the list of available driver in the logger screen.
If the event racing mode supports automatic rotation of drivers, then only active drivers are rotated through.
Modification Controls
The driver can be moved up/down in the list, modified, or deleted

Tap  to move a driver lower in the list.
Tap  to move a driver higher in the list.
Tap  to open the driver context menu:

Edit Driver
Tap to open an edit dialog and make changes to the driver profile.
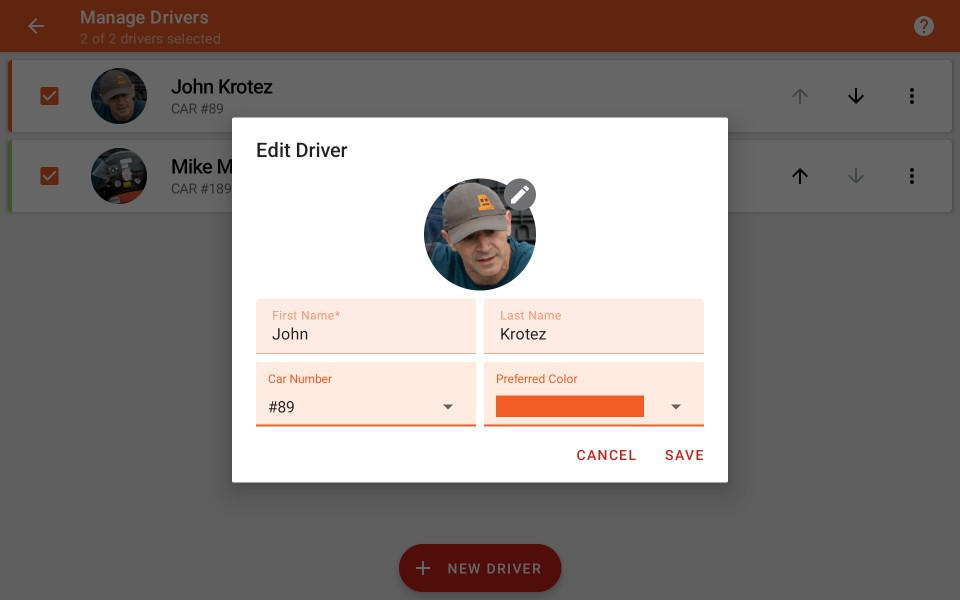
Delete Driver
Tap to delete the driver from the list.
Note: Deleting a driver from this list will NOT delete any recorded data for that driver.
Course Markers
Set position markers to improve lap time estimates, or to provide logger triggers in some racing modes.
For certain marker types, you will not be allowed to enter duplicate marker locations. This prevents issues with timing and logger operation.
Note that it is NOT necessary to define markers in order for the logger to correctly function, unless an ad-hoc circuit is configured.
Staged Racing Modes
Staged racing modes allow for the definition of Staging, Start and Finish Markers, as well as Sector Splits.
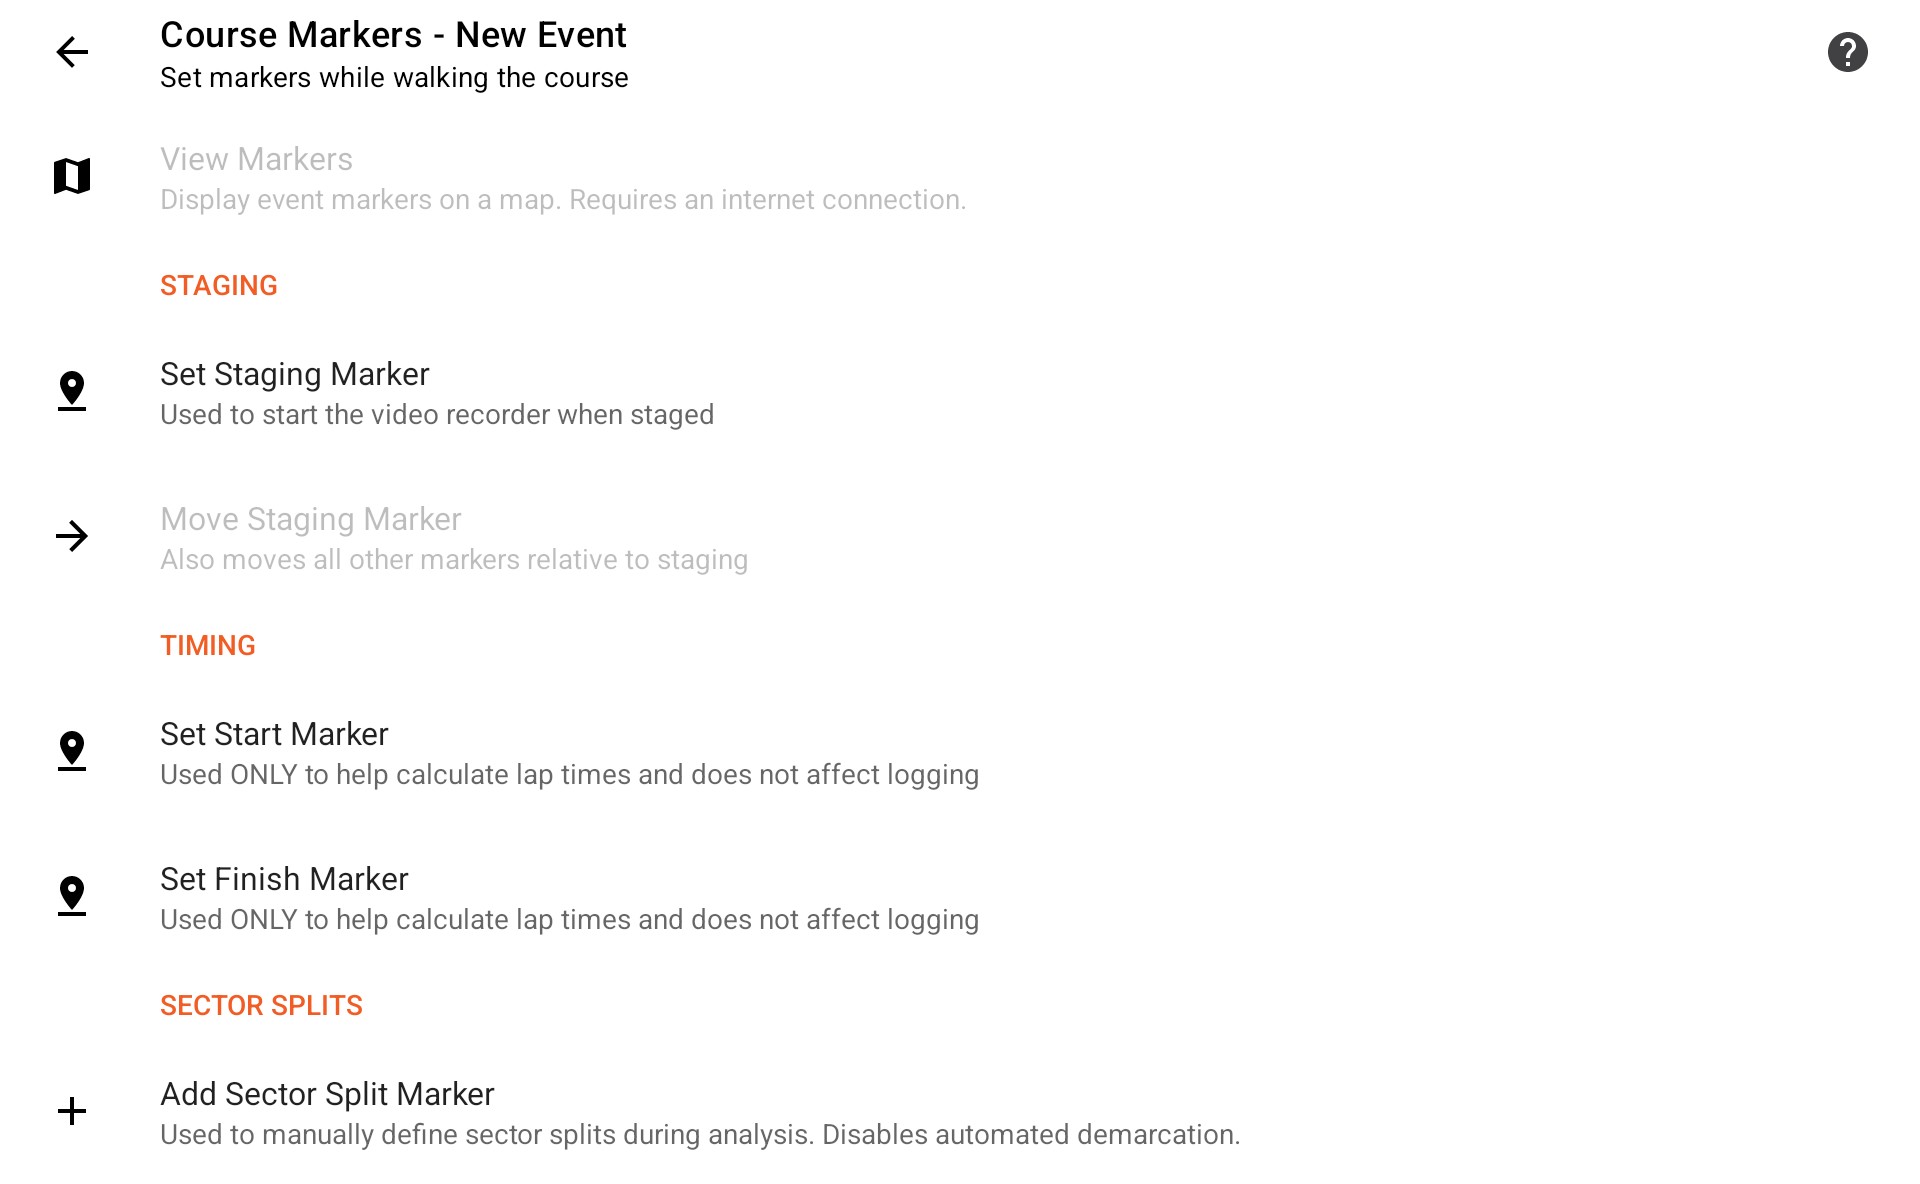
If an Autocross or ProSolo event is configured, then you must set both the start and finish markers to enable the solo lap time delta indicator on the logger screen.
If an ad-hoc Hill Climb event is configured, then you must set both the start and finish markers for start and finish triggers to function.
Set/Clear Staging Marker
Tap to set or clear the Staging marker which controls the video camera functionality.

The logger start trigger may also be configured to not start unless the vehicle is staged. That can help prevent false starts in some cases.
Move Staging Marker
Tap to move the staging marker to the current location if there is an issue with it not being detected due to GPS drift.

This option is only enabled when a staging marker is set.
Note that this will move ALL other markers the same relative distance and direction.
Set/Clear Start Marker
Tap to set or clear the Start marker.

Note that the start marker only affects lap time calculations.
Set/Clear Finish Marker
Tap to set or clear the Finish marker.

The finish marker affects lap time calculations but it may also be configured to trigger the logger to stop in the Logger Triggers settings.
Circuit Racing Modes
When using circuit racing modes, course markers may only be defined if an ad-hoc circuit is configured, or if an endurance racing event is configured.
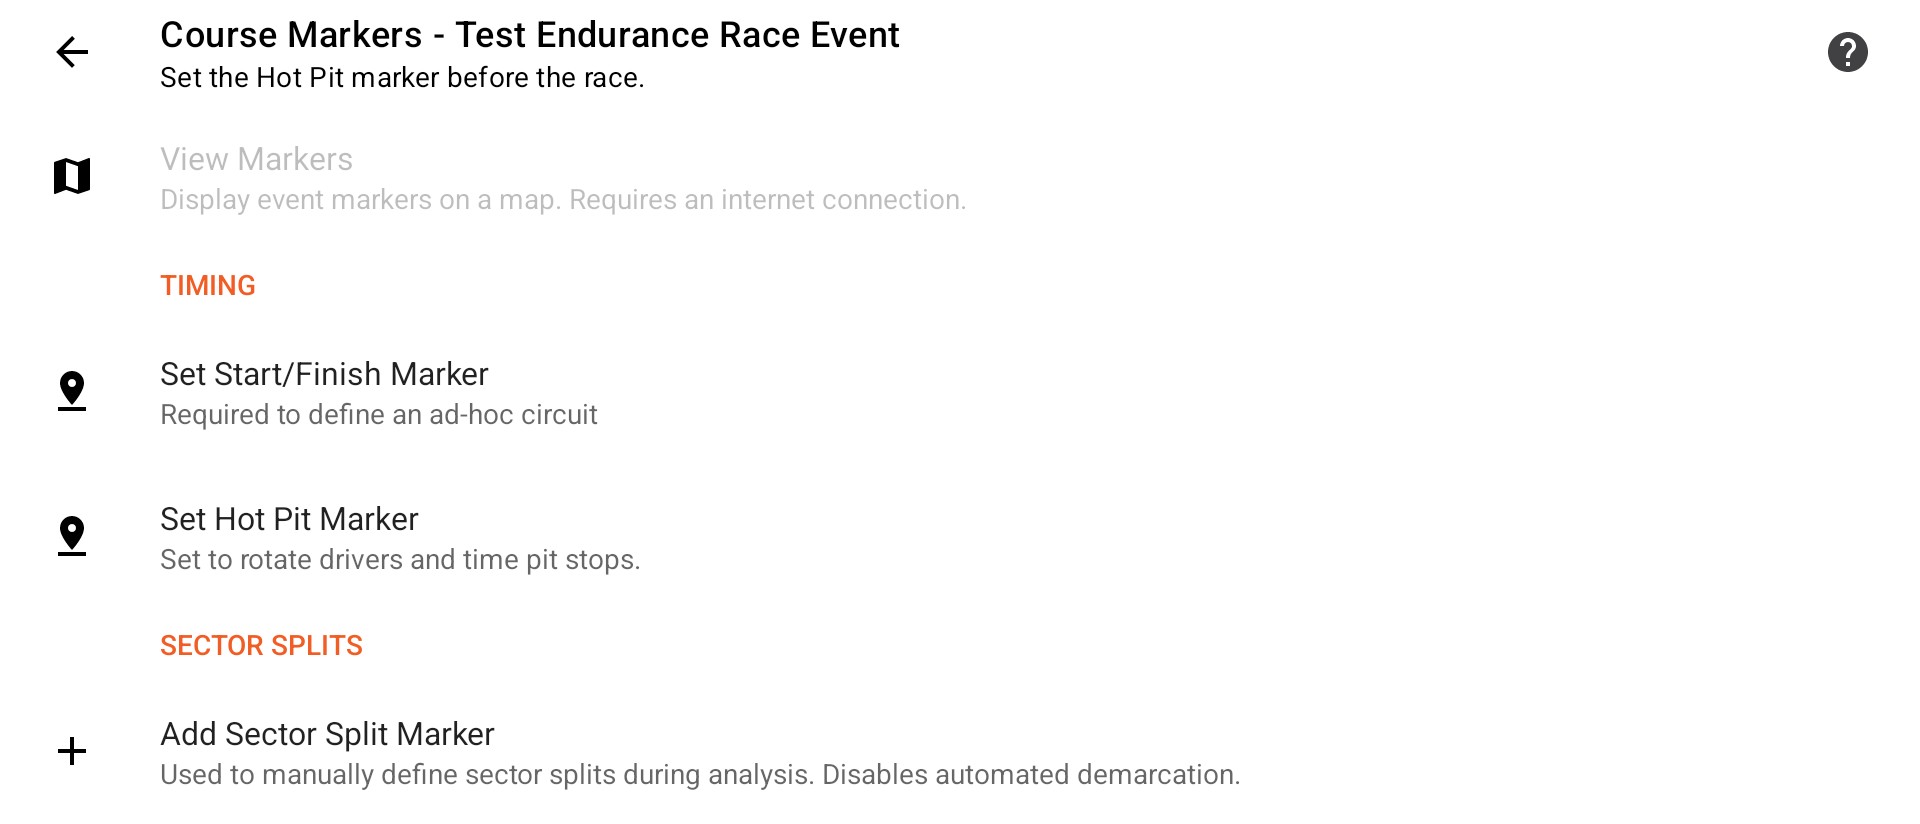
Start/Finish Marker
Tap to set or clear the Start/Finish marker which controls the logger functionality.

Hot Pit Marker
Tap to set the hot pit location marker. When the vehicle comes to a stop at this location, a pit timer will be displayed, and the current driver can be selected from a dropdown list.

This option is only available when the current event is configured with the Endurance racing mode.
View Markers
Tap to view the configured event markers on a satellite map.

This option requires an internet connection, and is only enabled when markers are set.
Sector Splits
Sector split markers can be defined to override the default sector-demarcation algorithm.

Tap to add a sector split. It will appear in a list below. Each split marker may be individually cleared if required.
Calibrate Internal Accelerometer
Calibrate the internal accelerometer on your mobile device.
This is not necessary when using an external data source with a dedicated accelerometer.
Vehicle and Mobile Device Setup
In order to calibrate the accelerometer, the following conditions must be met:
- Your device must be mounted in your vehicle in the position where you intend it to record data from.
- You are sitting in the drivers seat and are securely belted in and restrained.
- No unsecured items or passengers are in your vehicle.
- There is a safe amount of space around your vehicle to sharply accelerate forward and then come to a complete stop.
After meeting these conditions, calibration can continue.
Running the Calibration Process
From the main logger screen, open the main app menu and tap 'Calibrate Accelerometer'.
Instructions Prompt
Follow the instructions displayed in the prompt:

When you are ready, tap to proceed with calibration.
Countdown and Finish
A 5 second countdown will be displayed:
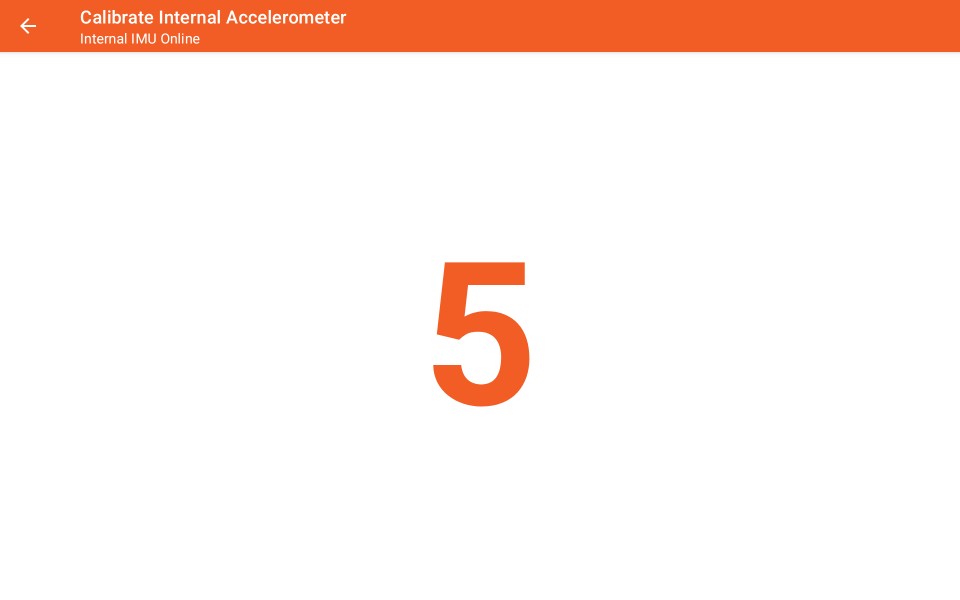
After the countdown ends, sharply accelerate forward for 1 second then bring the vehicle to a complete stop:
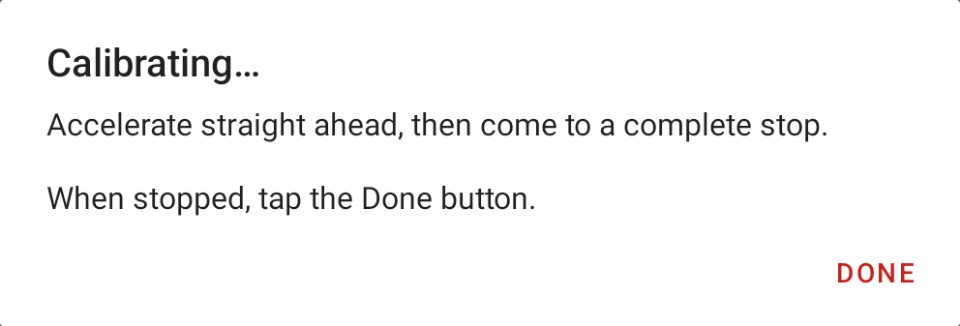
Tap to complete calibration.
Calibration Failure
If the calibration process was unsuccessful, an failure message will be displayed:
If this happens, retry the calibration process again, paying attention to accelerating sharply but smoothly, and braking firmly as well.
Confirming Calibration
Once the mobile device accelerometer has been calibrated correctly, the acceleration indicator on the logger screen will read near-zero and be centered in the middle of the accelerometer display:

Calibrate External Accelerometer
Calibrate the accelerometer in an external GNSS receiver or data logger.
Only specific devices support calibration through this process. You will be notified if your configured device requires manual calibration instead.
Calibrating an external accelerometer is similar to calibrating the internal accelerometer, except that a connection to the device must first be established.
External Device Setup
In order to calibrate the accelerometer, the following conditions must be met:
- Your device must be mounted in your vehicle in the position where you intend it to record data from.
- You are sitting in the drivers seat and are securely belted in and restrained.
- No unsecured items or passengers are in your vehicle.
- There is a safe amount of space around your vehicle to sharply accelerate forward and then come to a complete stop.
After meeting these conditions, calibration can continue.
Running the Calibration Process
From the main logger screen, open the main app menu and tap 'Calibrate Accelerometer'.
Instructions Prompt
Follow the instructions displayed in the prompt:

When you are ready, tap to proceed with calibration.
Connect to External GNSS Receiver / Logger
A status message and a progress indicator will be displayed in the app toolbar while attempting to connect to your device.
Countdown and Finish
After the connection is established, a countdown will proceed in the same way as for internal accelerometer calibration.
Follow the instructions that appear on the screen.
Calibrate DL1 Accelerometer
Calibrate the accelerometer on your Race Technology DL1.
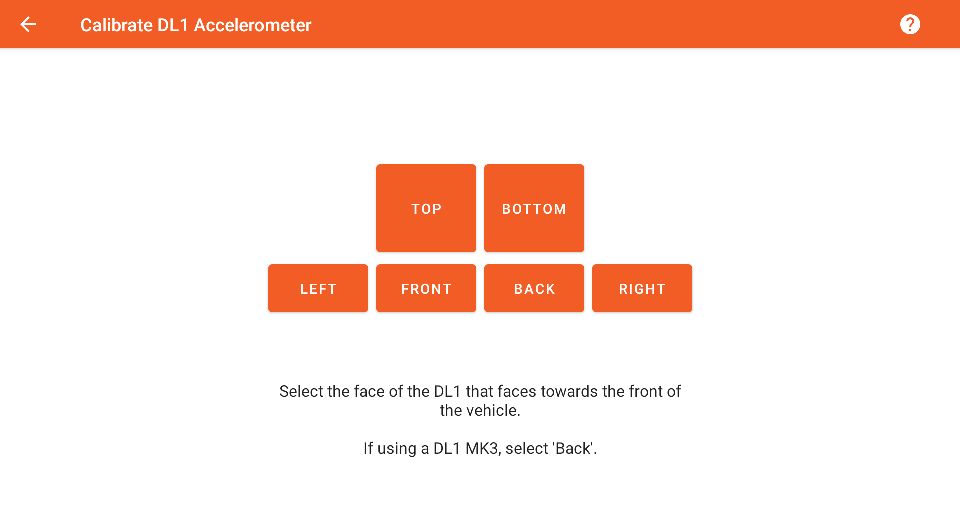
Tap on the button that represents the face of the DL1 that is facing towards the front of the vehicle.
This is the same selection that you made in the Race Technology software to configure the accelerometer values for analysis.
Settings
Configure the main application settings, including connected devices, logger channels, video cameras, and storage location.
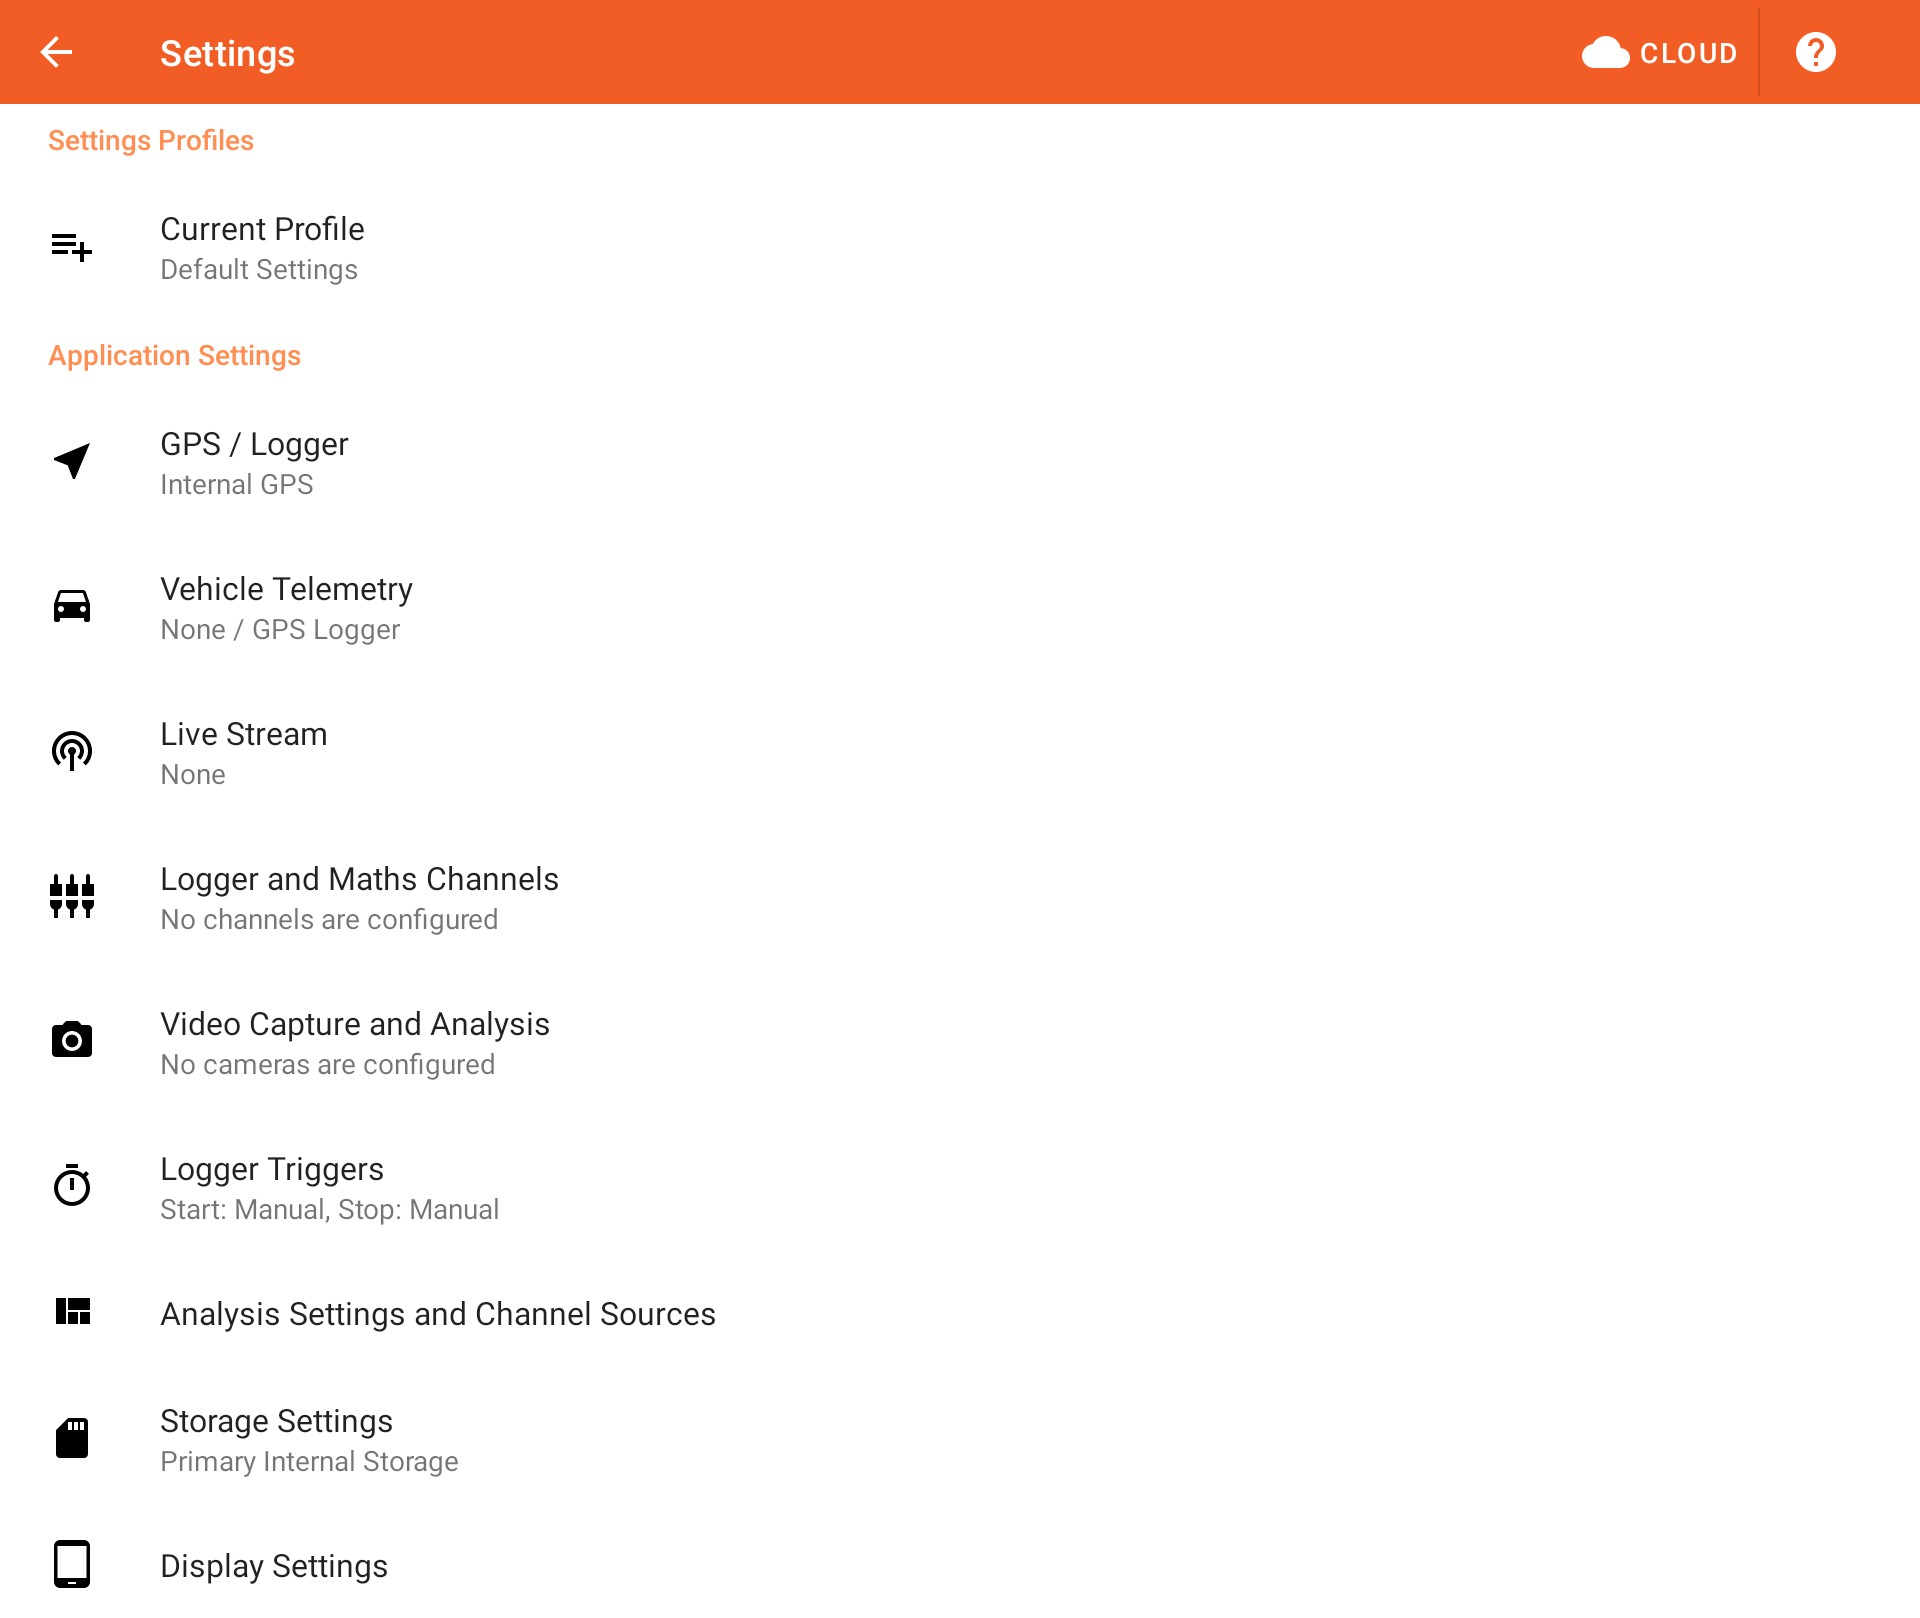
Settings Toolbar

Petrel Cloud Settings Backup

Tap to open the Petrel Cloud menu:
App settings can be uploaded to your Petrel Cloud account in order to create a backup in case you need to perform a software reinstall on you mobile device, or in the case that you need to transfer this software to a new device.
The Petrel Cloud service includes a single 'slot' for app settings. Any time you upload new app settings, then the previously saved ones will be overwritten.
Please note that you will need to upgrade to a paid Petrel Cloud subscription in order to use this feature.
Settings Profiles
App settings are saved to a profile, which can be quickly changed when switching vehicles.
Current Profile

Tap to select the current settings profile from a list of available profile names:

Tap to create a new settings profile.
If multiple profiles are listed, tap to delete the current settings profile.
Application Settings
GPS / Logger
Tap to select a Bluetooth or Wi-Fi GPS receiver or external data logger.

External data loggers can provide additional logger channels via analog inputs or CAN bus integration. These can be configured in the Logger and Maths Channels settings.
Vehicle Telemetry
Tap to select a Bluetooth or Wi-Fi source for vehicle telemetry data.

Vehicle telemetry sources provide vehicle data channels, but no GPS channels. The most common option is a Bluetooth OBD II scan tool.
Live Stream
Tap to configure a data or Wi-Fi connection to a live-stream service.

The connection will only be established for circuit racing modes (Time Attack, Endurance, etc).
Logger and Maths Channels
Tap to configure the source of logger or vehicle data channels, and configure optional calculated maths channels.

Software channels such as throttle position, engine speed and brake pressure must have their source specified.
Select the appropriate channels from the configured external data logger or vehicle telemetry source.
Video Capture and Analysis
Tap to configure recording via internal and Wi-Fi video cameras.

Make sure that you calibrate each camera in the video settings in order to ensure correct video and data synchronization.
Logger Triggers
Tap to configure the logger triggers.

The logger triggers control when data is recorded by the software data logger. You may adjust them as required, however the default settings for each racing mode work best.
Analysis Settings and Channel Sources
Tap to configure the settings used in the analysis screen and video overlays.

You can select and configure specific data channel sources such as acceleration and vehicle channels. Acceleration values can be inverted if necessary.
Storage Setting
Tap to select the storage location of the database containing log and video files.

Data can be stored in the internal device storage, or on an external SD card if your device supports it and one is installed.
The log and video database can also be permanently deleted if necessary.
Display Settings
Tap to configure display settings such as screen lock, screen rotation, auto shutdown, etc.

Some changes may require you to terminate and restart the application.
Create New Settings Profile
Create a new app settings profile.

Use settings profiles in order to quickly change between different vehicles or logger configurations.
Settings Profile Toolbar

Save

Tap to create a new settings profile using the current values, and return to the previous screen.
The current settings profile will be set to the created one.
Profile Info
Profile Name
Tap to set the new profile name.

When this screen is opened, the dialog used to edit the profile name is automatically opened.
Copy Current Profile
Enable this option to apply the current profile settings to the new profile (default).

GPS / Logger Settings
Select the source of the GPS (Global Positioning System) or GNSS (Global Navigation Satellite System) data stream.

Some device, such as the RaceCapture series of data loggers, will also include additional analog or CAN sensor channels.
GPS / Logger devices are connected via either Bluetooth or Wi-Fi radio.
GPS / Logger Source
Tap to select the gps receiver or data logger.

When selecting a Bluetooth device, first make sure that it is paired with your mobile device in the system Bluetooth settings.
When selecting a Wi-Fi device, first make sure that it is configured as an access point in the system Wi-Fi settings. You will also need to grand permission to access the device location as well as use fine grained location resolution (depending on Android device). Revoking these permissions will prevent the logger from detecting and connecting to the Wi-Fi access point.
The internal mobile device GPS receiver is not an appropriate source of data and will not yield usable results. You will also need to grand permission to access the device location as well as use fine grained location resolution (depending on Android device).
At a minimum, a Bluetooth GPS puck-style receiver is required.
Source Device List
Choose from the list of supported device types:
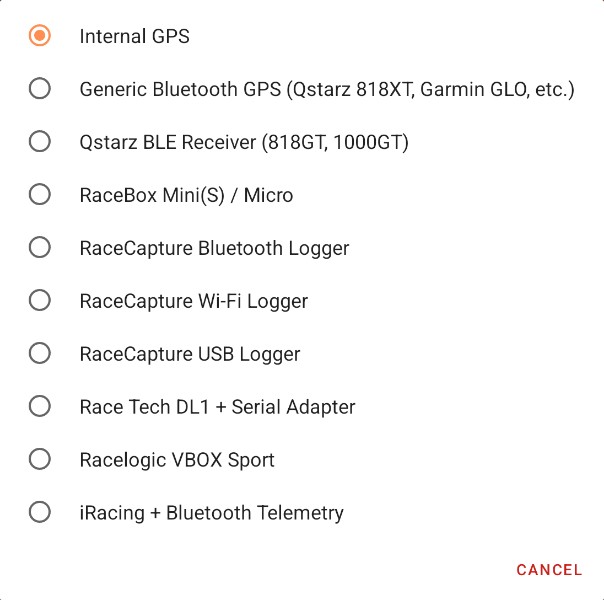
Select Wi-Fi Device SSID
After selecting a supported Wi-Fi device as the data source, you must select its Wi-Fi SSID. This differs depending on the app and the version of Android running on the mobile device.
Devices Running Android 9 and Lower
After selecting a supported Wi-Fi device as the data source, you must select its Wi-Fi SSID from a list of available Wi-Fi access points configured on your mobile device:
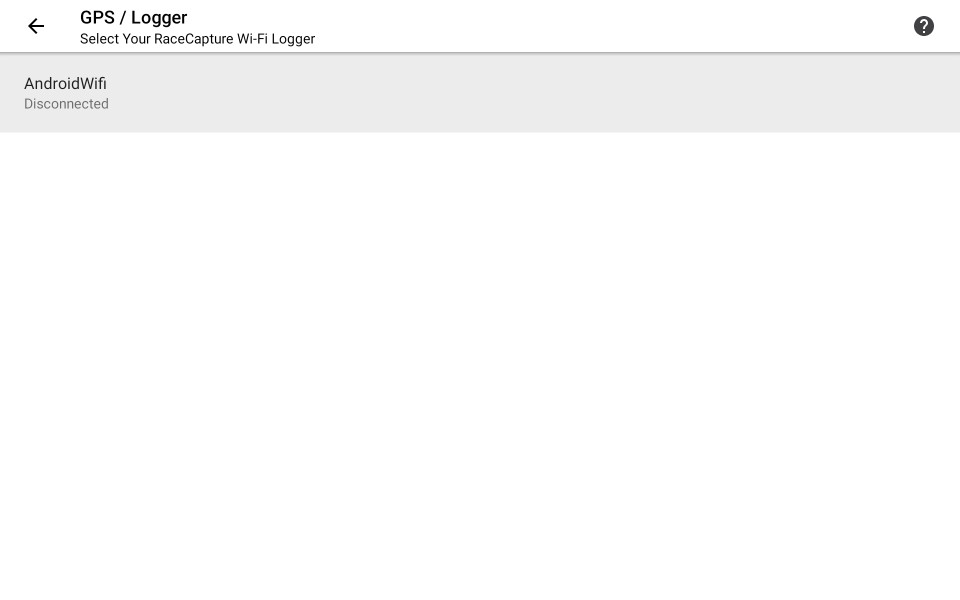
Note: Only Wi-Fi access points that were configured manually by you will be displayed in this list. Access points configured by other apps will not be displayed by the operating system due to security restrictions.
Note: The app will not allow you to select a Wi-Fi network that does not have a unique SSID (ie there are duplicates). In this case, you need to removed the duplicate networks from your device Wi-Fi settings.
Devices Running Android 10 and Higher
Due to security restrictions, you must first connect to the desired network in order for it to be visible to the app. You will also need to provide the Wi-Fi network password, if required.

Tap Select Current Wi-Fi Network to select the currently active network.

Selecting the current Wi-Fi network will prompt you to confirm your choice, and also select the Wi-Fi network security option and enter a password if required.
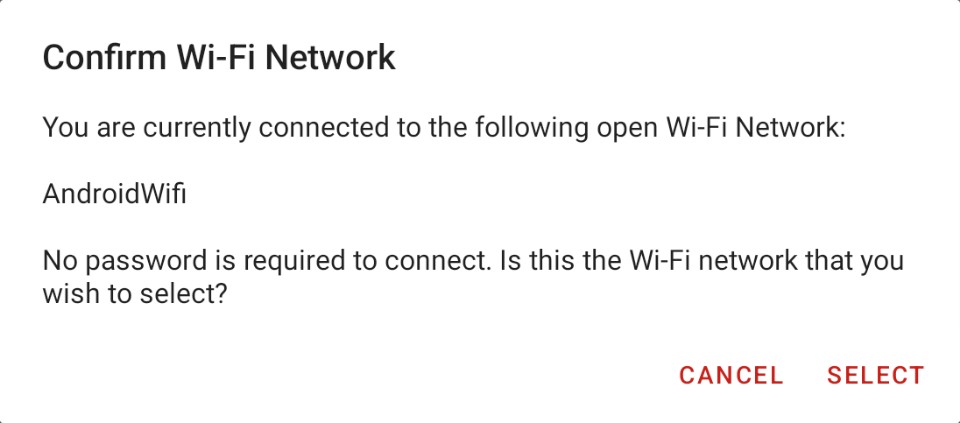
Note: On devices running Android 12 and above, the app can detect the current Wi-Fi network security model, so you will only be required to enter a password if the active network is secured.
Note: The Android OS will require you to approve the selected Wi-Fi network the first time that the app connects to it. After approving the network, the app will automatically connect on subsequent attempts.
Select Bluetooth Device
After selecting a supported Bluetooth device as the data source, you must select it from a list of available Bluetooth devices paired with your mobile device.
You will be prompted to confirm that the selected Bluetooth device is the correct one for the configured GPS / Logger Source.
Selected Wi-Fi Device
If you have configured a Wi-Fi data source, the currently selected Wi-Fi SSID is displayed.

You may change the selected Wi-Fi SSID if necessary.
Important: If your mobile device allows you to configure a networking option to 'Scan for Nearby Devices', then you must disable it when using a Wi-Fi data logger. If you do not, the mobile device will periodically pause traffic over the Wi-Fi network.
Wi-Fi Device SSID
Tap to select a different Wi-Fi SSID from a list of configured access points on your mobile device.

Selected Bluetooth Device
If you have configured a Bluetooth data source, the currently selected Bluetooth device is displayed.
Bluetooth Device
Tap to select a different Bluetooth device from a list of paired Bluetooth devices on your mobile device.
Secure Bluetooth Connection
Try enabling this option if the app has problems connecting to your bluetooth device.
Prioritize Bluetooth LE Connection
This option is available only for Bluetooth Low Energy devices. Try enabling this option if your BLE device will not sustain its maximum advertised sample rate.
Note: This option may cause intermittent connection losses on some Android devices, especially models manufactured by Samsung.
Disable this option if you are experiencing connection losses.
Vehicle Telemetry Settings
Select the source of additional vehicle data that does not include a GPS (Global Positioning System) or GNSS (Global Navigation Satellite System) data stream.

Vehicle Telemetry devices are connected via either Bluetooth or Wi-Fi radio.
Typical vehicle telemetry sources are an OBD II scan tool or an OEM Wi-Fi module such as in late-model Porsche GT cars.
Vehicle Telemetry Source
Tap to select the vehicle telemetry source.

When selecting a Bluetooth device, first make sure that it is paired with your mobile device in the system Bluetooth settings.
When selecting a Wi-Fi device, first make sure that it is configured as an access point in the system Wi-Fi settings.
If you have already configured and external data logger as the GPS / Logger source, do not select it here.
Source Device List
Choose from the list of supported device types:
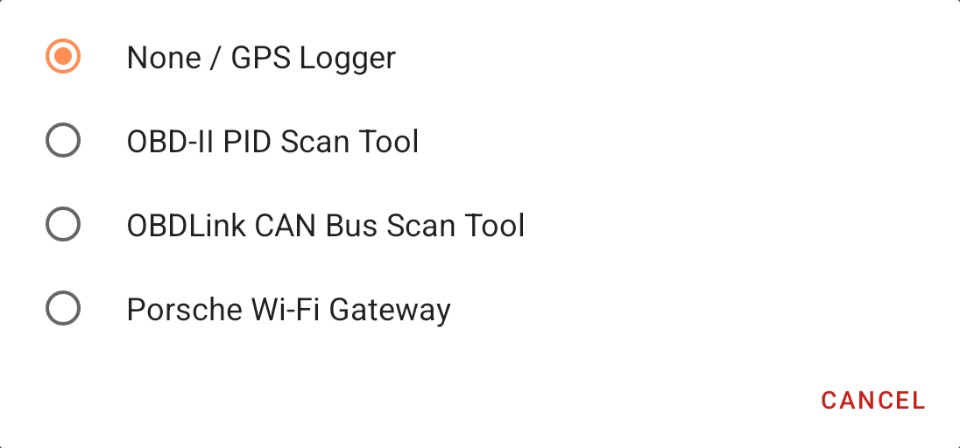
Select Wi-Fi Device SSID
After selecting a supported Wi-Fi device as the data source, you must select its Wi-Fi SSID. This differs depending on the app and the version of Android running on the mobile device.
SoloStorm and CircuitStorm on Devices Running Android 9 and Lower
After selecting a supported Wi-Fi device as the data source, you must select its Wi-Fi SSID from a list of available Wi-Fi access points configured on your mobile device:
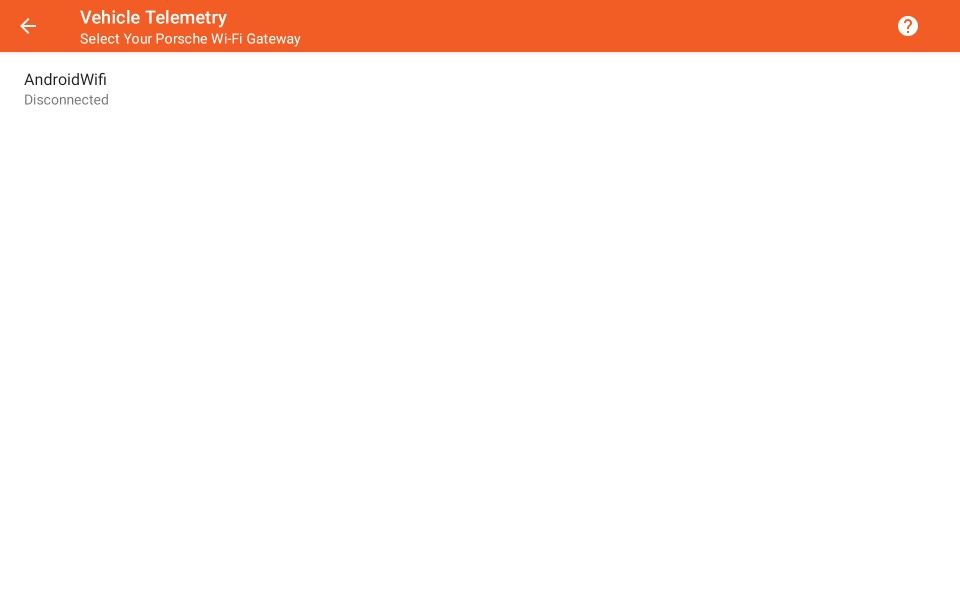
Note: Only Wi-Fi access points that were configured manually by you will be displayed in this list. Access points configured by other apps will not be displayed by the operating system due to security restrictions.
Note: The app will not allow you to select a Wi-Fi network that does not have a unique SSID (ie there are duplicates). In this case, you need to removed the duplicate networks from your device Wi-Fi settings.
CircuitStorm on Devices Running Android 10 and Higher
Due to security restrictions, you must first connect to the desired network in order for it to be visible to the app. You will also need to provide the Wi-Fi network password, if required.

Tap Select Current Wi-Fi Network to select the currently active network.

Selecting the current Wi-Fi network will prompt you to confirm your choice, and also select the Wi-Fi network security option and enter a password if required.
Note: On devices running Android 12 and above, the app can detect the current Wi-Fi network security model, so you will only be required to enter a password if the active network is secured.
Note: The Android OS will require you to approve the selected Wi-Fi network the first time that the app connects to it. After approving the network, the app will automatically connect on subsequent attempts.
Select Bluetooth Device
After selecting a supported Bluetooth device as the data source, you must select it from a list of available Bluetooth devices paired with your mobile device.
You will be prompted to confirm that the selected Bluetooth device is the correct one for the configured Vehicle Telemetry Source.
Selected Wi-Fi Device
If you have configured a Wi-Fi data source, the currently selected Wi-Fi SSID is displayed.

You may change the selected Wi-Fi SSID if necessary.
Wi-Fi Device SSID
Tap to select a different Wi-Fi SSID from a list of configured access points on your mobile device.

Selected Bluetooth Device
If you have configured a Bluetooth data source, the currently selected Bluetooth device is displayed.
Bluetooth Device
Tap to select a different Bluetooth device from a list of paired Bluetooth devices on your mobile device.
Secure Bluetooth Connection
Try enabling this option if the app has problems communicating with your bluetooth device.
CAN Bus Data Sources
When a dedicated CAN bus data source (OBDLink LX/MX/MX+ scan tool) is selected as the Vehicle Telemetry Source, the Vehicle CAN Library and CAN Bus Logger are enabled.
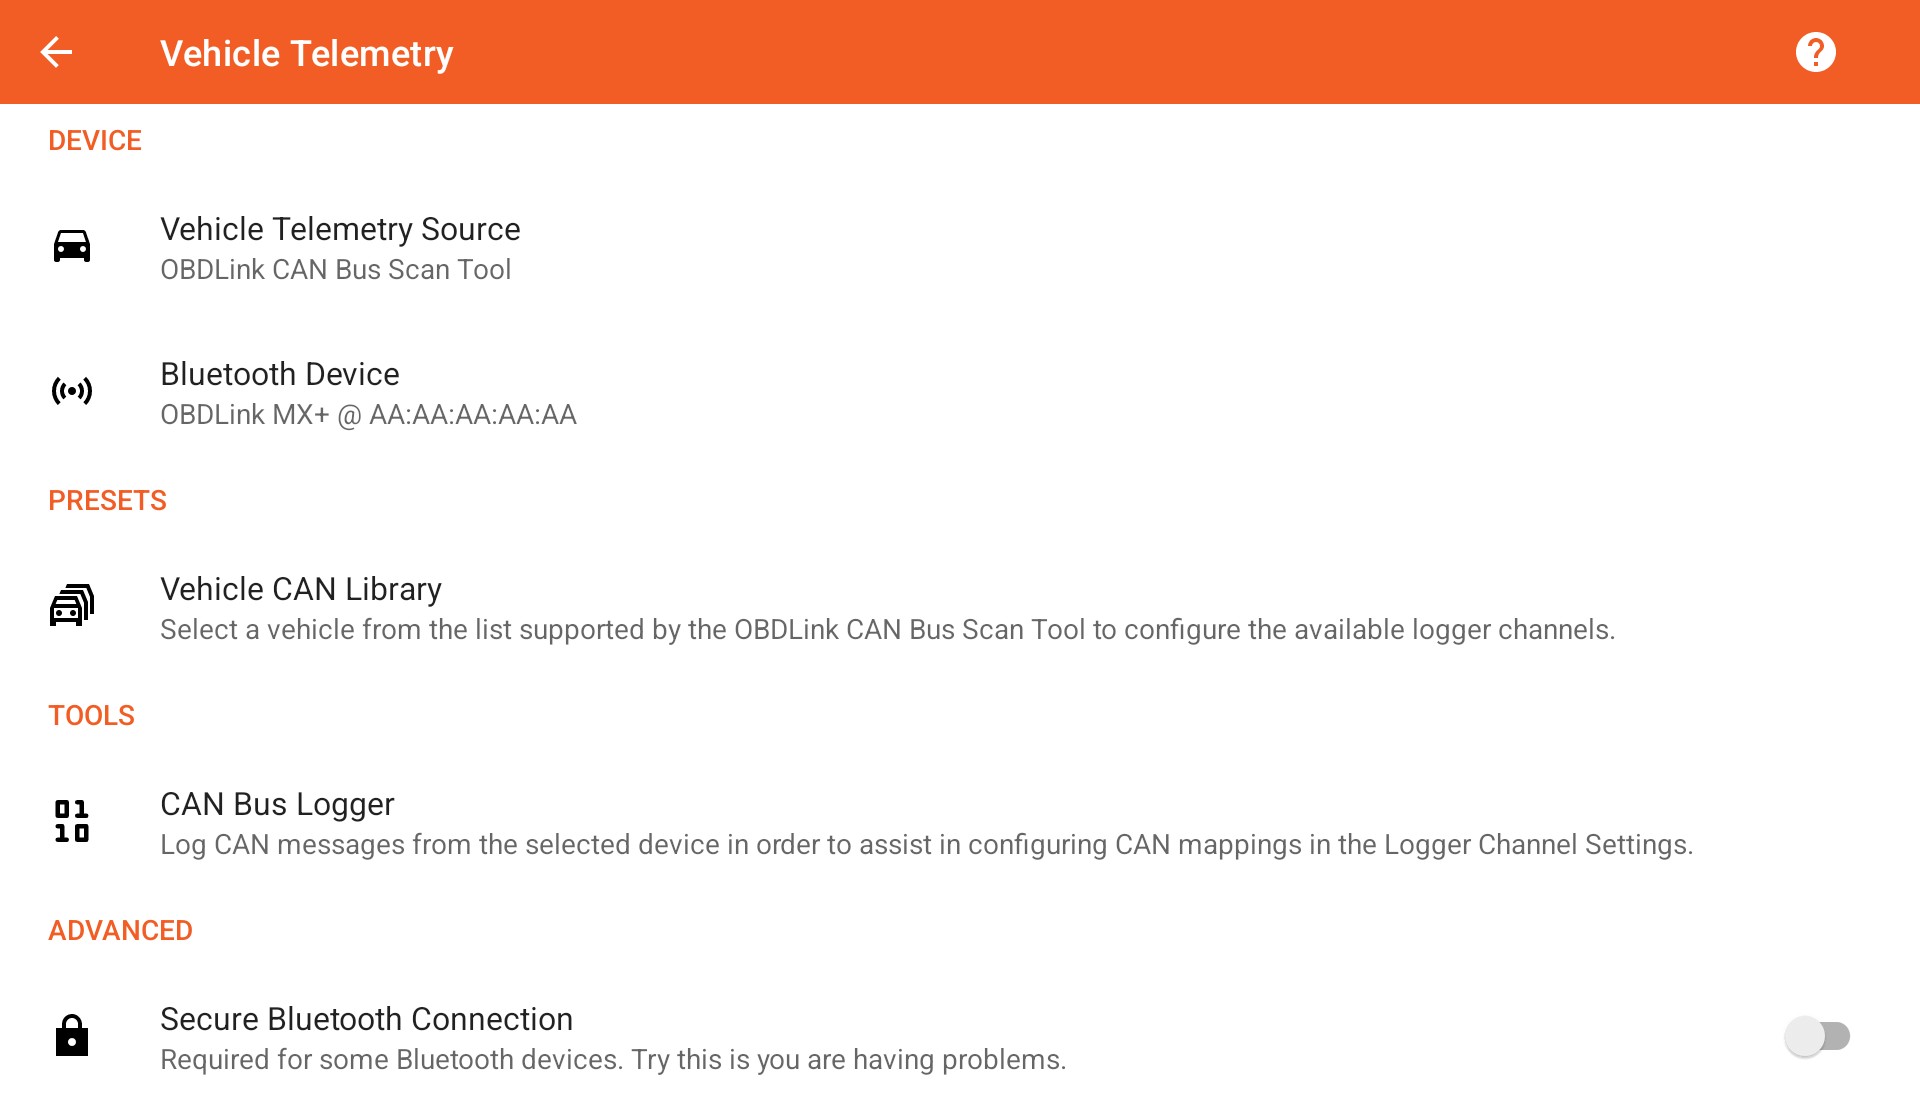
Vehicle CAN Library
Tap to browse the library of vehicle profiles.

Note: Only vehicle CAN profiles supported by the currently selected data source can be selected.
CAN Bus Logger
Tap to open the CAN bus logger.

Note: Only CAN bus speeds of 500kbps are supported via the OBDLink CAN bus scan tool. It also does not support CAN termination, which may be required for certain motorsports applications (Bosch MS ECU series, etc).
Vehicle CAN Library
The Vehicle CAN bus library features a list of vehicles for which logger CAN channel mappings have been pre-defined, and can be quickly applied to the logger configuration.
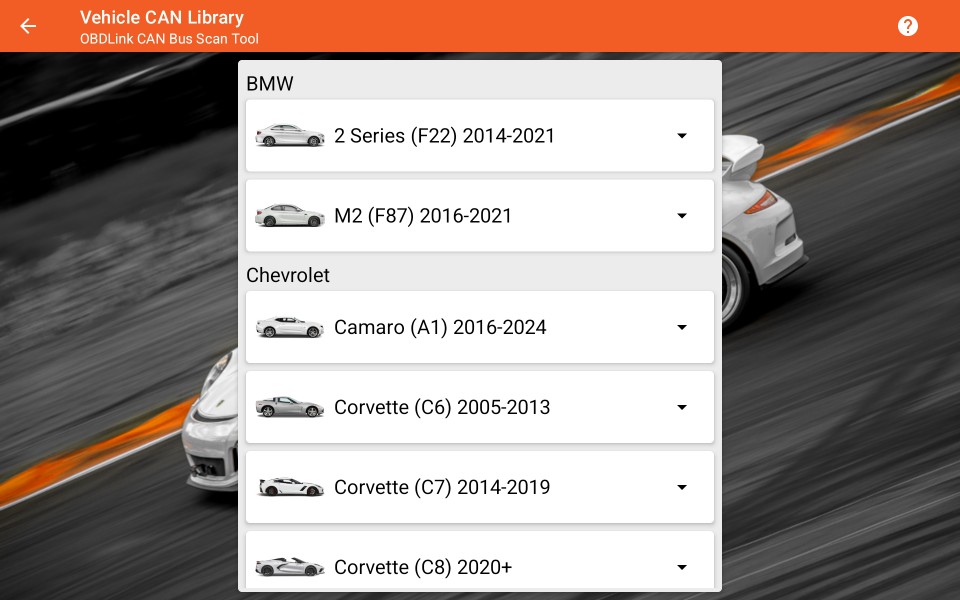
Note: Only vehicle mappings that are supported by the currently selected CAN-enabled data source will be listed.
Note: CircuitStorm requires an active subscription for the logger to read channels configured using the Vehicle CAN Library. The configured CAN channels will de disabled when the logger is powered on, and a warning message will be displayed. SoloStorm has no such restriction.
Vehicle Details
Scroll the list of vehicles and view the vehicle details by tapping on the vehicle name.

Depending on the selected CAN-enabled data source, some vehicles may feature additional information such as CAN network speed, termination, and wiring information.
Vehicle Wiring
When working with vehicle wiring, it is crucial to verify all wire colors and pin locations using manufacturer-provided information. You are solely responsible for correctly modifying your vehicle's wiring if necessary. Petrel Data Systems assumes no responsibility for any modifications you make. While any wiring information provided has been verified to the best of our knowledge, you must independently confirm its accuracy.
Tap the APPLY button to select a vehicle CAN mapping. You will be prompted to confirm your choice.
Vehicle Options
On vehicles that require different CAN mappings based on their build options, you can select the appropriate options.

Support configuration options are:
- Transmission (Automatic/Manual)
Applying Vehicle Mappings
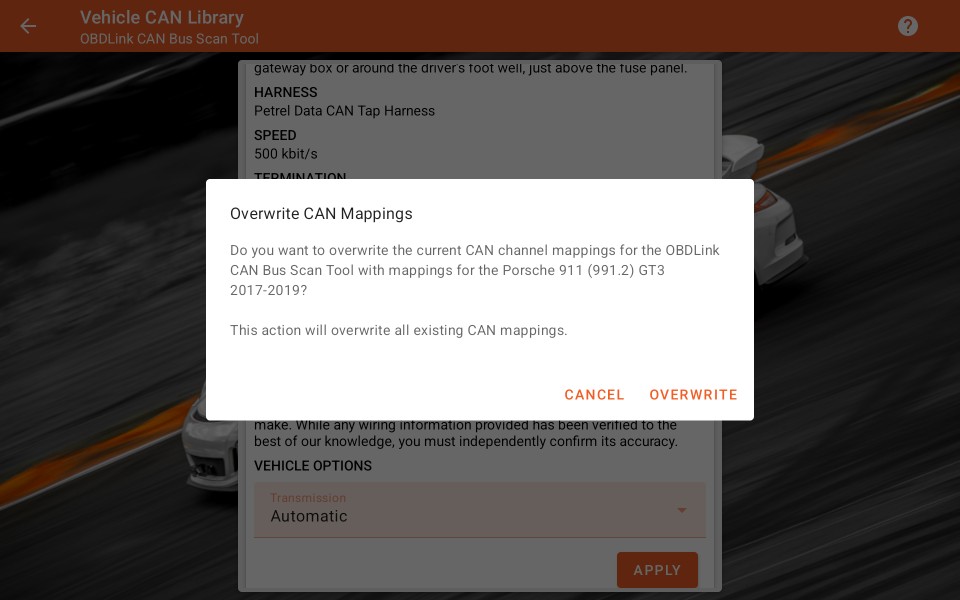
Confirm that you have selected the correct vehicle, and tap the OVERWRITE button to apply the current selection to the logger settings.
This will configure mappings for the available logger channels listed in the vehicle record, as well as select these channels as sources for the logger.
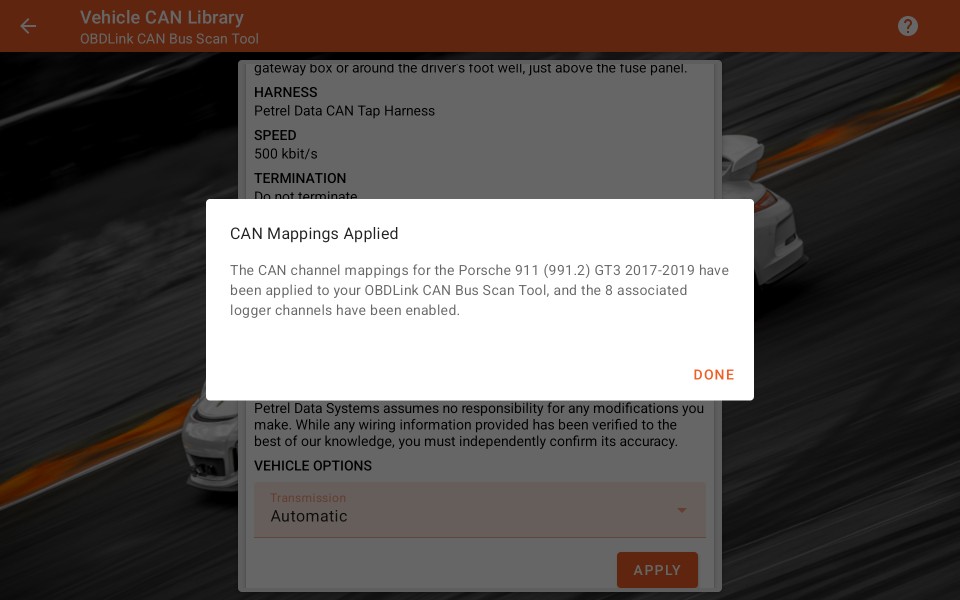
Tap the DONE button to close the Vehicle CAN Library screen.
CAN Bus Logger
The CAN bus logger allows you to connect to the configured CAN data source, filter messages, and copy them to the device clipboard.
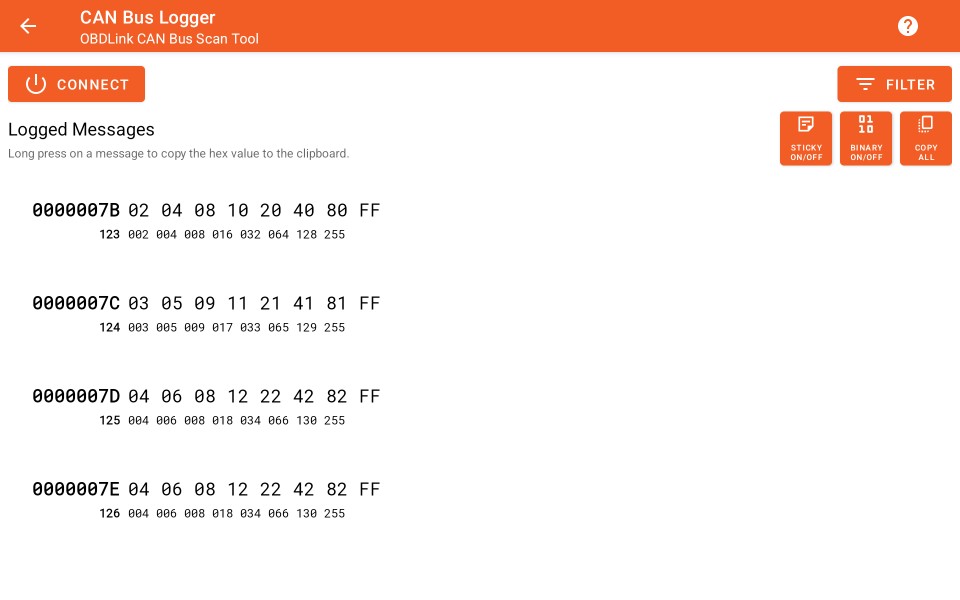
Connect to Configured CAN Device
Tap  to toggle the connection to the currently configured CAN device.
The connection button will be updated as the connection is established to indicate the connection state.
Message Filter
Tap  to display the message filtering options.

The following filter options are available:
| Message ID | The CAN message ID header to match on. Leave this blank to disable the filter and receive all available messages. You will be allowed to enter either an 11-bit number or a 29-bit number depending on the value of the Length field. |
| Length | Select either 11-bit or 29-bit message IDs to match on. The most common format is 11-bit. |
| ID Mask | Some CAN message IDs contain additional data specific to the the sender of the message or the state of the system. To ignore these additional data, set a mask to be applied to the incoming message ID header (logical AND) before being compared to the filter message ID. For example, to match on only on the lowest 2 bytes on a 29-bit header of 0x1FFFFFFF, apply a mask value of 0x0000FFFF. |
| Row ID | Some CAN systems such as certain Bosch Motorsport ECUs will reuse a single message ID in order to deliver a number of different signal payloads. To differentiate the payloads, each payload will also use a row ID as the first byte of the payload. Therefore, messages may be additionally filtered by row ID prior to extracting signals values. Some systems also refer to the row ID as the sub-ID. |
Note the message ID and message ID mask values are all big-endian, meaning that the most-significant (largest) bytes appear on the left of the hexadecimal string.
Tap  to toggle the filter options to be entered in either hexadecimal or decimal format. The alternate format will be displayed below each field.
Tap  to clear all of the filtering options except for the Message ID Length. This will remain set to the selected value.
Tap  to hide the filter options.
Logged Messages
The list of logged messages may be scrolled as needed. Up to 100 messages are kept in the list.
Tap  to copy all messages in the list to the device clipboard as lines of hexadecimal text. You can then paste it
into an email or a document.
Optionally, long press on a single message to copy it to the device clipboard. You may then paste it directly into the Test Message field when configuring a CAN channel.

The message is displayed as in 2 parts, the ID (in bold text), and the payload containing the individual signal bytes. By default, the ID and payload are displayed as both hexadecimal and decimal values.
Logged CAN Message Handling
The background color of a newly logged CAN message will briefly flash orange to indicate that it has been added or updated.
Appending Mode
By default, logged CAN messages are appended to the end of the list, and old messages are removed from the top of the list to limit its size.
Sticky Mode
Alternatively, sticky mode can be toggled which sorts the list by message ID, and updates message payloads with new ones that are logged. This will limit the size of the list to the number of unique CAN message IDs, and can be used to more easily identify changes in message payloads when searching for specific signals.
Tap  to toggle between appending updates (default) and sticky updates.
Binary Values
A binary representation of each message payload byte can be toggled on/off in order help identify bitwise (non byte-aligned) fields as well as sign-magnitude and signed-integer fields.
Tap  to display a list of binary values for each message.

Live Stream Settings
Select a supported live streaming service to forward logger data to as it is recorded.

Data is streamed over the cellular of Wi-Fi radio, depending on your device configuration. It is possible to stream data via the cellular network while using the Wi-Fi radio to connect to a Wi-Fi data source or control an external camera.
Streaming Service
Tap to select the streaming service.

Use of a live streaming service requires that you have an active internet connection. Additional data charges with your carrier may apply.
Service List
Choose from the list of supported services:
Podium Streaming Service
Additional configuration information is required when using the Podium.live streaming service:

Podium Device ID
Enter the private device ID that has been assigned to you by Podium.

Register on Podium
Tap this setting in order to open the Podium dashboard in a web browser. You can then registered on Podium and receive a device ID, or log in and find your device ID,

Logger and Maths Channels
Configure the sources of the vehicle channels, and define formulas for the optional maths channels.
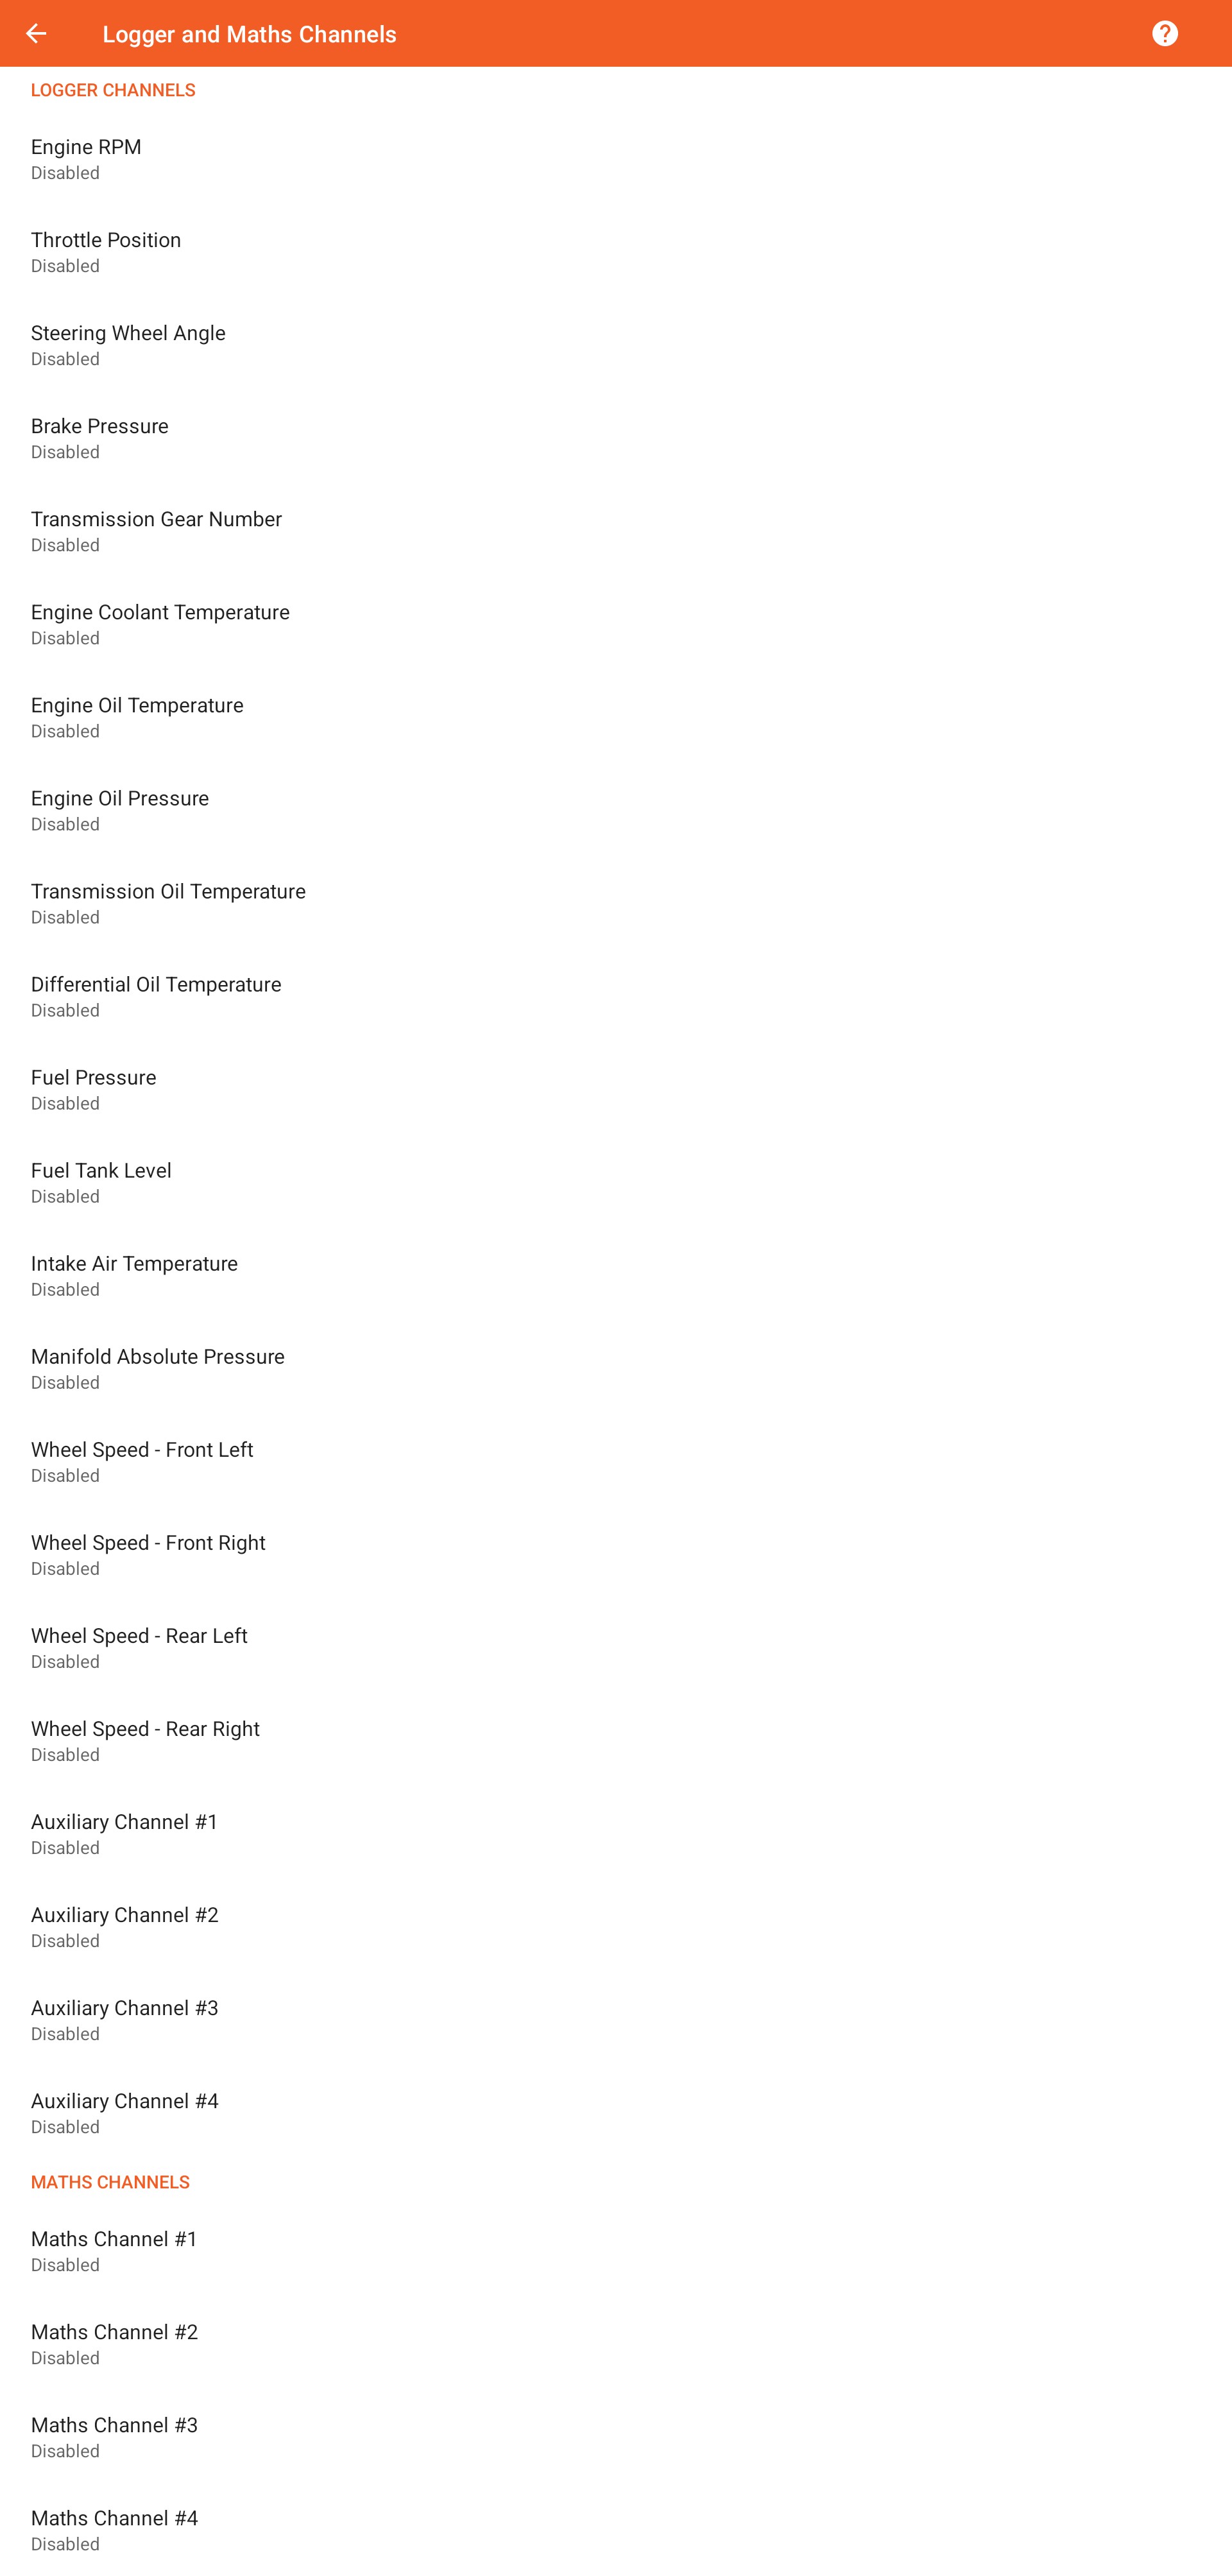
Logger Channels
Tap each channel to configure it with the appropriate hardware device channel source.
Engine RPM
Tap to select the hardware source for engine RPM.

An audible RPM alarm can be set, and a frequency multiplier can be set for certain data sources.
Throttle Position
Tap to select the hardware source for throttle position.

The throttle position can be calibrated for certain data sources.
Steering Angle
Tap to select the hardware source for steering angle.

These channels use the values from the external data logger verbatim. No additional configuration is provided.
Gear Number
Tap to select the hardware source for the current transmission gear number.

Pressure and Temperature Channels
Tap to select the hardware source for pressure and temperature channels.


These channels store the logged values in metric units, and convert them to the specified display units.
Fuel Level
Tap to select the hardware source for fuel level.

Wheel Speed Channels
Tap to select the hardware source for individual wheel speed channels.


Wheel speed channels can be used to analyze driven wheel slip as well as braking performance.
Auxiliary Channels
Tap to select the hardware source for auxiliary logger channels.


These channels use the values from the external data logger verbatim. You can provide a custom name for each channel (Transmission Temperature, Differential Temperature, etc).
Maths Channels
Tap each channel to define the correspinding maths expression.

Maths channel values are calculated during analysis.
Logger Channel Settings
Configure a logger input channel.

Channel Source
Tap to select the hardware source from a list of supported sources for this channel.

Select a hardware channel corresponding to the configured Logger or Vehicle Telemetry data source.
You will only be able to select channels for sources that you have configured in the GPS / Logger and Vehicle Telemetry settings. For example, if you have only a RaceCapture logger configured, then you will not be able to select OBD Scan Tool channels.
RaceCapture Logger Channel Sources
When selecting channels from a RaceCapture logger, it is important to select the correct channel type so that the units of measure will be correctly converted and displayed.
The available RaceCapture channels are:
- RaceCapture Engine RPM (“RPM”)
- RaceCapture Throttle Position (“TPS”)
- RaceCapture Steering Angle (“Steering”)
- RaceCapture Brake Pressure (“Brake”)
- RaceCapture Transmission Gear (“Gear”)
- RaceCapture Engine Coolant Temperature (“EngineTemp”)
- RaceCapture Engine Oil Temperature (“OilTemp”)
- RaceCapture Engine Oil Pressure (“OilPress”)
- RaceCapture Transmission Oil Temperature (“TransTemp”)
- RaceCapture Differential Oil Temperature (“DiffTemp”)
- RaceCapture Fuel Pressure (“FuelPress”)
- RaceCapture Fuel Tank Level (“FuelLevel”)
- RaceCapture Intake Air Temperature (“IAT”)
- RaceCapture Manifold Absolute Pressure (“MAP”)
- RaceCapture Wheel Speed – Front Left(“WheelSpdFL”)
- RaceCapture Wheel Speed – Front Right(“WheelSpdFR”)
- RaceCapture Wheel Speed – Rear Left(“WheelSpdRL”)
- RaceCapture Wheel Speed – Rear Right(“WheelSpdRR”)
Units will only be converted when displayed if these channels are mapped to a specific channel type (RPM, Throttle, etc), and NOT an Analog channel.
Channel Types
Engine RPM
The Engine RPM channel has additional configuration options:
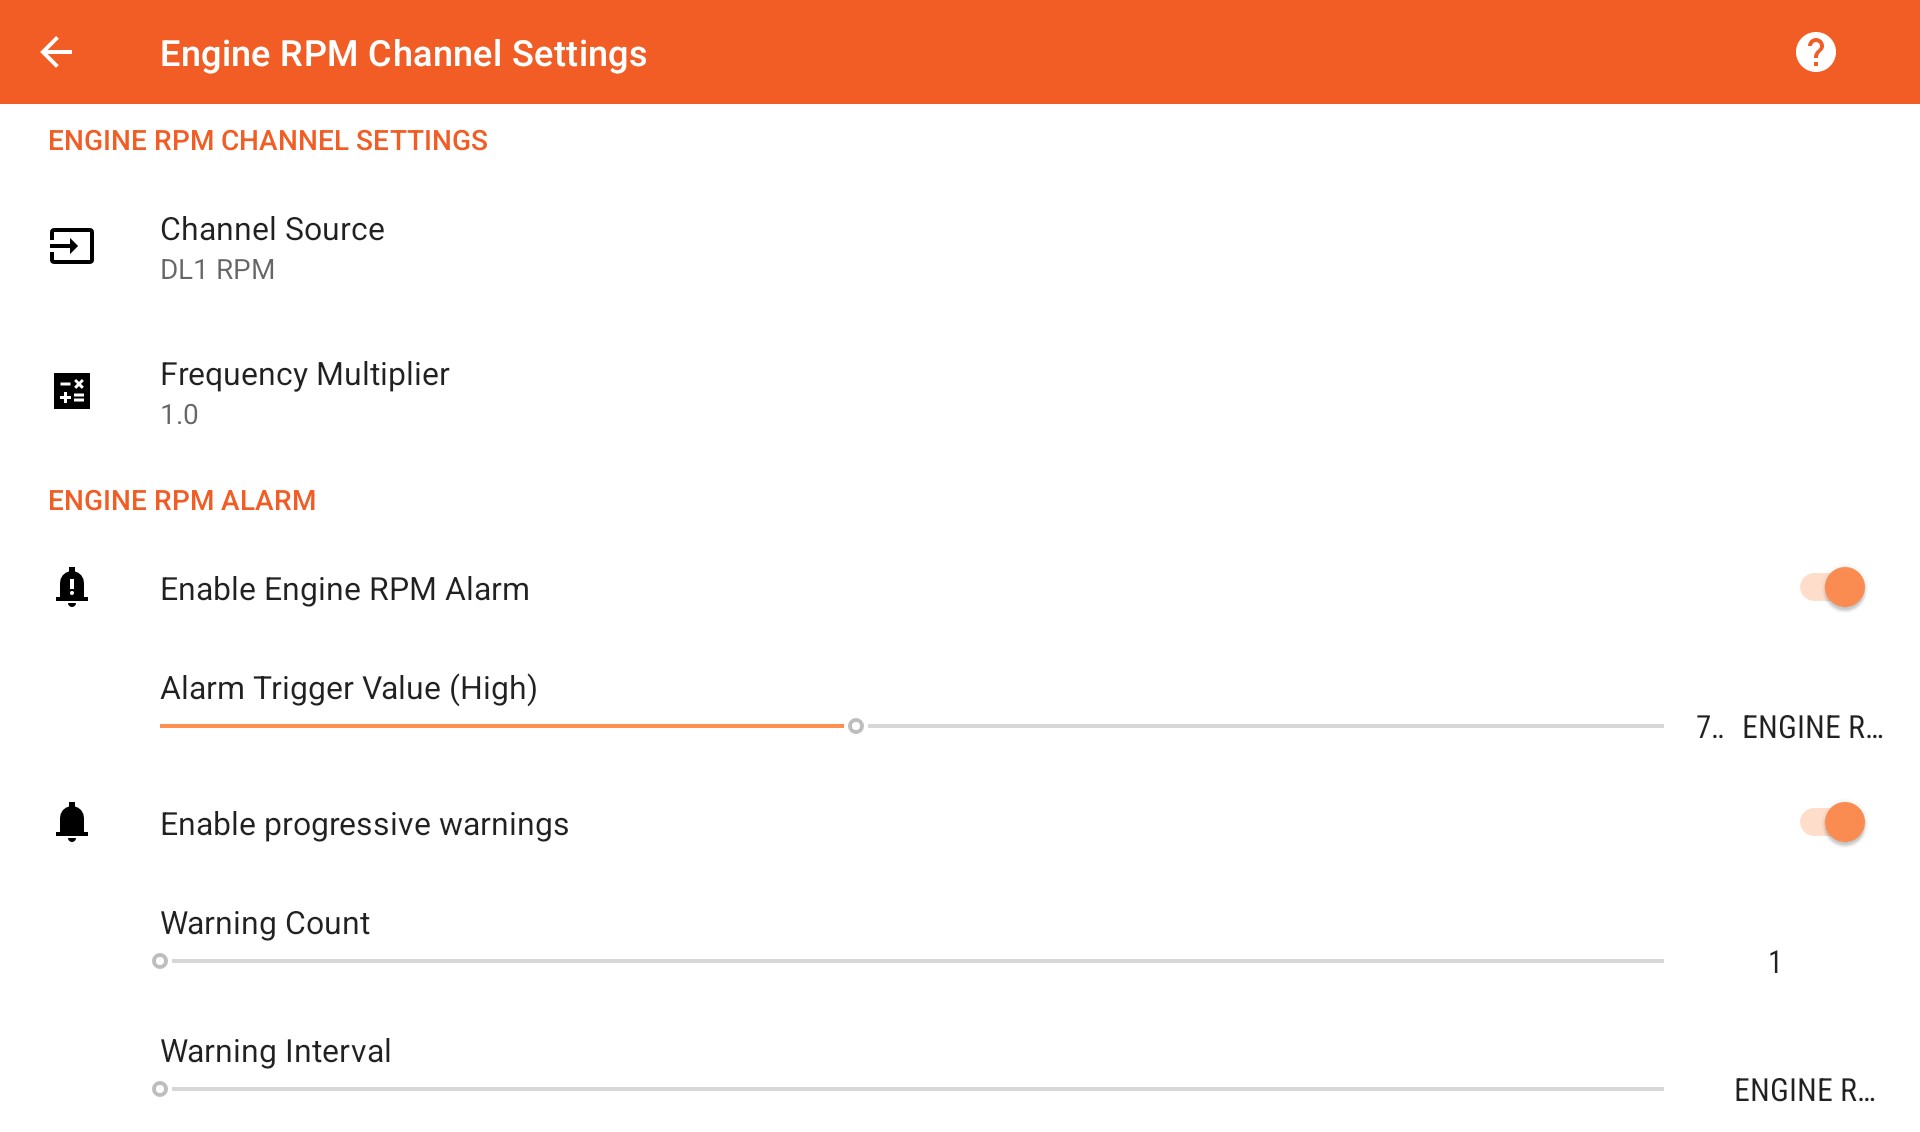
Frequency Multiplier
This setting is enabled when your selected hardware source does not support conversion of ignition triggers into engine RPM.

Select the appropriate multiplier value to calculate the correct RPM value.
Engine RPM Alarm
Enable Engine RPM Alarm
Tap to enable an optional engine RPM / shift alarm beeper.

Alarm Trigger Value
Slide to select the RPM alarm trigger value.

Alarm Progressive Warnings
Tap to enable a progressive series of warning alerts.

Alarm Warning Count
Slide to select the number of warning alerts.

Alarm Warning Interval
Slide to select the RPM interval between alerts.

Throttle Position
The throttle position channel has additional configuration options:

Calibrate Throttle Sensor
This setting is enabled when your selected hardware source does not support calibration or mapping of the throttle value.

Tap this setting and follow the instructions on the screen to calibrate the throttle sensor.
Your hardware data source must be connected to your vehicle and available to connect to your mobile device in order to begin calibration.
Steering Wheel Angle
The Steering channel uses the verbatim value from the selected hardware channel. No additional configuration options are available.
Pressure and Temperature Channels
Pressure and Temperature channels are stored internally in metric units, and converted when displayed as per the selected display units.
Engine Coolant and Oil Temperature Alarms
Fluid temperature range alarms may be set on Coolant and Oil Temperature channels.
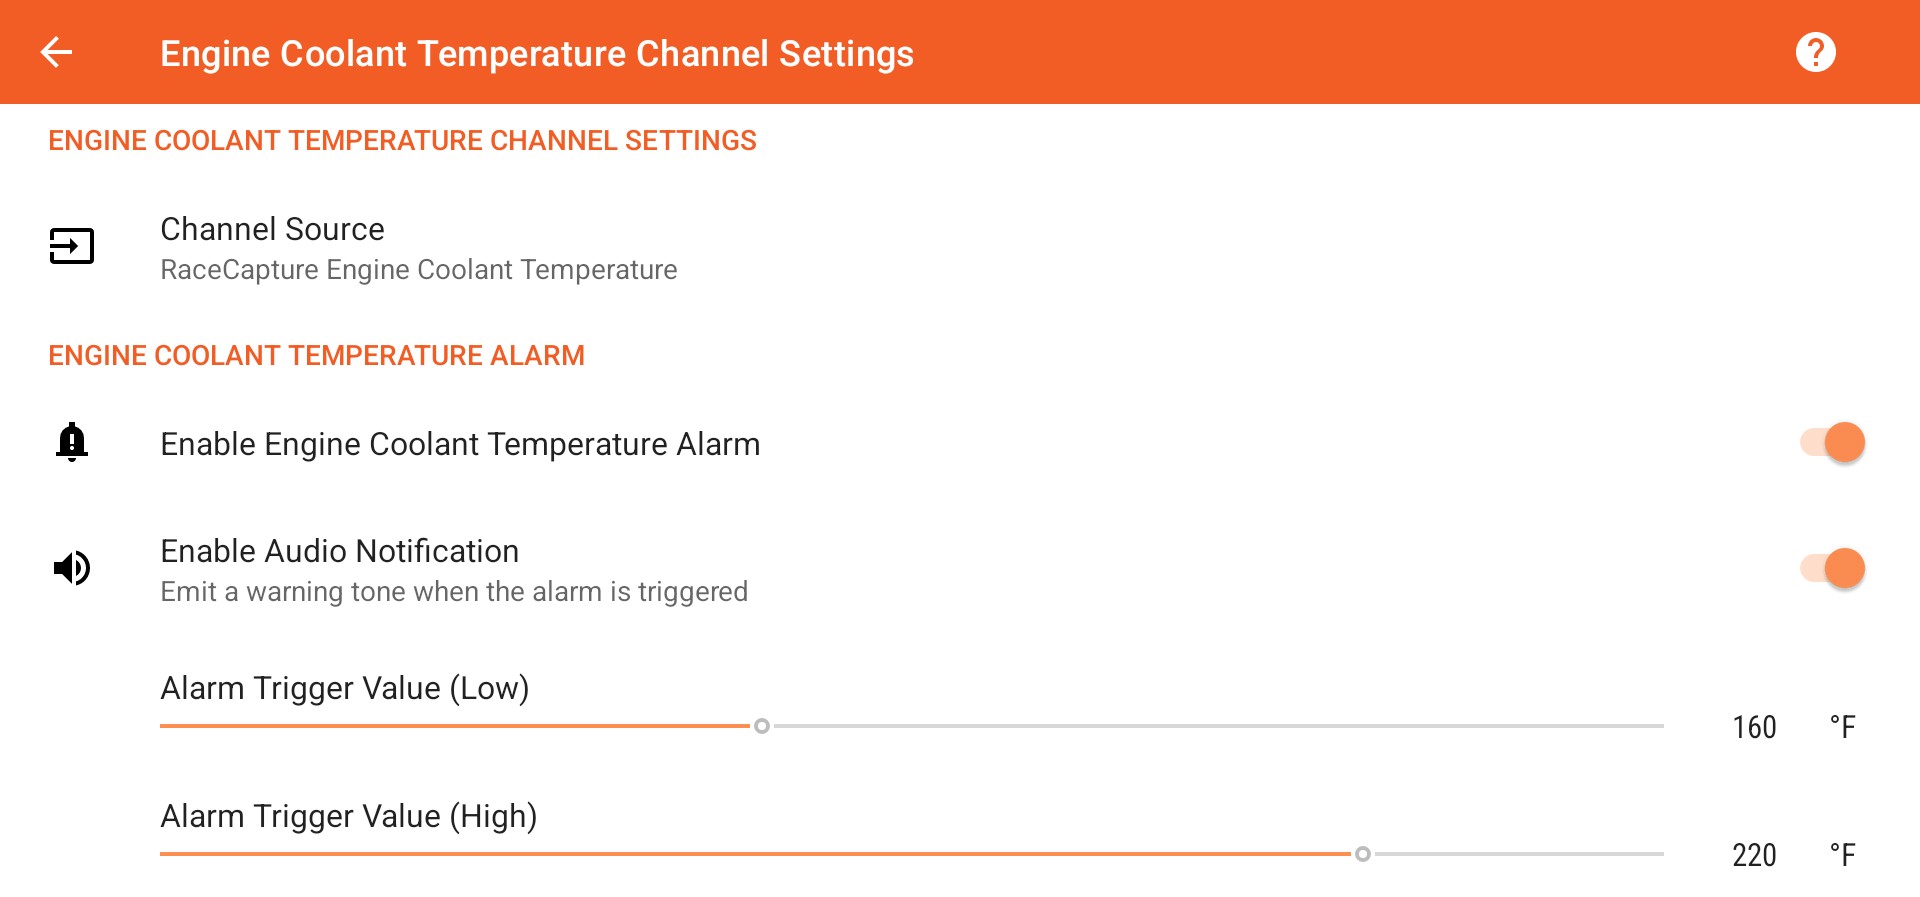
Warnings (low temperature) and alerts (high temperature) are displayed in the channel list on the logger screen, as well as in the gauges on the lap timer screen.
Enable Temperature Alarm
Tap to enable the alarm. This enables visual notifications in the logger and lap timer screens.

Enable Audio Notification
Tap to enable audio notifications on high temperature alarms.

Alarm Trigger Values
Slide to select the low temperature warning and high temperature alert values.


Oil and Fuel Pressure Alarms
Fluid pressure alarms may be set on Oil and Fuel Pressure channels.
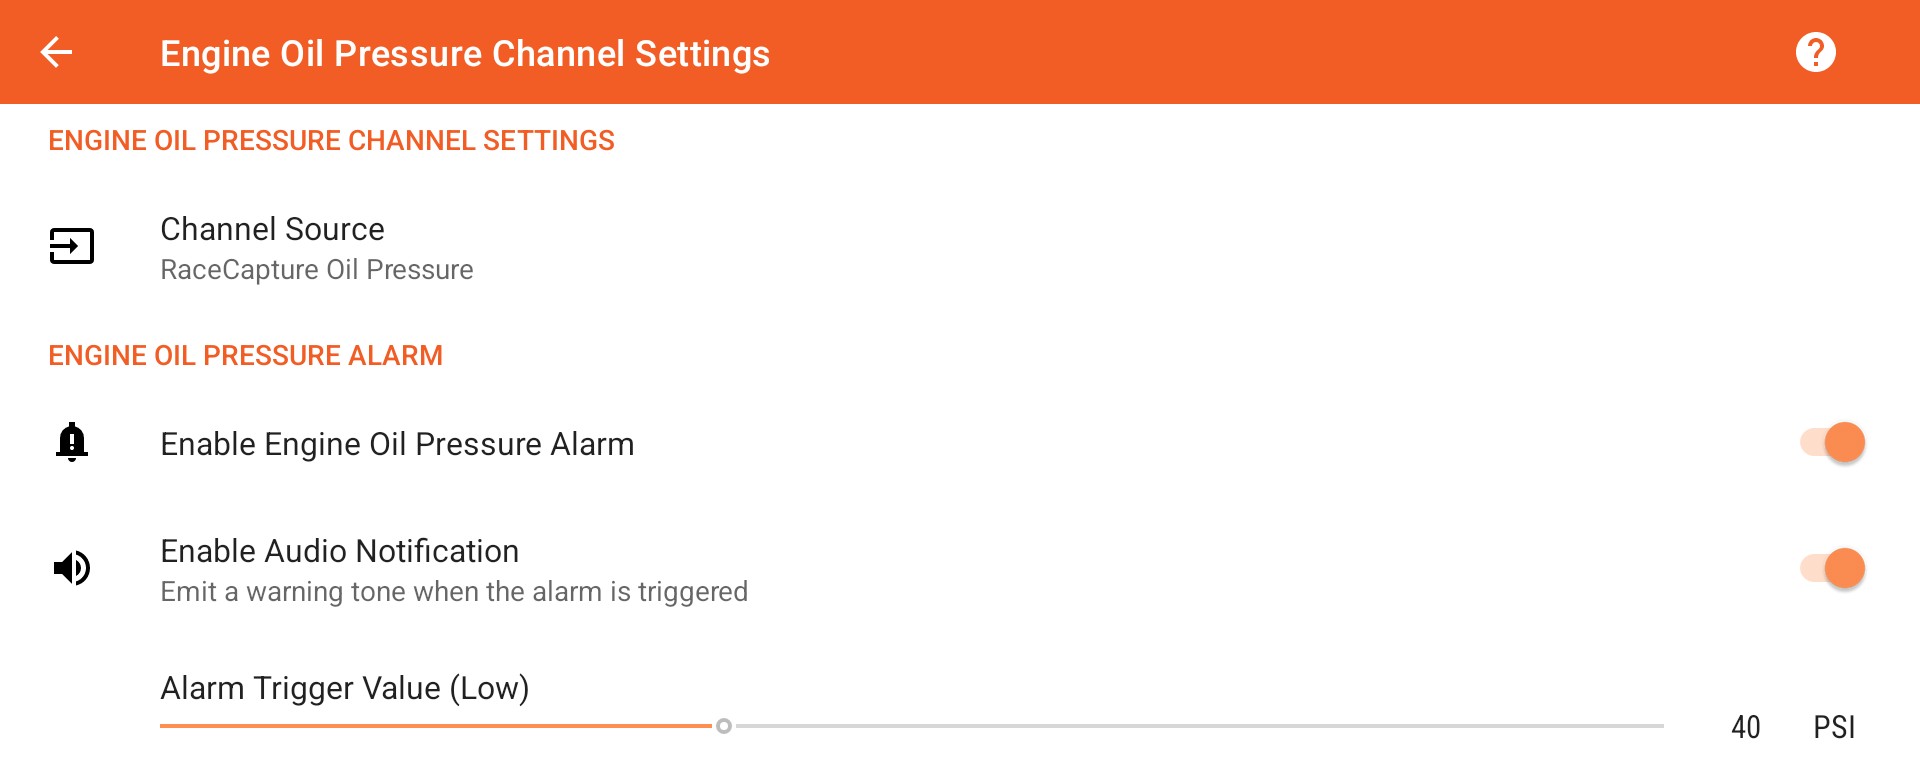
Alerts (low pressure) are displayed in the channel list on the logger screen, as well as in the gauges on the lap timer screen.
Enable Pressure Alarm
Tap to enable the alarm. This enables visual notifications in the logger and lap timer screens.

Enable Audio Notification
Tap to enable audio notifications on low pressure alarms.

Alarm Trigger Value
Slide to select the low pressure alert value.

Auxiliary Channels
Auxiliary channels use the verbatim value from their selected hardware channels, and have additional configuration options:
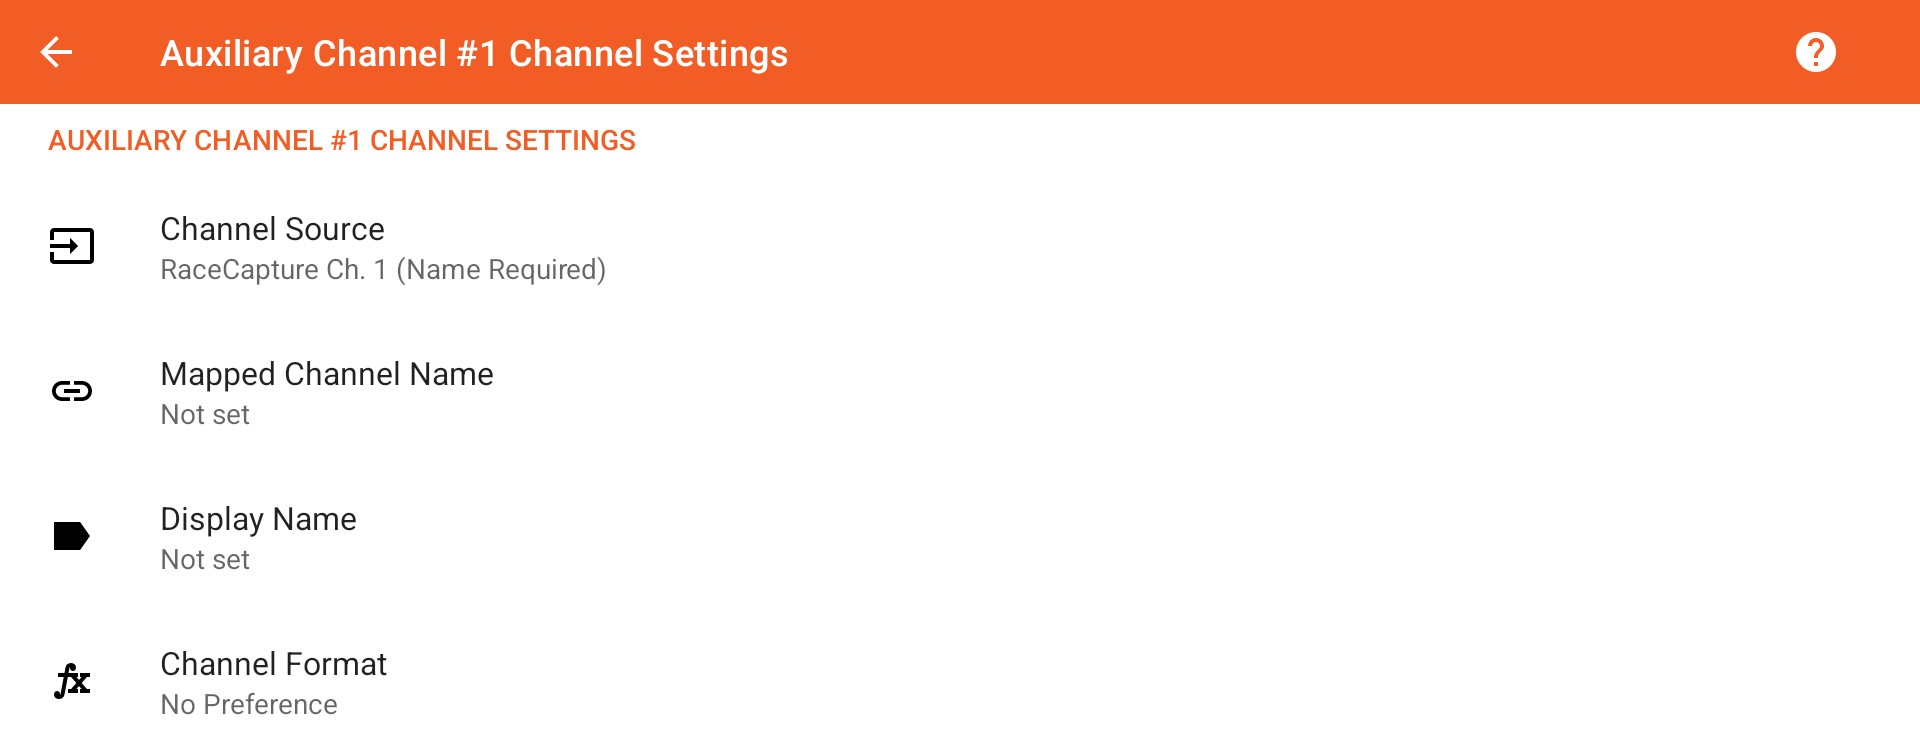
Mapped Channel Name
If using a generic channel (1 to 12) from a RaceCapture logger, you must enter the name that it was assigned in the RaceCapture app channel configuration.

Display Name
Enter a display name for the auxiliary channel, for example 'Trans Temp', or 'Diff Temp'.

Channel Format
Select a channel format to ensure that values are displayed in the correct units.

The following channel formats are supported:
- Distance (ft/m)
- Pressure (PSI/kPa)
- Speed (mph/kph)
- Temperature (°F/°C)
CAN Channels
When you have configured an OBDLink CAN Bus Scan Tool or other supported CAN capable device, then you will be able to select one of the configurable CAN Bus channels as the logger channel source.
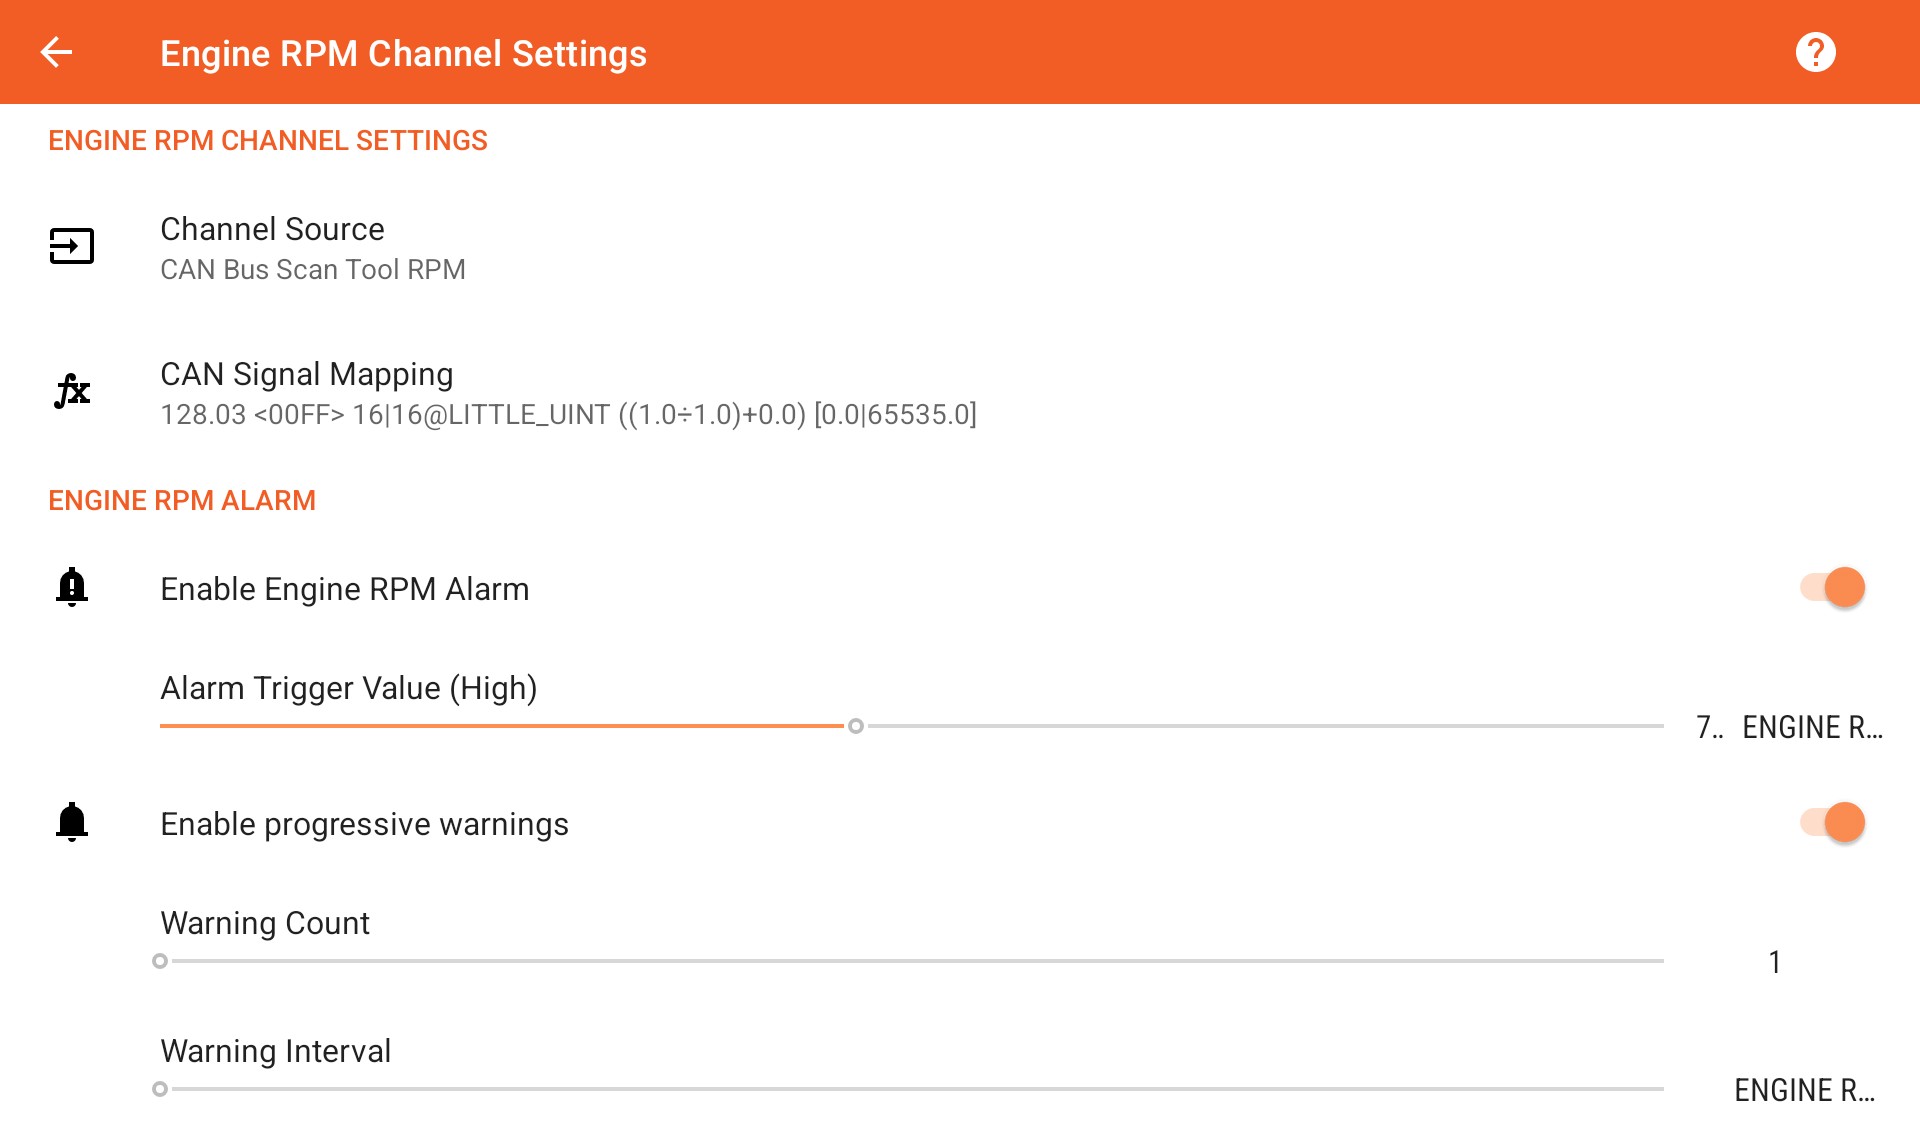
You will need to configure the CAN signal mapping for this channel to function. Tap on the CAN signal Mapping preference to specify the mapping options.

For user-defined mappings, an encoded summary of the CAN channel will be displayed. The format is as follows:
MESSAGE_ID_DECIMAL <MESSAGE_ID_MASK_HEX> SIGNAL_OFFSET_BITS|SIGNAL_LENGTH_BITS@ENDIANNESS_NUMBER_FORMAT (SIGNAL_SCALE|SIGNAL_OFFSET) [MIN_VALUE|MAX_VALUE]
Note: For CAN channel mappings configured from the internal Vehicle CAN Library, the name of the signal source is displayed instead of the formula. CAN mappings that were configured form the Vehicle CAN Library can not be edited. If one is modified, then it will be overridden with a new, default configuration.
Logger Channel CAN Signal Mapping
Configure CAN channel signal mapping options.
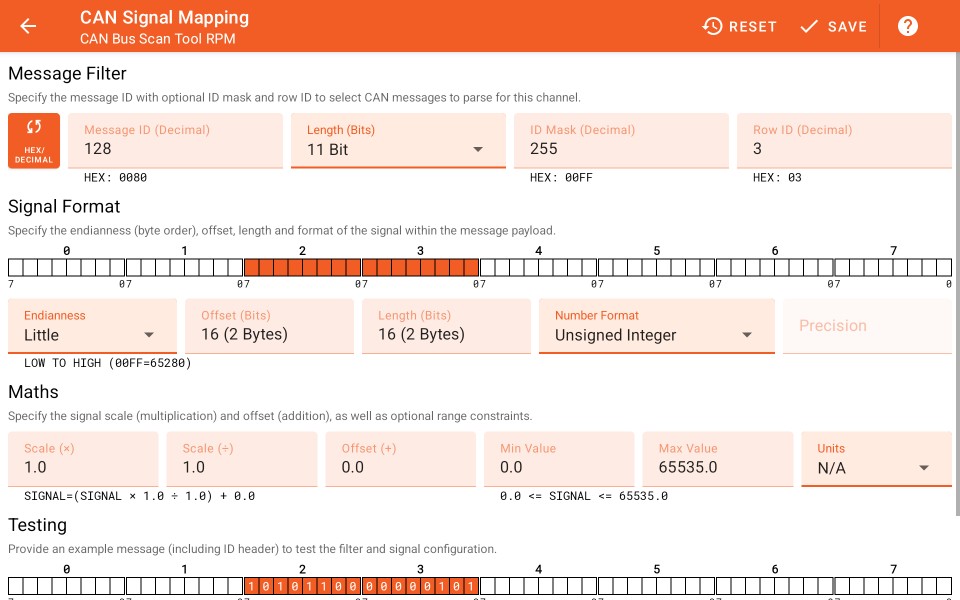
CAN Signal Mapping Toolbar

Reset
Tap RESET to reset the mapping options back to their original values.

Save
Tap SAVE to persist the current mapping options and close this screen.

Signal Mapping Options
Various options can be configured to select CAN messages and parse their signals.
Message Filter
CAN messages must be filtered before having their signals parsed. Filtering requires a message ID, and optional message ID mask and row ID. The size of the message ID must be provided.

The following filter options are available:
| Message ID | The CAN message ID header to match on. Leave this blank to disable the filter and receive all available messages. You will be allowed to enter either an 11-bit number or a 29-bit number depending on the value of the Length field. |
| Length | Select either 11-bit or 29-bit message IDs to match on. The most common format is 11-bit. |
| ID Mask | Some CAN message IDs contain additional data specific to the the sender of the message or the state of the system. To ignore these additional data, set a mask to be applied to the incoming message ID header (logical AND) before being compared to the filter message ID. For example, to match on only on the lowest 2 bytes on a 29-bit header of 0x1FFFFFFF, apply a mask value of 0x0000FFFF. |
| Row ID | Some CAN systems such as certain Bosch Motorsport ECUs will reuse a single message ID in order to deliver a number of different signal payloads. To differentiate the payloads, each payload will also use a row ID as the first byte of the payload. Therefore, messages may be additionally filtered by row ID prior to extracting signals values. Some systems also refer to the row ID as the sub-ID. |
Tap  to toggle the filter options to be entered in either hexadecimal or decimal format. The alternate format will be displayed below each field.
Signal Format
Specify where the signal is in the payload, and how to interpret it.

A preview 8-byte signal is displayed, showing which bits will be selected from it for the given options below. Note that for each byte, bit 7 is the high bit, and bit 0 is the low bit.
The following configuration options are available:
| Endianness |
This field specified the byte-order that multiple-byte signals are parsed in. The available options are:
Note: The endianness setting will vary how the signal start offset is calculated. |
| Offset (Bits) |
Specify the offset of the first signal bit from the beginning of the payload (after the message ID bytes). The offset of the first bit is 0. Offset values that align on byte boundaries (8, 16, 32, etc) are also displayed with a byte count. When the offset bit count does not align with a byte boundary, then the signal is referred to as a bit-wise signal. Bit-wise signals can be more challenging to map, and follow different rules depending on the selected endianness value. Use the provided signal preview to confirm which bits will be captured in the signal. Note: The signal bit offset value follows the same convention followed by DBC files, which can vary from other CAN signal editors. For this reason, copying values shared by others online may not yield the desired mapping result. Whenever possible, use DBC files as the source for signal mappings. |
| Length (Bits) | The length of the signal field may be from 1 to 64 bits. The same format is used as the Offset field. |
| Number Format |
Specify how the signal should be interpreted. The available options are:
|
| Precision | When Floating Point is selected as the number format, a precision must be specified. Values from 0.1 to 0.00001 all up to 5 decimal places may be specified. |
Maths
Specify maths values to transform the interpreted signal.

The following maths options are available:
| Scale (×) – Required | Used to multiply the raw signal value. Defaults to 1.0. |
| Scale (÷) – Required | Used to divide the raw signal value. This allows signals to be scaled by a rational fraction. Defaults to 1.0. |
| Offset (+) – Required | Added to the previously scaled raw signal value. Defaults to 0.0. |
| Min Value – Optional | Specify to limit the minimum value after scale and offset are applied. |
| Max Value – Optional | Specify to limit the maximum value after scale and offset are applied. |
| Units – Varies by channel type | Specify to ensure that the signal value is converted to the internal units required by the logger. This does not affect the test result below. |
Note: All CAN values must be converted to the appropriate units of measure using the maths options. All fields require metric units of measure where applicable: mps(speed), m(distance), °C(temperature), kPa(pressure).
Testing
Input a sample CAN message as hexadecimal bytes, including the message ID, to test the current configuration.

Filtering and parsing errors will be displayed. When parsed successfully, the resulting value will be displayed. A visual explanation of the filter and parser is given below the original message in the following format:
A preview of the test signal bytes is displayed in order to confirm which bits were extracted to produce the test result. The individual bit values are also displayed.
| Message ID Match |
The matching message ID are displayed in white text with a black background. Example: 0080 |
| Row ID Match |
The matching row ID (if configured) are displayed in white text with a dark grey background. Example: 03 |
Maths Channel Settings
Configure a maths channel expression using other logger and maths channels as inputs.
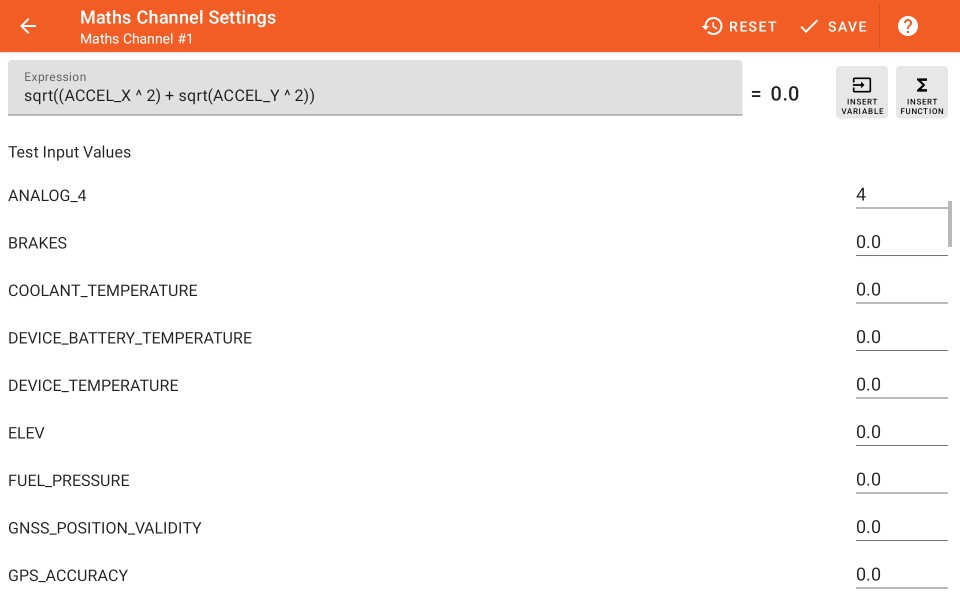
Enter a maths expression in the edit text field using the input channels and expressions that are provided.
Maths Channel Toolbar

The toolbar allows you to make adjustments to the video synchronization, and displays the current adjustment amount.
Tap  to reset the expression to the last saved value.
Tap  to save the current expression and return to the channel configuration screen. The button will be enabled only when the updated expression has been validated and
does not contain an error.
Input Channels
Tap  to select input channels from a list and insert them at the current position in the expression input field.
Maths Expressions
Tap  to select basic maths expressions from a list and insert them at the current position in the expression input field.
Testing Your Expression
Changes made to the maths expression will be evaluated and the result will be displayed next to it.
The available input channels are listed along with sample value fields. You can set these values in order to test your expression.
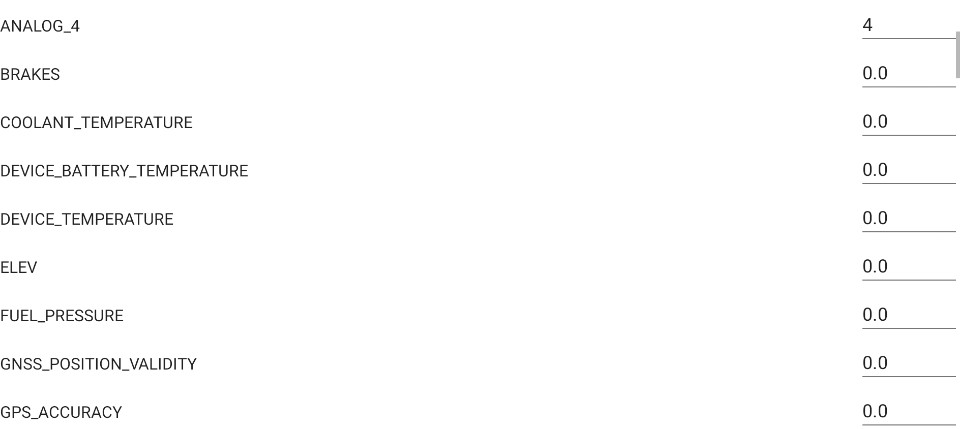
Scroll down the list to find the input channel that you are looking for.
Video Settings
Configure video recording and analysis.
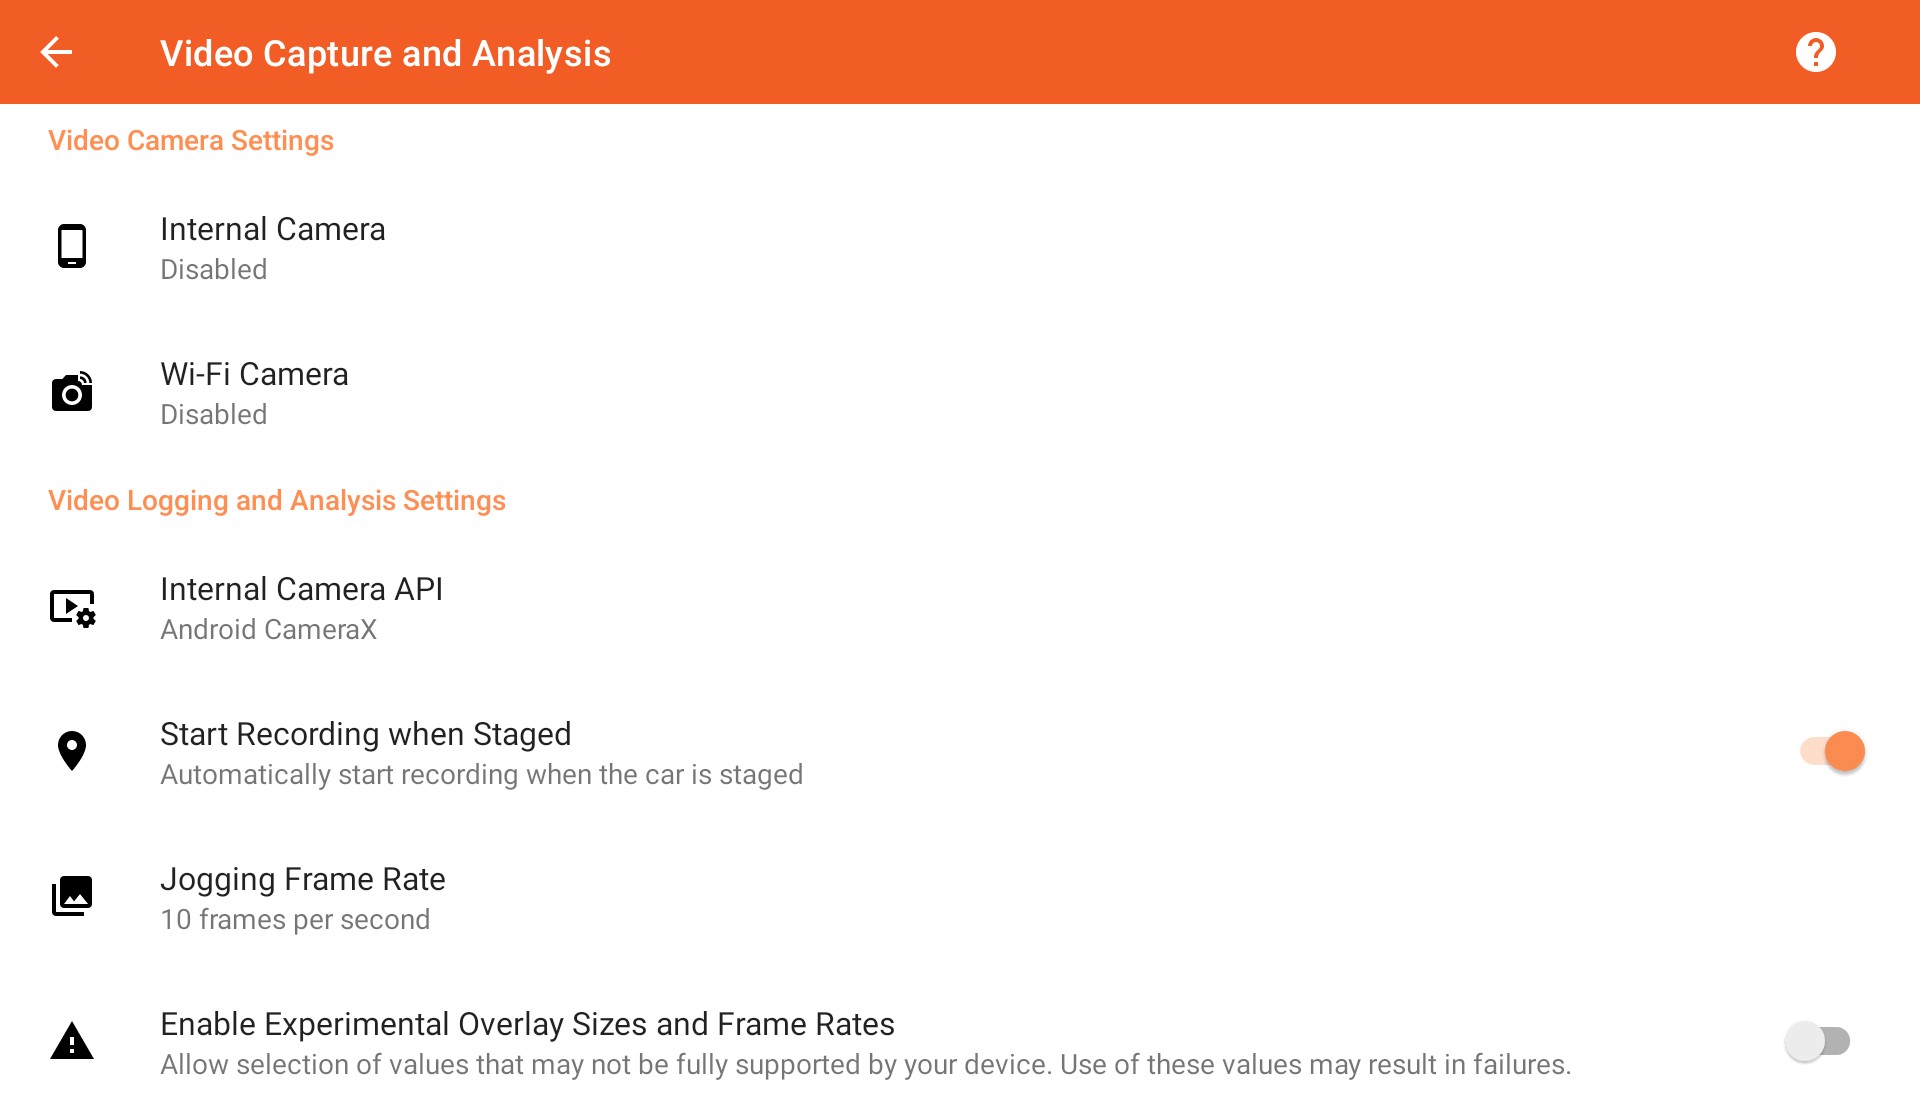
Video Camera Settings
Internal Camera
Configure an internal video camera on the mobile device.

Wi-Fi Camera
Configure an external Wi-Fi video camera.

You must first manually configure the camera as a Wi-Fi access point in your mobile device settings.
Due to security restrictions, you will not be able to use an access point that was automatically configured by a 3rd party app, such as the GoPro app.
Video Logging and Analysis Settings
Internal Camera API
Select which Android API is used to capture video using the internal camera.

This setting is displayed only if your device supports the newer Android CameraX library.
| Android CameraX |
Use the latest video capture API which improves compatibility and performance across devices. |
| Legacy |
Use the legacy Android Camera API. Only recommended if you are experiencing issues when using the CameraX API. |
Start Recording when Staged
Enable to start recording when the vehicle is near the staging marker and the event uses a racing mode that supports staging.

If not set, then the staging marker will be set each time you manually start video by pressing “Start Video” when logger is ready and an automatic logger trigger is configured.
Jogging Frame Rate
Determines number of frames per second that are displayed in the video widget during analysis.

A lower frame rate takes less time to process after the log is completed, however higher frame rates make it easier to align the analysis position to the vehicle position on course.
Enable Experimental Overlay Sizes and Frame Rates
Allow selection of values that may not be fully supported by your device, but may still yield positive results.

Some devices such as the Amazon Kindle Fire HD do not fully report their video capabilities via the Android Media APIs, so enabling this option will allow additional values to be selected when creating overlaid videos.
Note: Using these experimental sizes and frame rates may result in failure of the video processing job. Some experimentation will be required in order to find experimental values that will function on your device.
Internal Camera Settings
Configure an internal video camera for recording.
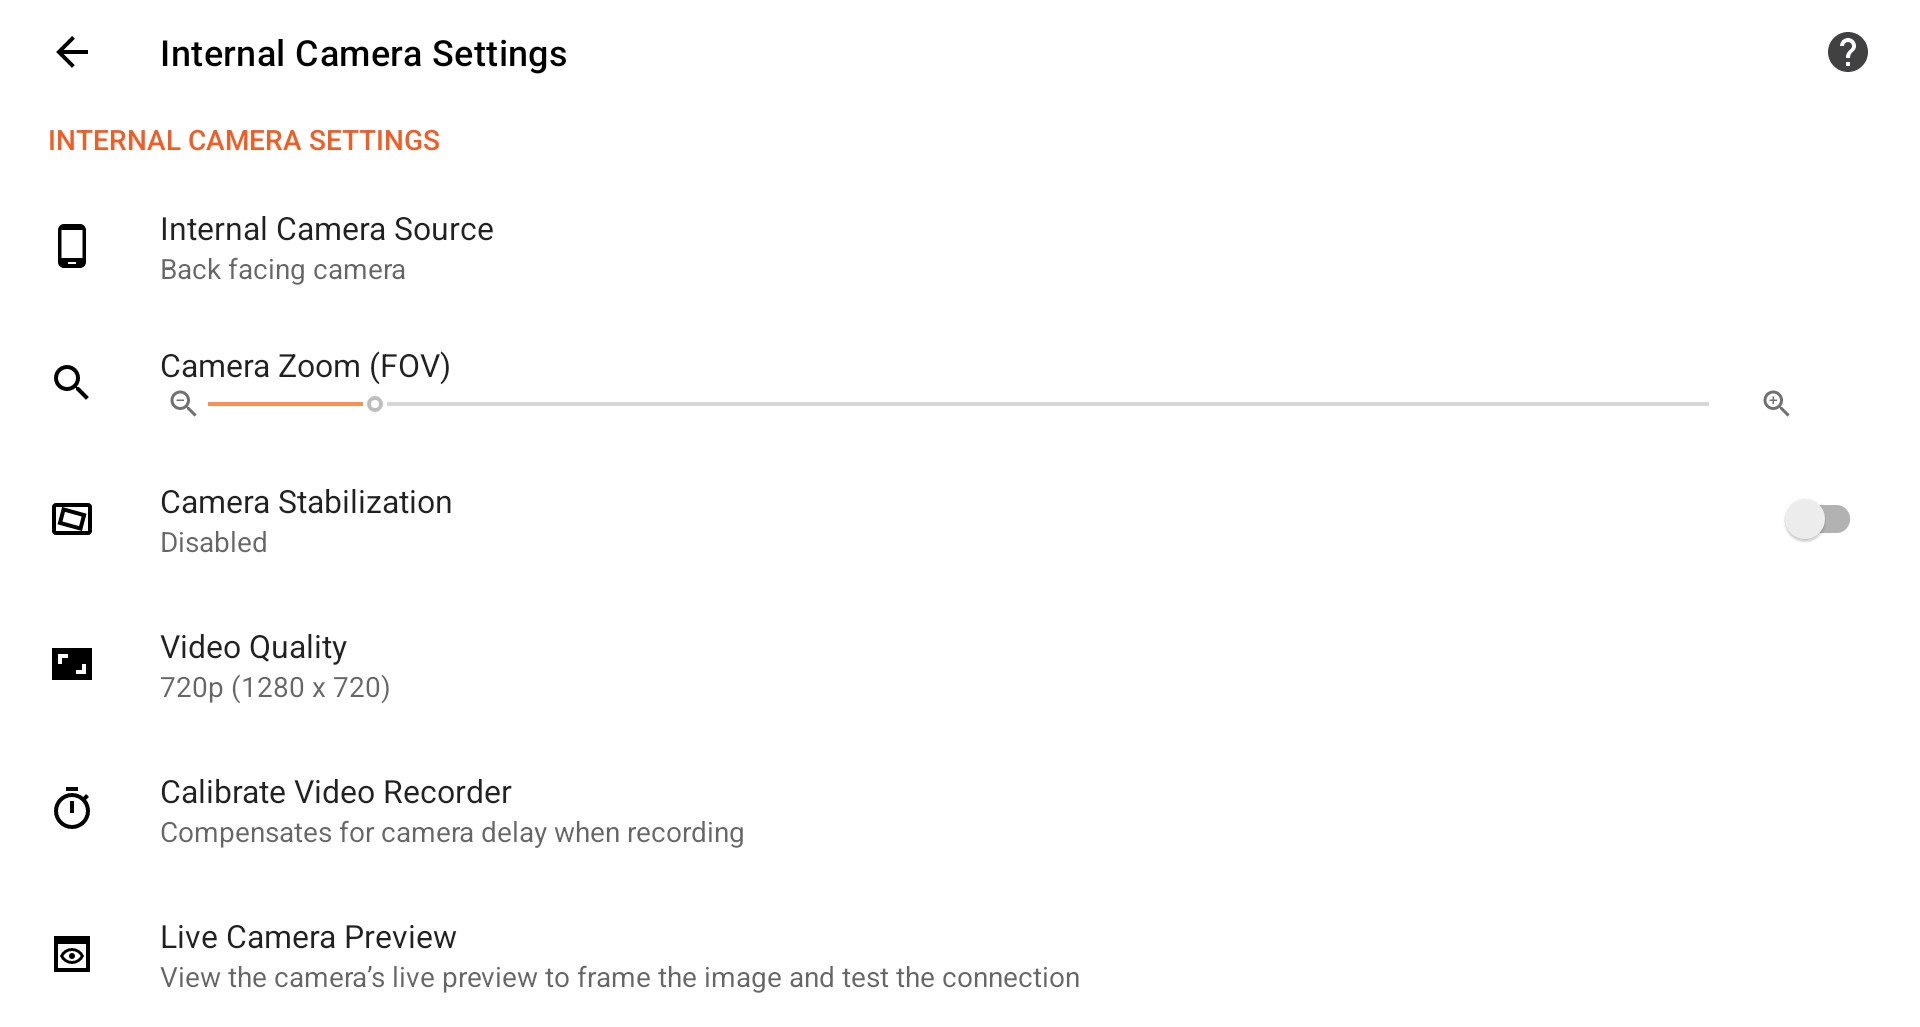
Internal Camera Source
Select from the internal cameras available on your device.

| Back facing camera |
Select this option to use the main camera which faces away from the mobile device screen. |
| Front facing camera |
Select this option to use the user-facing camera next to the mobile device screen. |
Camera Zoom (FOV)
Select the zoom level when using the internal camera.

Use the slider to set the zoom level for the currently selected internal camera. The resulting field of view can be confirmed in the video preview window during calibration or in the logger screen.
Note: This option is only available on devices that support camera zoom, and only when the Android CameraX API is selected as the internal camera API.
Note: On devices with multiple camera lenses (Google Pixel, etc), the camera zoom value also controls which physical camera lens is used.
Video Quality
Select the resolution and frame rate for recorded video.

Make sure that you calibrate the video recorder for the selected video quality.
Higher quality video files will consume more storage space, take longer to process and overlay. Also, your device may not be capable of overlaying higher-resolution video files.
Test your selected settings before racing.
Calibrate Video Recorder
Detect the startup delay when recording so that overlaid data will be correctly synchronized during playback.

Depending on which internal camera is configured, this will require at least one mirror.
Live Camera Preview
Use the live preview to frame the image and to test the connection to the camera.

Wi-Fi Camera Settings
Configure an external Wi-Fi video camera for recording.
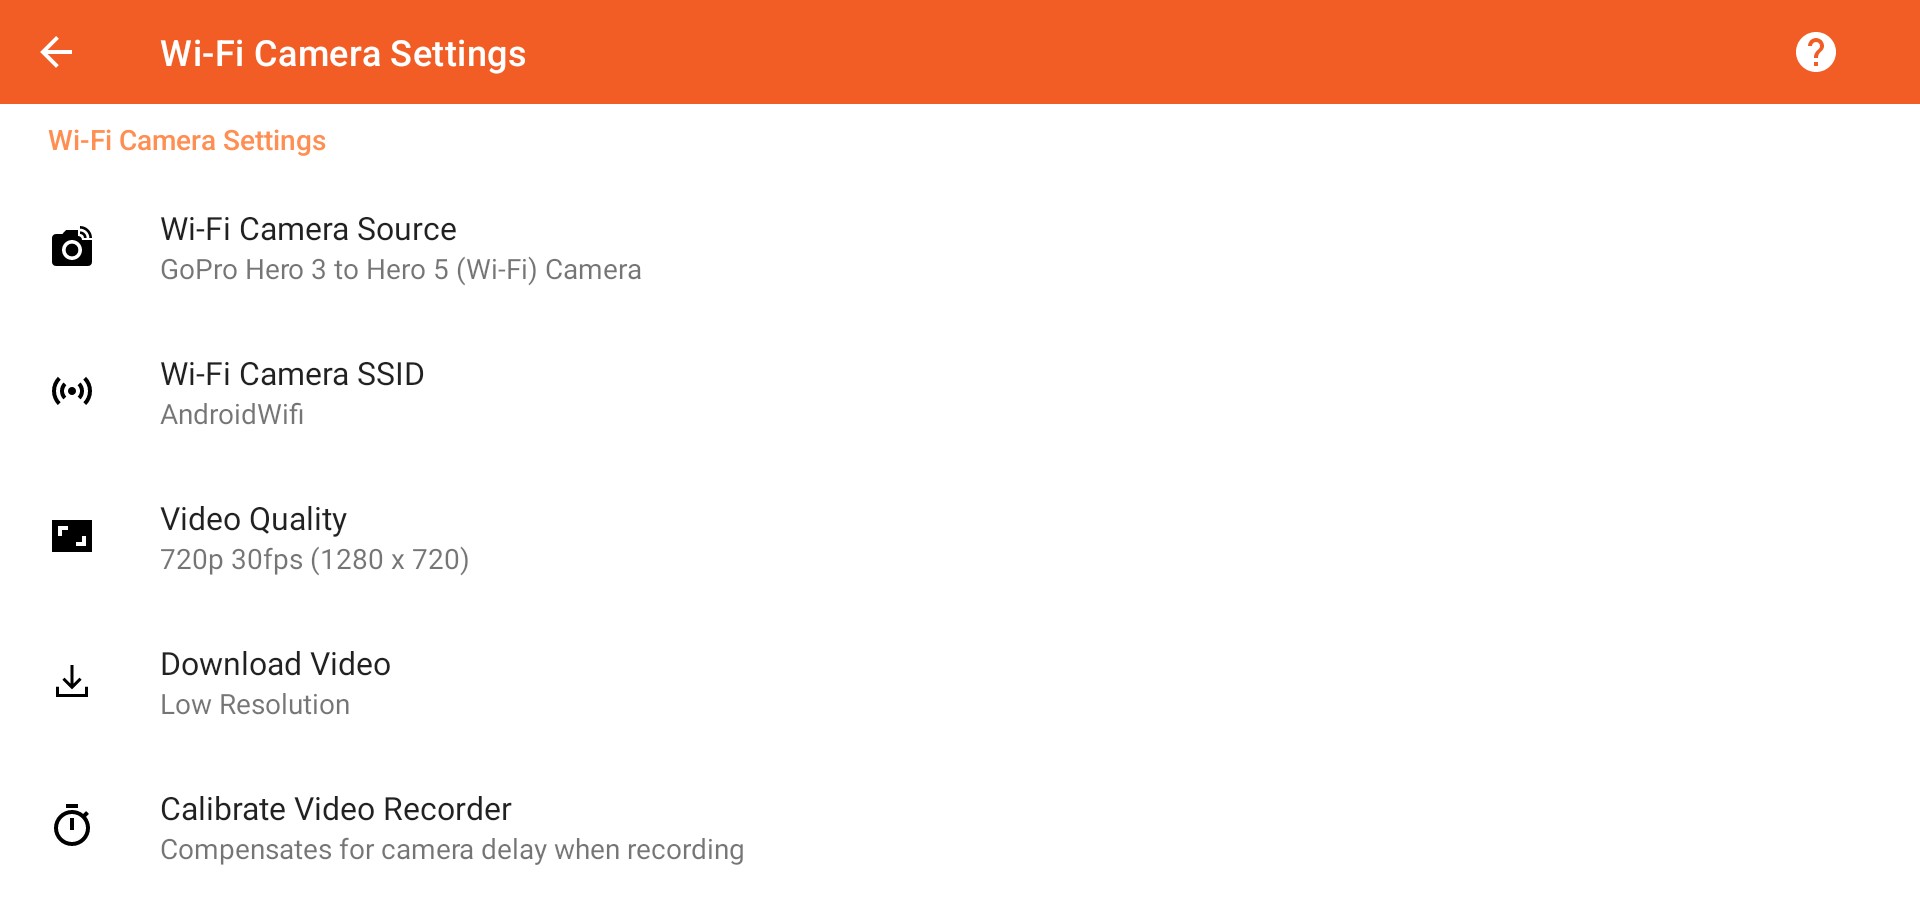
You must first manually configure the camera as a Wi-Fi access point in your mobile device settings.
Due to security restrictions, you will not be able to use an access point that was automatically configured by a 3rd party app, such as the GoPro app. You will also need to grand permission to access the device location as well as use fine grained location resolution (depending on Android device). Revoking these permissions will prevent the logger from detecting and connecting to the Wi-Fi access point.
Wi-Fi Camera Source
Select from the list of supported Wi-Fi cameras.

| GoPro Hero 3 to Hero 5 (Wi-Fi) camera |
These camera models are controlled only via Wi-Fi. Hero MAX and Fusion cameras are not supported. |
| GoPro Hero 6+ (Bluetooth + Wi-Fi) Camera |
Hero 6 and above are controlled via Bluetooth LE and Wi-Fi. |
| Garmin VIRB camera |
Garmin VIRB X, XE, and Ultra 30 camera models. |
| Garmin VIRB camera |
Garmin VIRB X, XE, and Ultra 30 camera models. |
| Polaroid Cube+ camera |
Does not support low-resolution file downloads. |
Important: If your mobile device allows you to configure a networking option to 'Scan for Nearby Devices', then you must disable it when using a Wi-Fi camera. If you do not, the mobile device will periodically pause traffic over the Wi-Fi network.
Select Wi-Camera SSID
After electing your Wi-Fi camera type, you must select the camera access point SSID. This differs depending on the app and the version of Android running on the mobile device.
Devices Running Android 9 and Lower
After selecting a supported Wi-Fi camera type, you must select its Wi-Fi SSID from a list of available Wi-Fi access points configured on your mobile device:
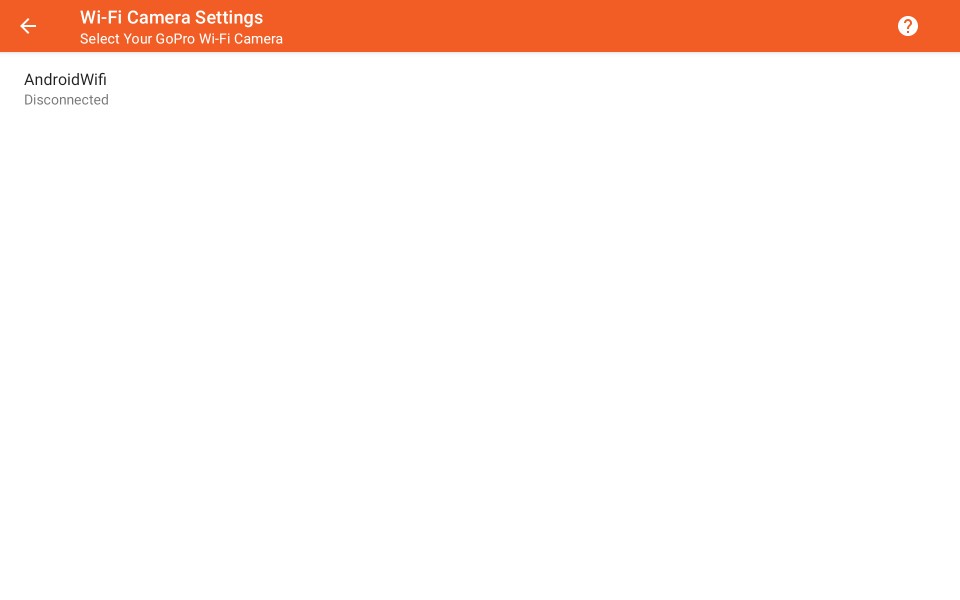
Note: Only Wi-Fi access points that were configured manually by you will be displayed in this list. Access points configured by other apps will not be displayed by the operating system due to security restrictions.
Note: The app will not allow you to select a Wi-Fi network that does not have a unique SSID (ie there are duplicates). In this case, you need to removed the duplicate networks from your device Wi-Fi settings.
Devices Running Android 10 and Higher
Due to security restrictions, you must first connect to the desired network in order for it to be visible to the app. You will also need to provide the Wi-Fi network password, if required.

Tap Select Current Wi-Fi Network to select the currently active network.

Selecting the current Wi-Fi network will prompt you to confirm your choice, and also select the Wi-Fi network security option and enter a password if required.
Note: On devices running Android 12 and above, the app can detect the current Wi-Fi network security model, so you will only be required to enter a password if the active network is secured.
Note: The Android OS will require you to approve the selected Wi-Fi network the first time that the app connects to it. After approving the network, the app will automatically connect on subsequent attempts.
Camera Bluetooth Address
If your camera supports a Bluetooth connection, you must select it from a list of available Bluetooth devices.
Note: Cameras that can be controlled via Bluetooth do not require you to select a Wi-Fi network.
Video Quality
Select the resolution and frame rate for recorded video.

Not all listed qualities will be supported by your camera. Ensure that your camera will record video at the selected quality. Also, make sure that you calibrate the video recorder for the selected video quality.
Higher quality video files will consume more storage space, take longer to process and overlay. Also, your device may not be capable of overlaying higher-resolution video files.
Test your selected settings before racing.
Download Video
Select the video resolution to download from your Wi-Fi camera after the logger stops.

| Disabled |
Do not automatically download video files. You can manually import or download the files during analysis. |
| Low Resolution (default) |
Download the smaller, low-resolution video file. Download and frame extraction times are greatly reduced. Only available on cameras that record a low resolution version of the video file. |
| High Resolution |
Download the original video file as specified by the video quality selection. Depending on the quality, this can take a long time to download. The high resolution file can be downloaded during analysis, and is required when exporting a video with overlaid data. |
Calibrate Video Recorder
Detect the startup delay when recording so that overlaid data will be correctly synchronized during playback.

Calibrate Internal Video Recorder
Determine the camera recording delay so that analysis and data overlay will be correctly synchronized.
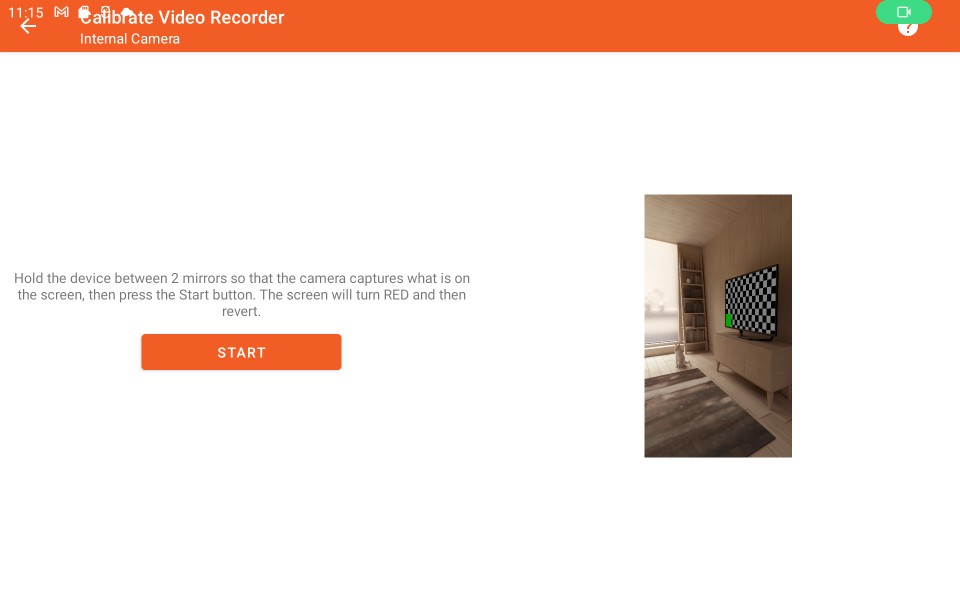
A video preview is displayed at the right side of the screen.
Perform the camera calibration a couple of times in order to confirm a consistent startup delay time.
Preparation
Follow the directions on the screen and set up the device as follows:
| Calibration a Back Facing Camera |
Hold the mobile device between 2 mirrors so that the back camera can capture the device screen. Bathroom vanity mirrors work well for this. |
| Calibration a Front Facing Camera |
Hold the mobile device up to a mirror so that the front camera can capture the device screen. |
Tap  after the mobile device is oriented correctly to begin the calibration process.
Frame Selection
Scroll through the list of captured frames and select the one that shows a red box start to display on the mobile device screen.
The correct frame should already be selected, however the result may require adjustment.
Calibrate Wi-Fi Video Recorder
Determine the camera recording delay so that analysis and data overlay will be correctly synchronized.
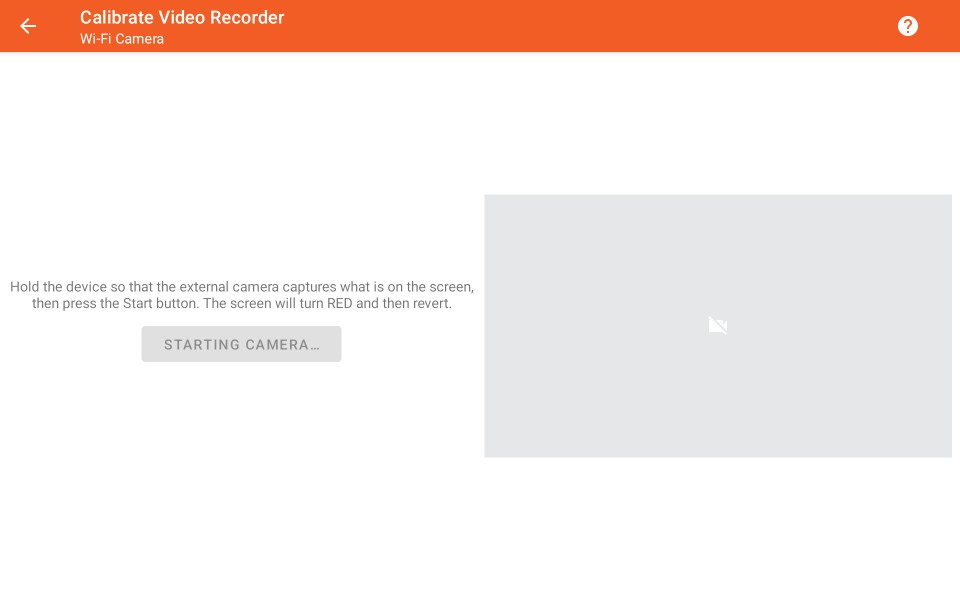
Wi-Fi cameras do not currently support a live preview.
Perform the camera calibration a couple of times in order to confirm a consistent startup delay time.
Preparation
Follow the directions on the screen. Turn on and (if necessary) connect your mobile device to your Wi-Fi camera.
Point the Wi-Fi camera at the mobile device screen.
Tap  after the mobile device is oriented correctly to begin the calibration process.
Frame Selection
Scroll through the list of captured frames and select the one that shows a red box start to display on the mobile device screen.
The correct frame should already be selected, however the result may require adjustment.
Live Camera Preview
Connect to the camera and view a live preview stream to frame the image and to test the connection to the camera.
Note: Not all video cameras support a live preview stream.
Trigger Settings – Staged Race Modes
Configure the conditions that cause the logger to start and stop recording in staged racing modes.
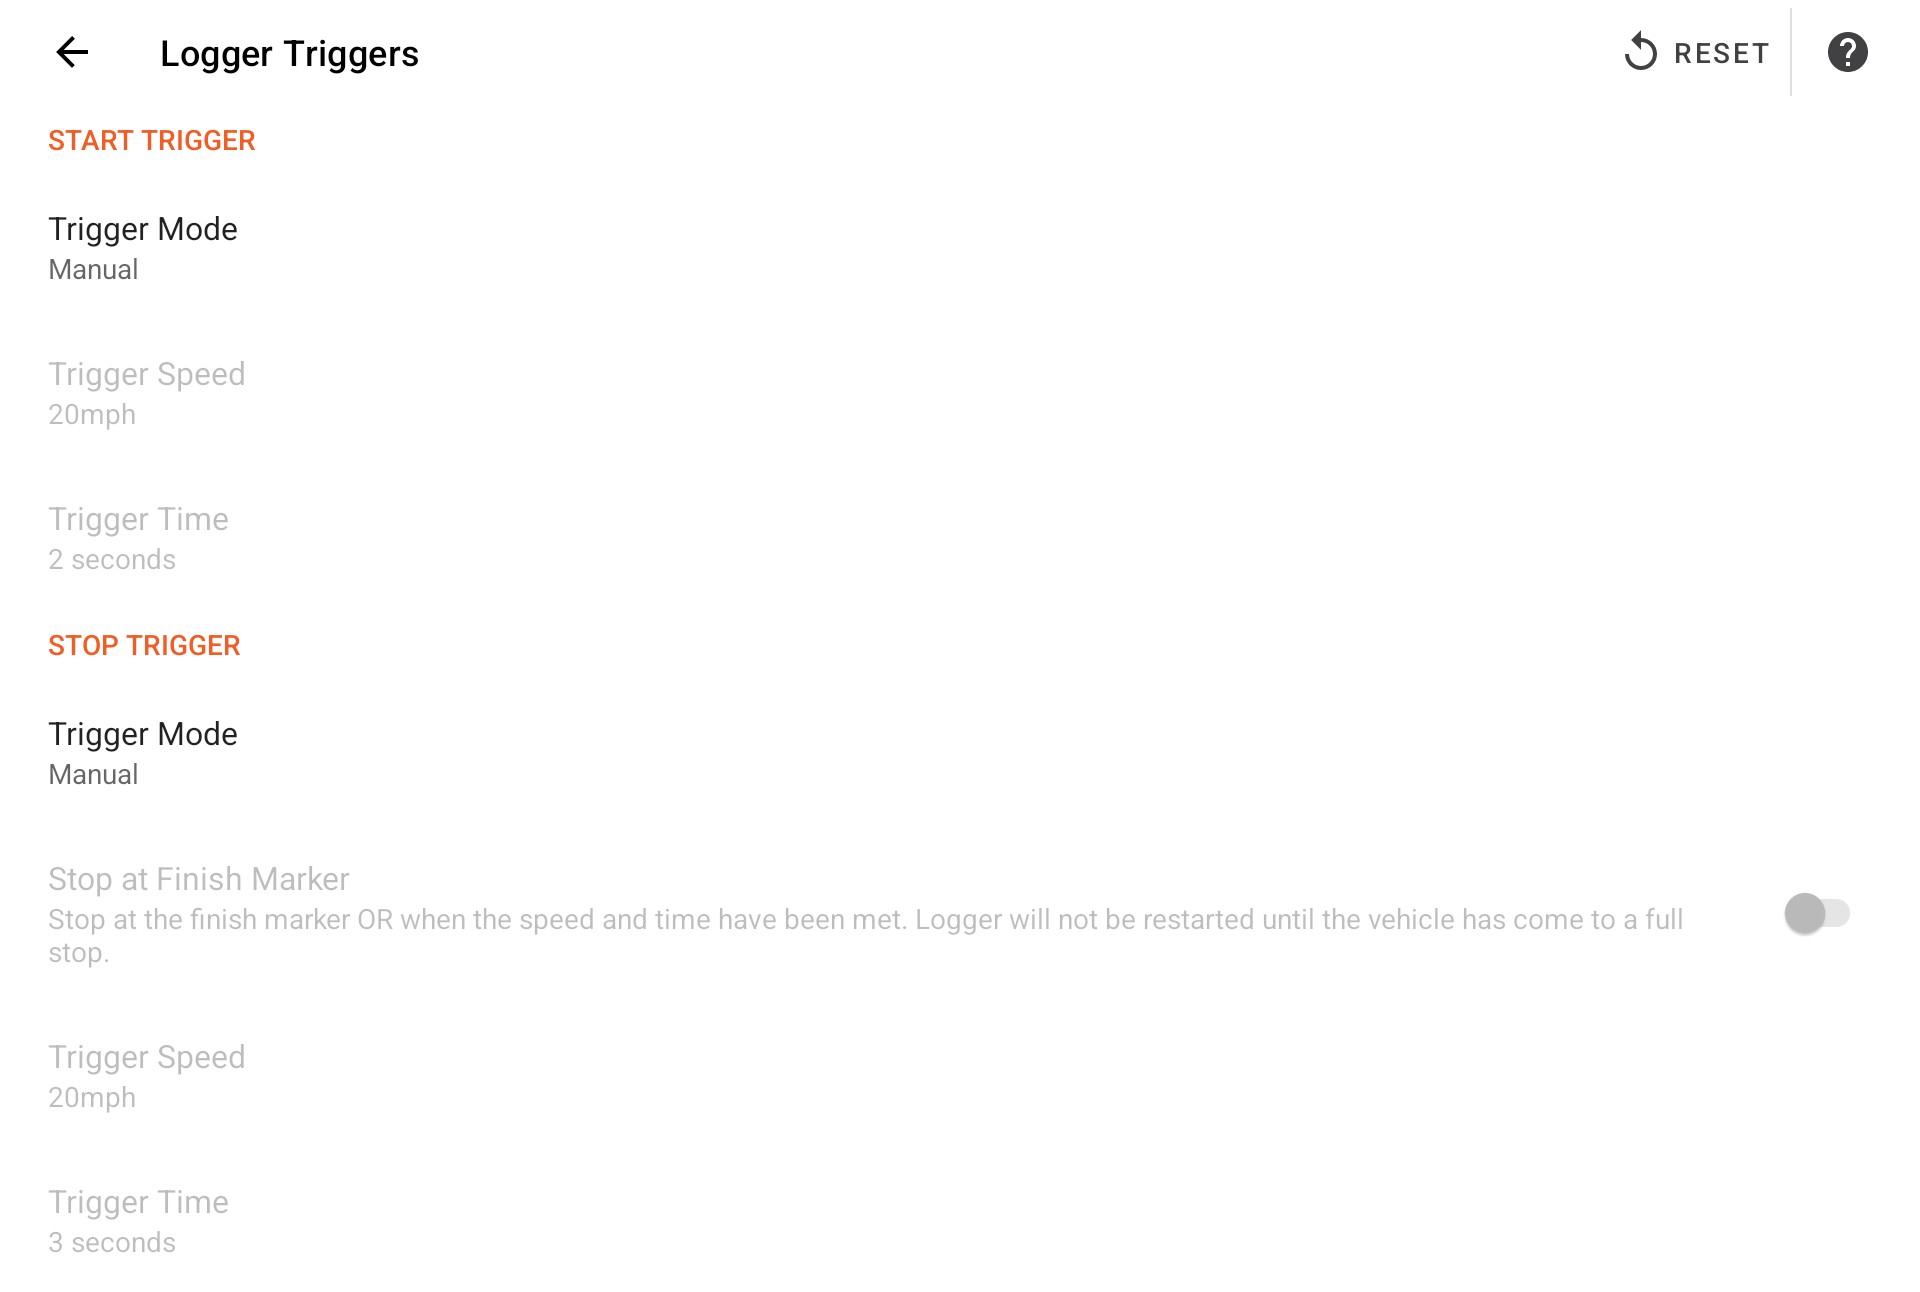
Manual triggers are available for testing purposes only. For race conditions, use only automatic triggers.
Trigger Functions
Start Trigger
Defines the conditions that cause the logger to start recording.
By default, the logger will START recording the vehicle has sustained at or above 20mph for 2 seconds.
In automatic mode, the logger will start recording after the vehicle has sustained the configured speed for the configured time.
Note: The logger is internally buffered, so samples will be captured immediately after the vehicle began moving.
Using a high start trigger speed will still record the vehicle is launch.
Stop Trigger
Defines the conditions that cause the logger to stop recording.
By default, the logger will STOP recording the vehicle has sustained below 20mph for 2 seconds.
In automatic mode, the logger will stop after the vehicle has dropped below the configured speed for the configured time.
Trigger Values
Trigger Mode
Select the desired trigger mode

| Automatic (default) |
The trigger will be detected using the configured vehicle speed and time. |
| Manual |
The trigger must be initiated manually by the user on the logger screen. |
The default Automatic mode is recommended.
Stop at Finish Marker
Enable this option to force the logger to stop when the finish marker has been crossed. This also causes the start trigger to only be armed after the vehicle has come to a full stop in order to prevent false starts after the finish is crossed.
If video is being recorded, an additional 2 seconds of it is captured after the finish so that it does not end abruptly and contains an outro.

Requires a finish marker to be set. If a finish marker is not set, then this setting has no effect.
Trigger Speed
Select the threshold speed to start or stop logger recording.

The default speed of 20mph is recommended.
Trigger Time
Select the time that the configured speed must be sustained for in order to activate the trigger.

The default time of 2 seconds is recommended.
Reset to Default Values

Tap on the Reset button in the toolbar to reset the logger triggers to the default values.
Trigger Settings – Circuit Race Modes
Configure the conditions required to trigger the logger to start recording in circuit racing modes.

Trigger Functions
Start Trigger
In circuit racing modes, the logger will start recording only when the vehicle passes the circuit start location and the vehicle is travelling at the configured minimum speed.
Stop Trigger
In circuit racing modes, the logger will demarcate and save a lap only when the vehicle passes the circuit finish location.
The logger is stopped manually by the user from the lap timer screen.
Trigger Values
Minimum Speed
Configure a minimum speed required for the logger to start recording in closed-circuit racing mode.

In order to guard against accidental starts when driving through the pits, a minimum required vehicle speed is required.
The default speed of 20mph is recommended.
Note: The minimum speed setting is not available when using the Hill Climb racing mode. Instead, the vehicle must be travelling at least 3mph/5kph in order to detect the start location.
Detection Range
Configure a start/finish detection range in circuit racing mode.

In order to prevent false triggers on tight courses, start/finish triggers are only detected when the vehicle is within a specified range.
By default this range is automatically determined by analyzing the selected circuit, but may need to be manually specified in some cases such as when using an ad-hoc circuit.
The default speed of Automatic is STRONGLY recommended.
Note: The use of the Automatic option with an Ad-Hoc circuit will result in the maximum detection range being used.
Reset to Default Values

Tap on the Reset button in the toolbar to reset the logger triggers to the default values.
Analysis Settings
Configure settings that affect log and video analysis.
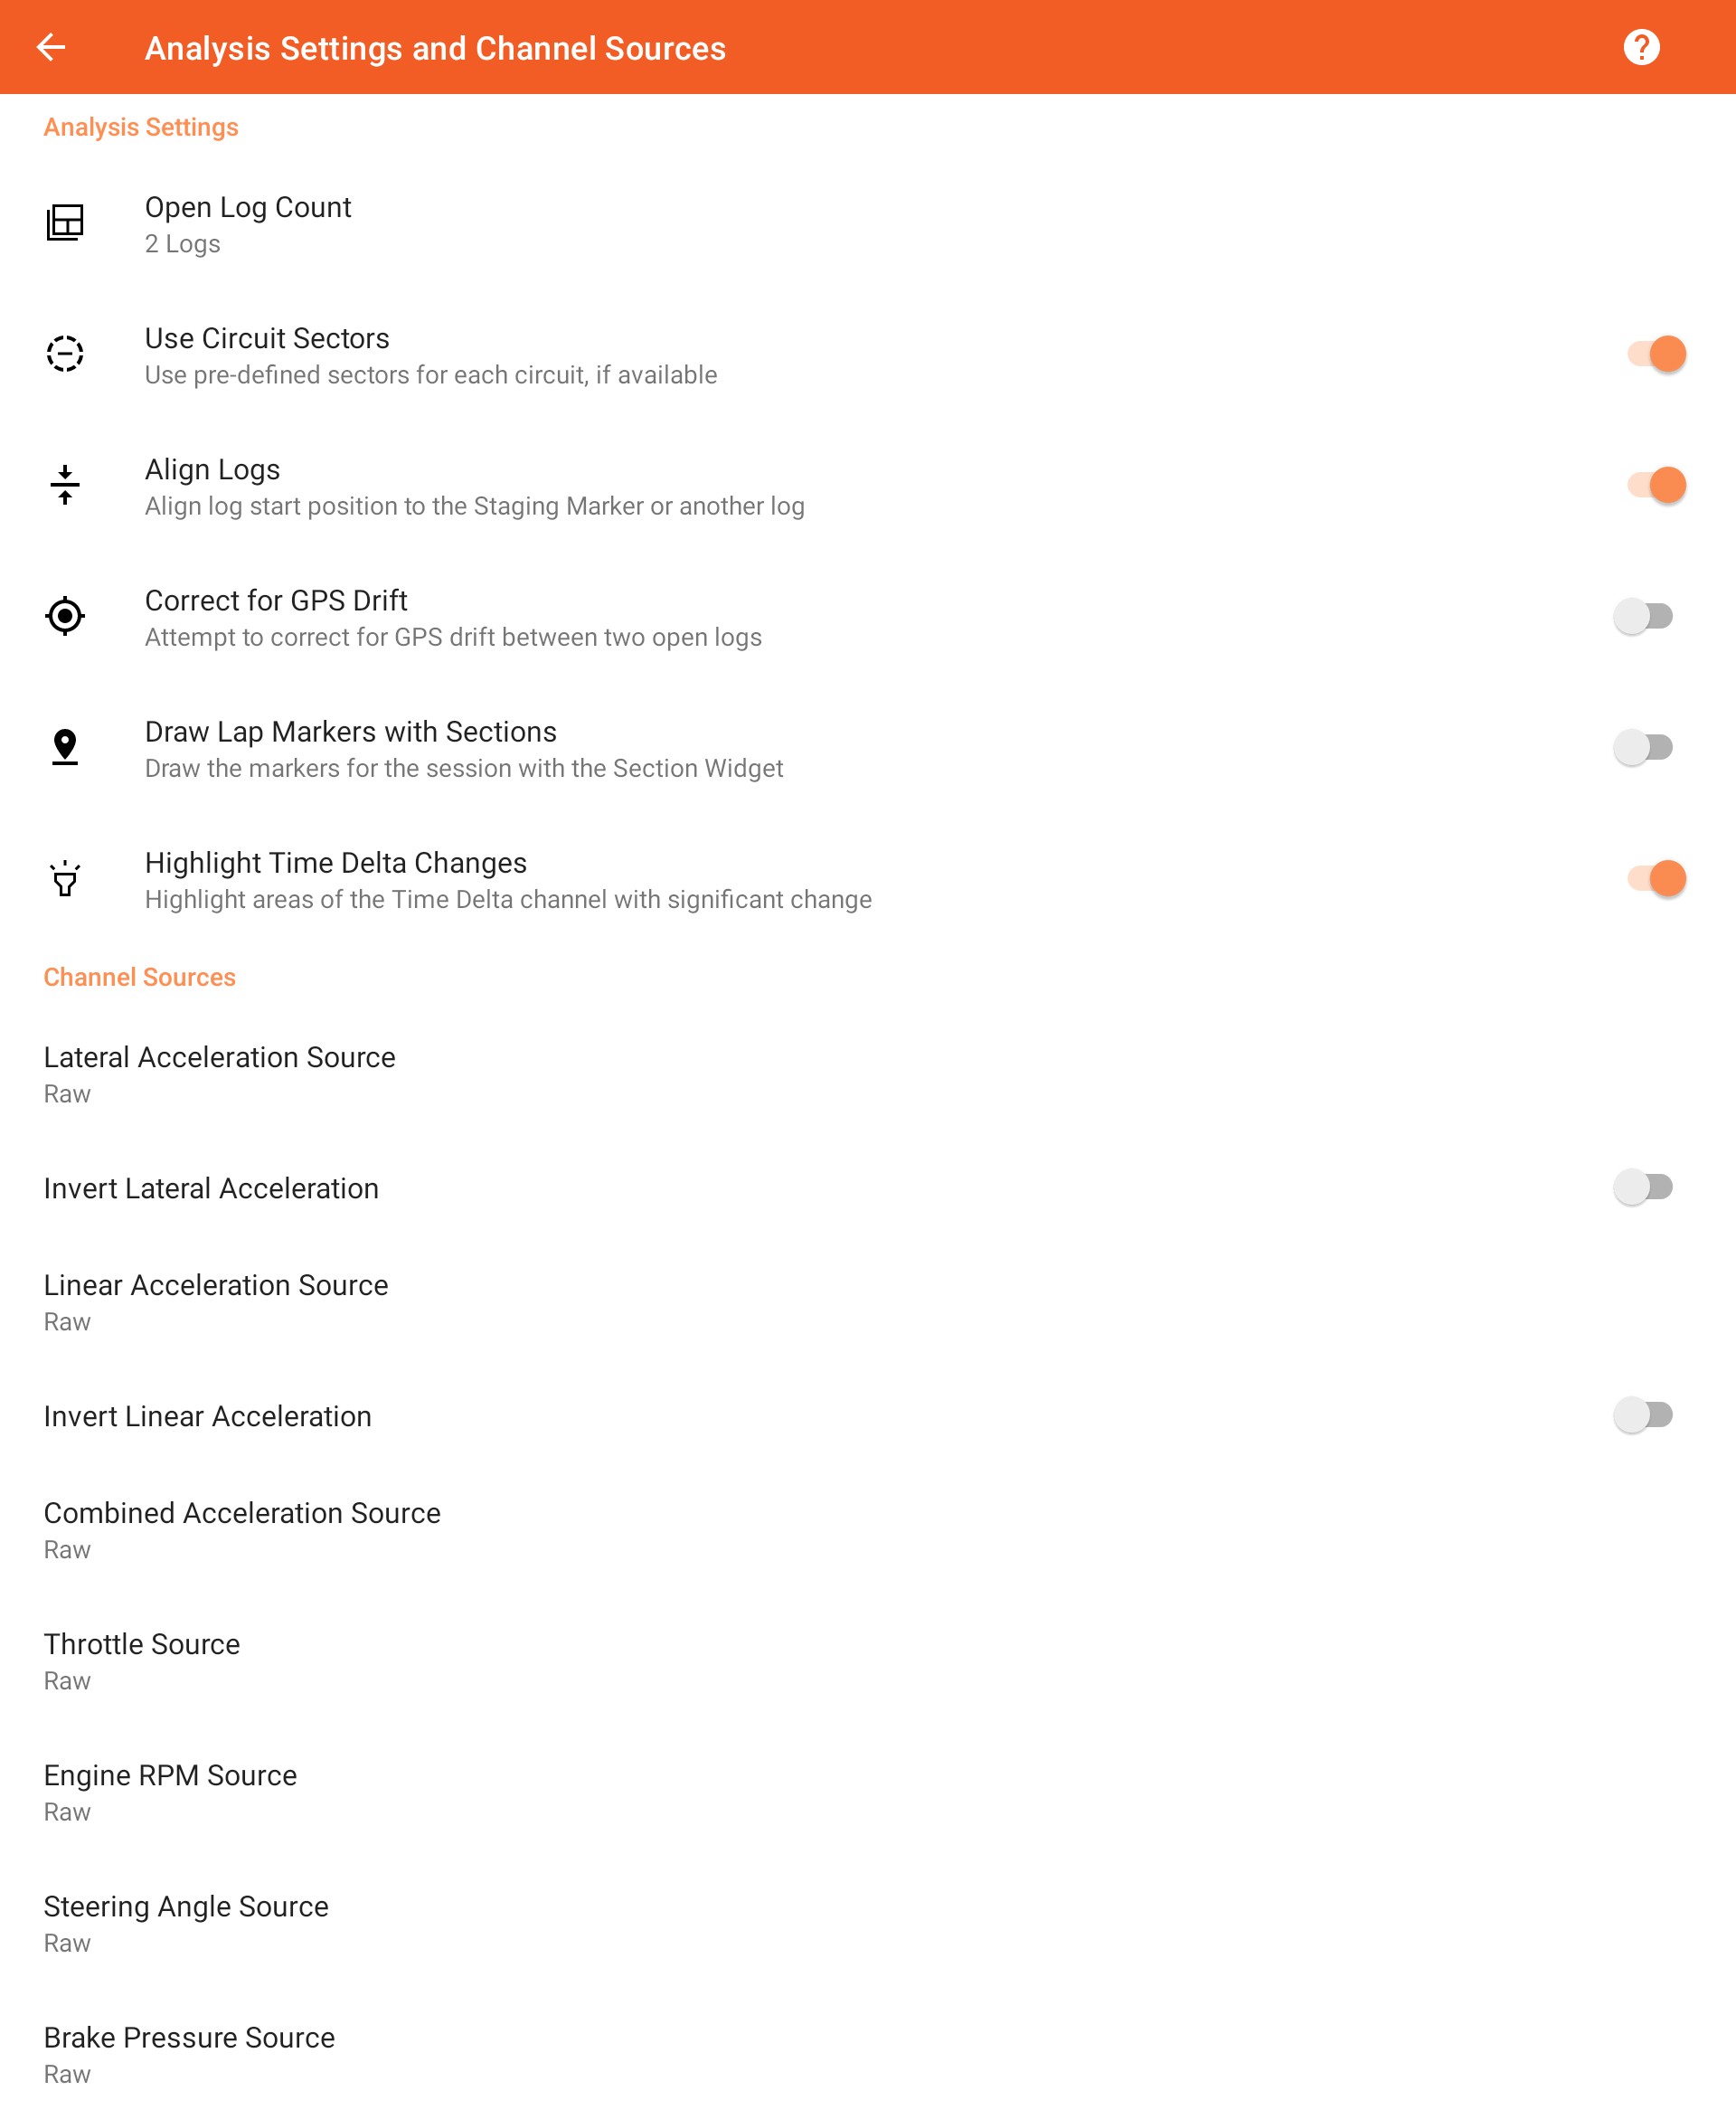
Analysis Settings
Open Log Count
This setting controls how many logs are left open in the analysis screen after a new log is recorded.

Up to 6 logs may be open for analysis at any given time.
Use Circuit Sectors
When using a racing mode that supports circuits, use standardized sectors during analysis by default.

Only applies when the selected circuit has sectors defined. You man still customize the sectors for the event.
Align Logs
When displaying recorded logs in the analysis screen, align the start of each log in the map widget.

GPS drift can cause the start location to vary slightly across logs. While this does not affect analysis, it is easier to compare logs when they closely overlay each other.
Correct for GPS Drift
In cases where GPS drift accumulates over the course of a log, it can be partially corrected for based on the selected baseline log.

This option is normally disabled.
Draw Lap Markers with Sections
Draw staging, start and finish markers in the analysis map widget when sectors are enabled.

This can help ensure that the markers are correctly placed in case they need to be modified from the sector editing tool.
The position of the start and finish markers (if set) in staged racing modes will determine calculated lap times.
Highlight Time Delta Changes
Display a background highlight in the Time Delta channel trace to signify areas of open logs that may require deeper analysis.

Channel Sources
Select Source
Analysis and video widgets (not the Traces widget) use the selected channel sources when displaying values.

Select one of the available channel sources:
| Filtered |
This option applies filtering and smoothing on the channel in order to compensate for noise or a lower-than-optimal sample rate. |
| Raw |
Use the values captured by the logger verbatim. Recommended if you are using an external data logger with a high sample rate and built-in filtering. |
| Calculated |
This option is available only for acceleration channels. Values are calculated based on GPS data channels. |
Invert Acceleration Channels
If required, the values of the acceleration channels used in analysis can be inverted.

Storage Settings
Configure and manage the log and video location and database.
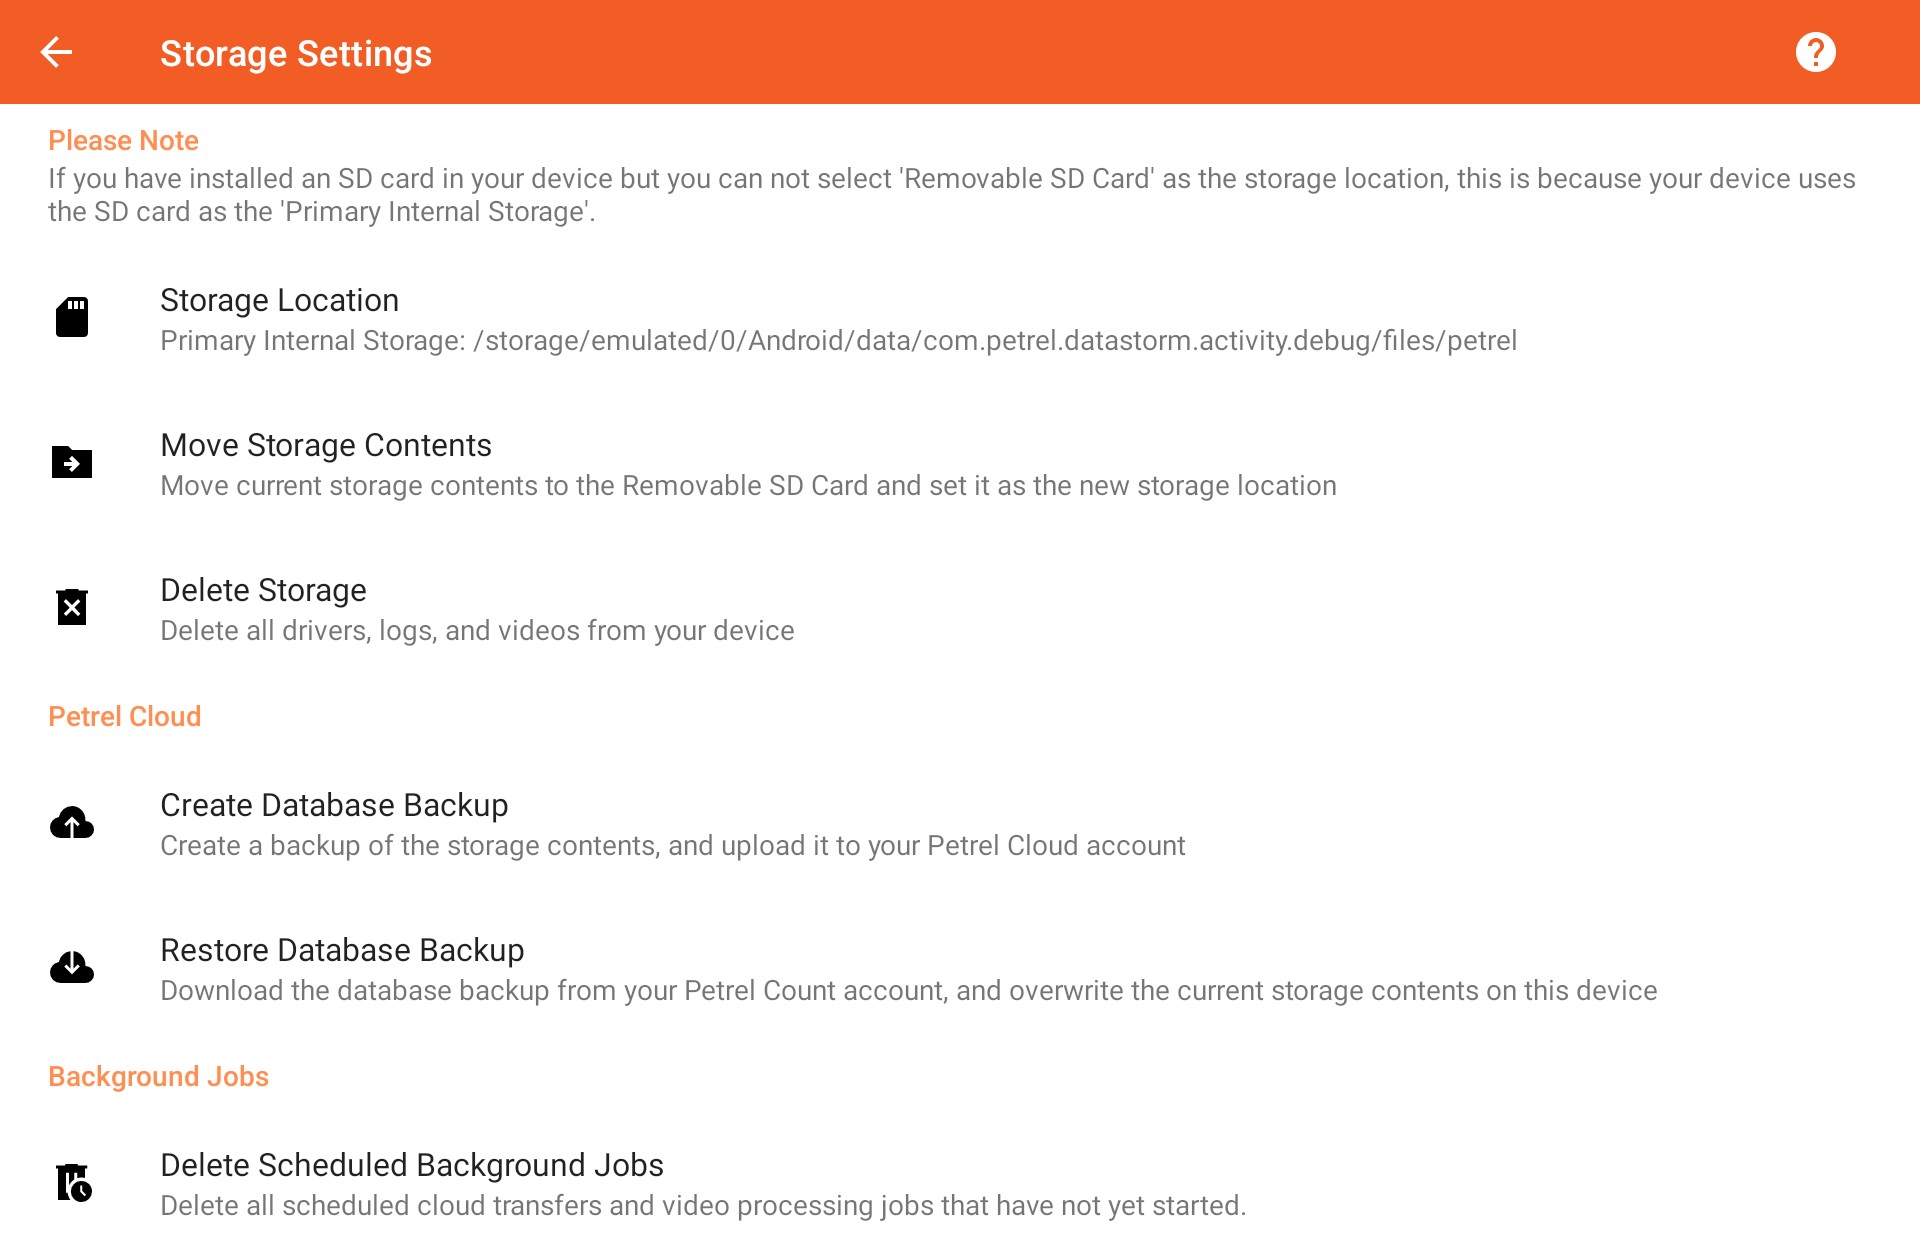
Storage Location
Select the memory location where the database where logs and videos are stored.

Due to security restrictions, the directory structure used by the app can not be changed.
For information purposes, the path of the app database is displayed.
Move Storage Contents
Move all data located in the current storage location to either internal storage or a removable SD card, and change the current storage location setting to match.

This option is only enabled if your device has an external SD card installed.
Delete Storage
Permanently delete all stored data, and create an empty database.

Use this feature to reclaim space or to recover from data corruption.
WARNING: This can NOT be undone! You must confirm in order to proceed:
Petrel Cloud
Create Database Backup
Create a backup of the current database and upload it to your Petrel Cloud account, if your subscription supports it.

This will lock the database while creating a backup, however the upload can happen in the background after that.
Restore Database Backup
Download a database backup from your Petrel Cloud account and overwrite the existing database.

Once the backup has been downloaded, you will be prompted to confirm that you wish to restore it.
Background Jobs
Delete Scheduled Background Jobs
Delete all scheduled background jobs from the database which are preventing a database backup or restoration operation.

These include any Petrel Cloud transfers and video processing jobs that are queued, or have encountered an error and are waiting to be retried.
Any jobs that are already in progress can not be deleted, but may be manually cancelled from the system notifications tray depending on the job type.
Create Database Backup
Create a backup of the current database and upload it to your Petrel Cloud account.
This is a multi-step process, and requires user input.
Database Analysis
A number of conditions need to be met in order to safely close and create a backup of the current database.
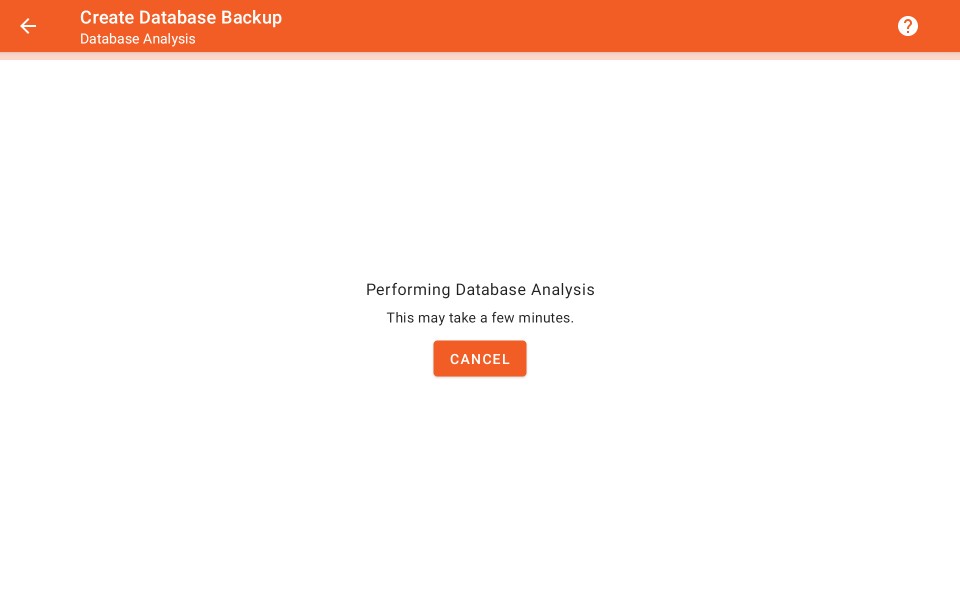
This step will analyze your current database and perform the following steps:
- Check for an active internet connection and a valid license.
- Determine the amount of free storage required to create a backup, and notify you if additional space is required.
- Ensure that your current Petrel Cloud subscription supports storing database backups, and that it contains enough capacity to store the current database.
- Ensure that no Petrel Cloud uploads/downloads or video jobs are in progress.
Depending on the size of your database, this step can take a few minutes.
Confirm Backup and Upload
This step allows you to confirm that you wish to create the backup archive and queue it to be uploaded.
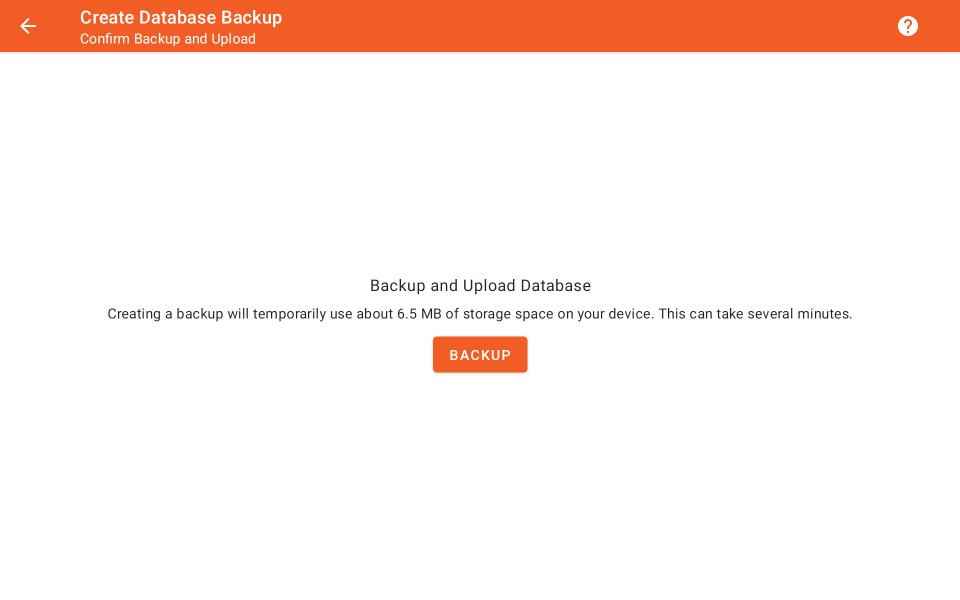
If you already have a database backup stored in your Petrel Cloud account, then you will be prompted to confirm that you wish to overwrite it.
Create Backup
This step creates the backup archive and may take several minutes depending on the size of your database.
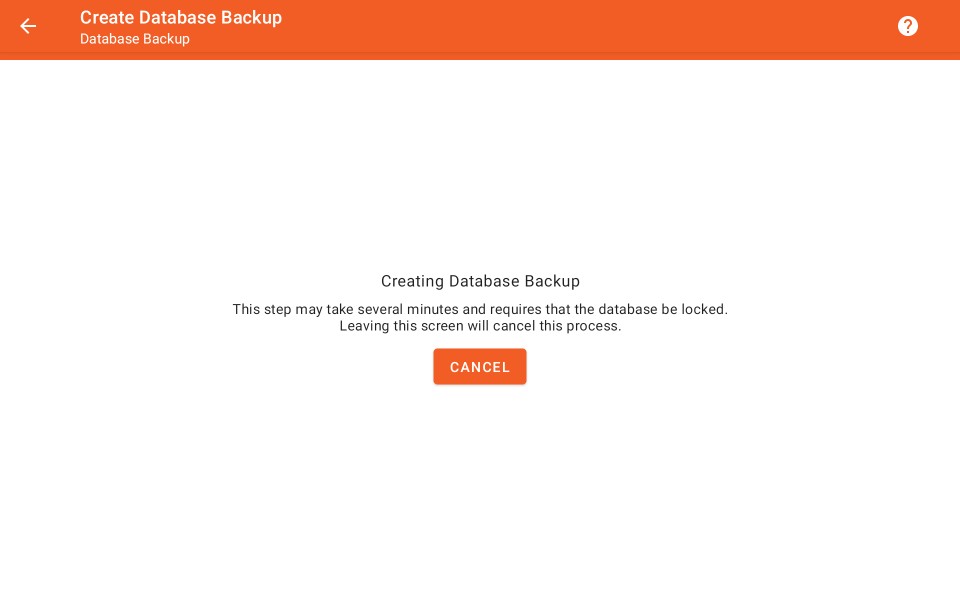
While the database backup is being created, the database must remain closed. Navigating away from this screen will cancel this process.
After the backup is created, an additional check for sufficient Petrel Cloud storage will be made, and the upload will be queued.
Database Upload
The status of your upload is displayed in this step. If your upload has not been started, you may cancel it.
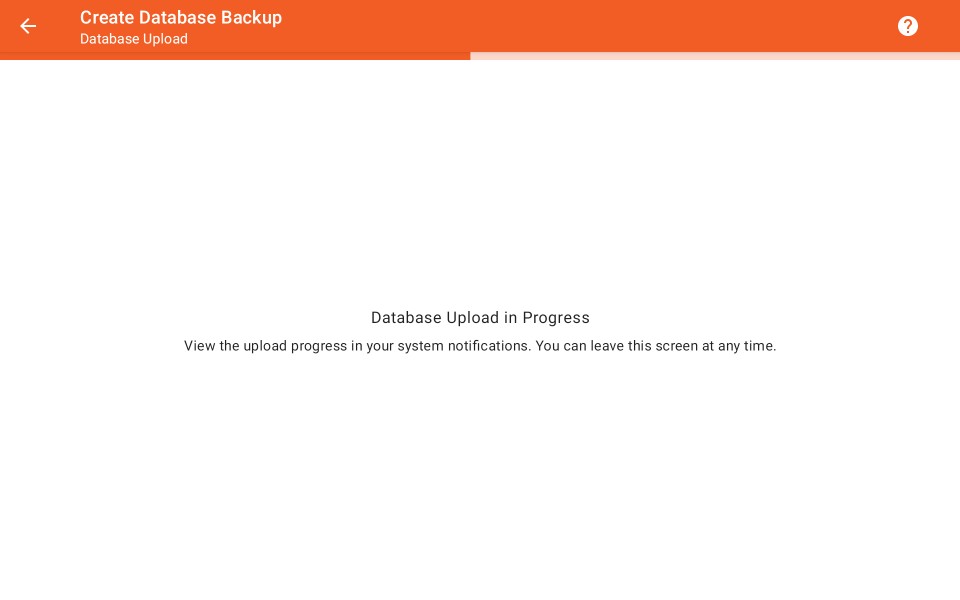
The upload will be sent in multiple parts, with automatic retries. If the upload has failed, you may either cancel or retry it.
You may leave this screen at any time. Progress will also be displayed as a system notification. If you open this workflow while an upload is scheduled, then you will be taken directly to this screen after the analysis step.
Restore Database Backup
Download a database backup from your Petrel Cloud account and restore it on the current device.
This is a multi-step process, and requires user input.
Device Analysis
A number of conditions need to be met in order to safely close and overwrite the current database.
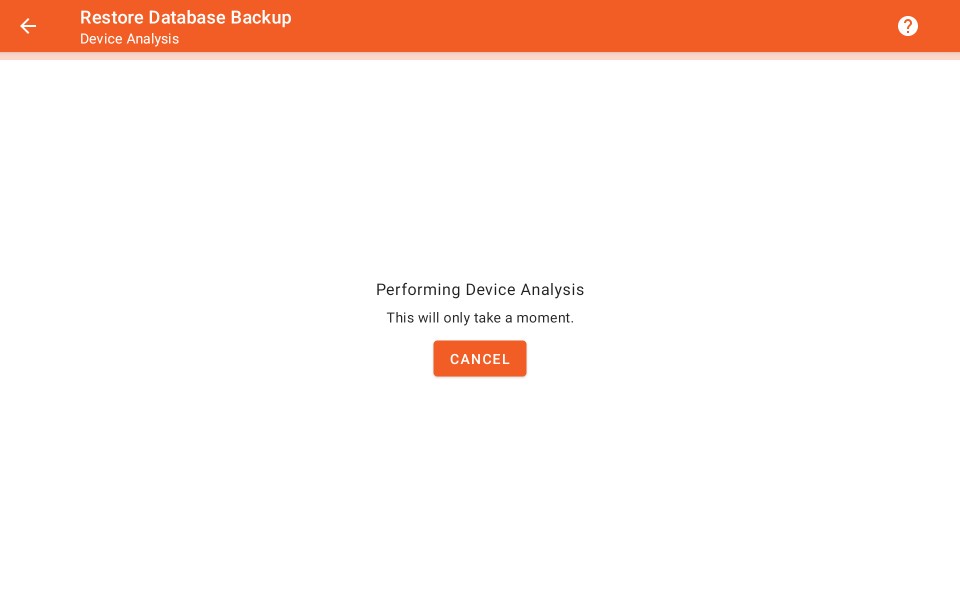
This step will analyze your device and perform the following steps:
- Check for an active internet connection and a valid license.
- Determine the amount of free storage required to download the backup, and notify you if additional space is required.
- Ensure that your current Petrel Cloud subscription supports storing database backups, that it contains an uploaded backup, and that your subscription is correct for the backup size.
- Ensure that no Petrel Cloud uploads/downloads or video jobs are in progress.
Database Download
Confirm that you wish to download the current database backup from your Petrel Cloud account.
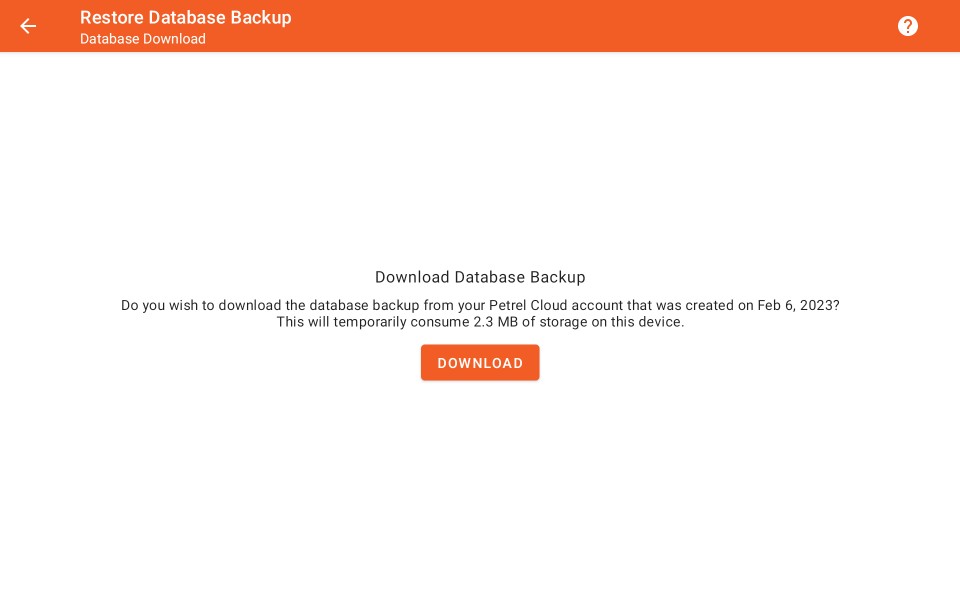
The download will be retrieved in multiple parts, with automatic retries. If the download has failed, you may either cancel or retry it.
You may leave this screen at any time. Progress will also be displayed as a system notification. If you open this workflow while a download is scheduled, then you will be taken directly to this screen after the analysis step.
Restore Database
You will be prompted to restore the downloaded database on this device.
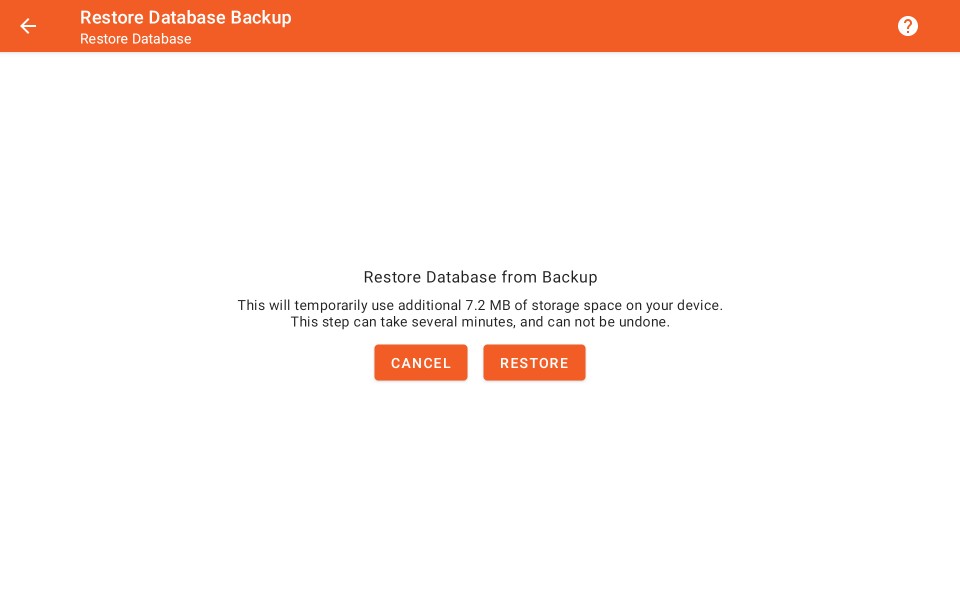
You must explicitly confirm that you wish to overwrite the existing database.
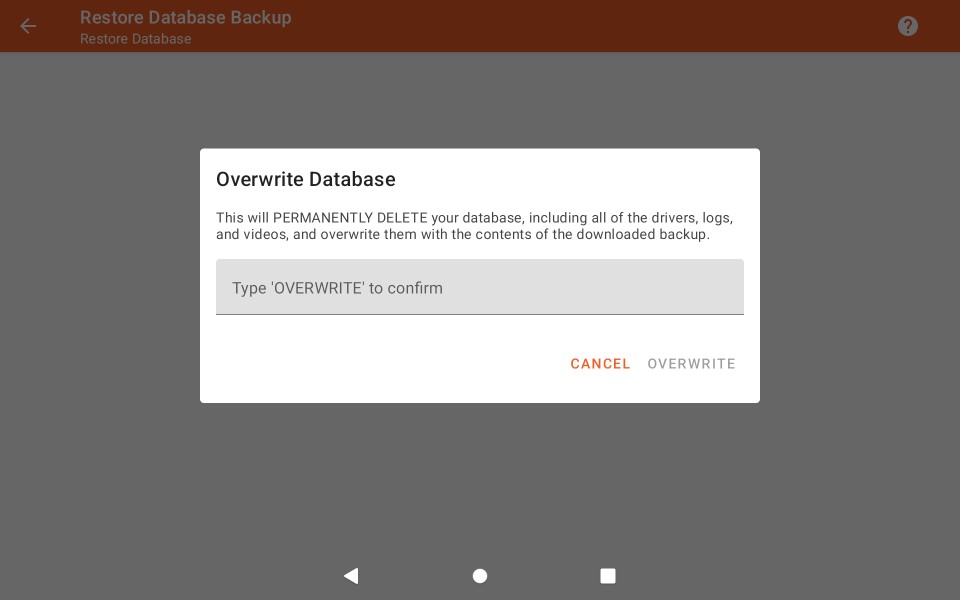
This step will restore the database backup on this device, and may take several minutes depending on the size of your database.
While the database is being restored, the database must remain closed. Navigating away from this screen will cancel this process.
The current database is temporarily renamed until the restoration process has been confirmed as successful, so you may cancel this step partway through.
Display Settings
Configure settings that affect the device screen, audio notifications, and battery life.
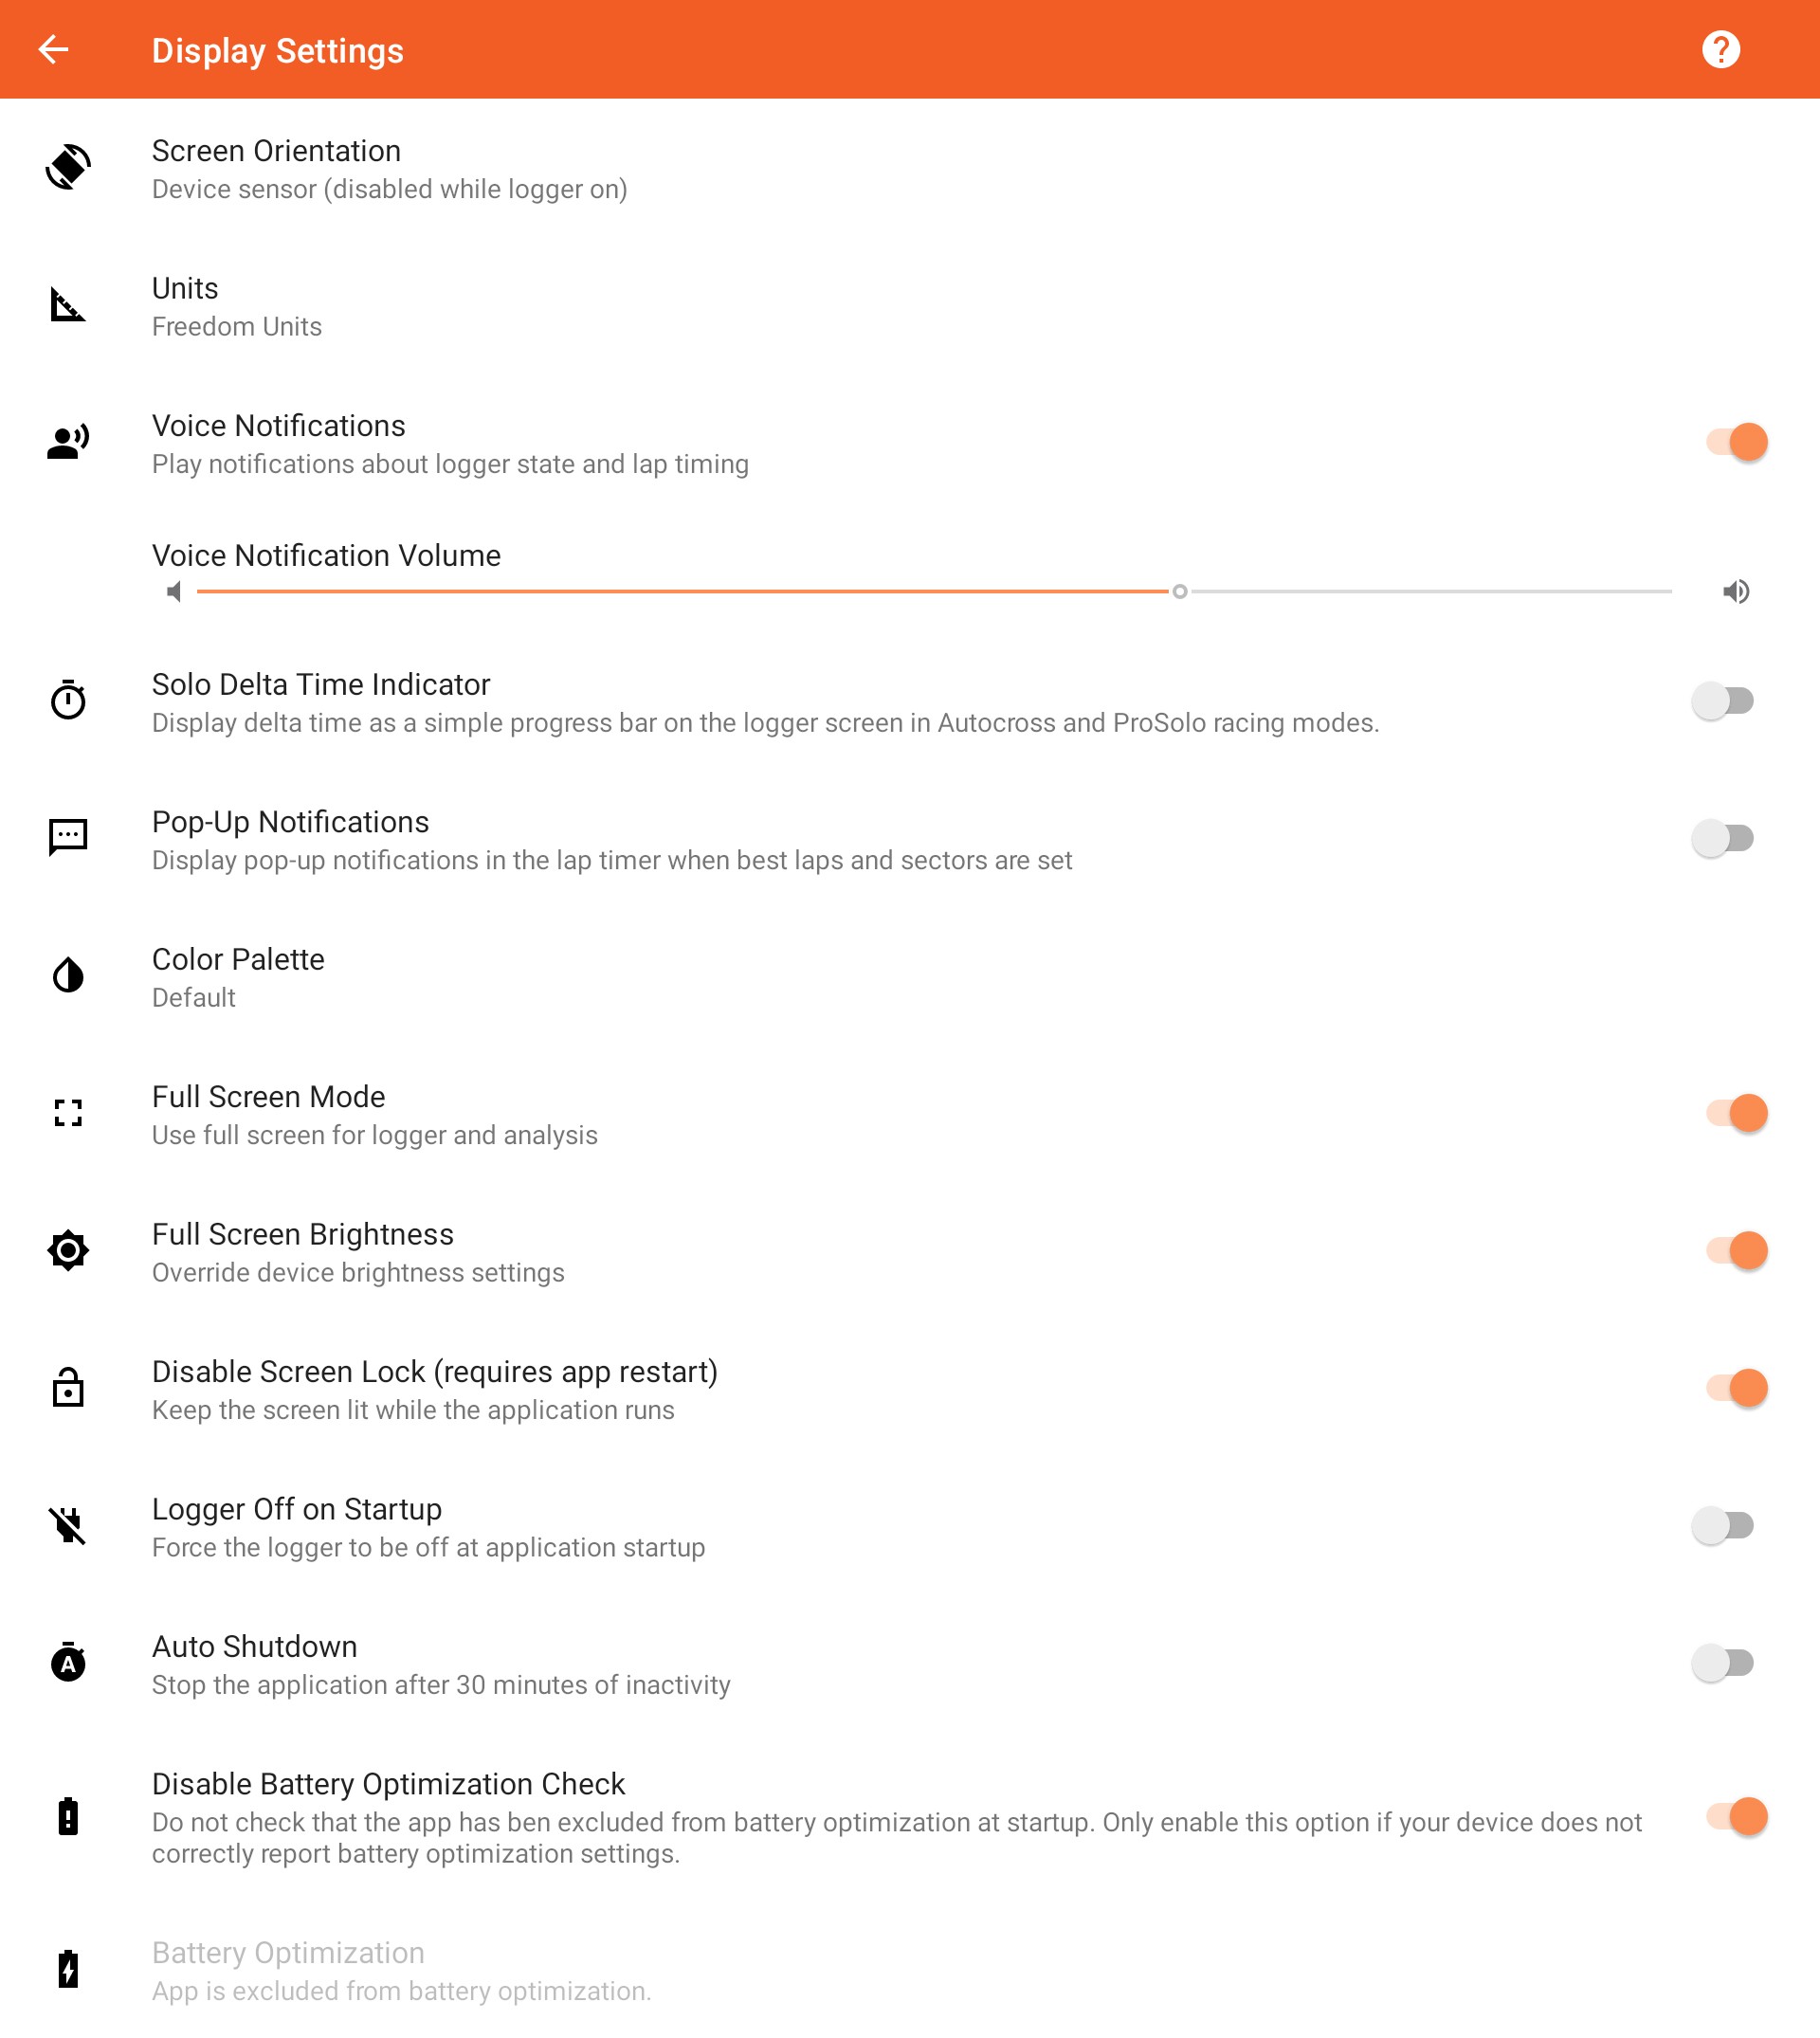
Setting Values
Screen Orientation
Select the screen and internal video camera orientation mode.

| Landscape (default) |
Forces the app to use landscape orientation at all times. This application UI is optimized for this setting. |
| Portrait |
Forces the app to use portrait orientation at all times. This is the optimal setting for single-handed operation. |
| Device Sensor |
Allow the app to switch between landscape and portrait orientation, depending on the device orientation. This option respects the device rotation lock. If the device rotation is locked in a specific orientation, then the app will use the same value. Due to use of the device IMU and camera, the orientation will be locked while the logger is powered on. |
Units
Select the units of measure to display, either American or metric.

Voice Notifications
Play voice notifications when the logger stage changes, or when faster laps and sectors are set in the lap timer screen.

Voice Notification Volume
Select the audio volume for voice notifications.

Solo Delta Time Indicator
Display delta time as a simple progress bar on the logger screen in Autocross and ProSolo racing modes.

Note: The baseline run used to calculate delta time will be the fastest run from the current event, and it will only be selected when start and finish markers have been set.
Pop-Up Notifications
Display pop-up notifications about fast laps and sectors in the lap timer screen.

Color Palette
Select the color palette in order to improve visibility.

Color palette options are as follows:
| Default |
Use a high-contrast palette to uniquely identify up to 6 logs during analysis. |
| Color Blind |
Use a limited, color-blind palette to identify logs. Due to the limited color range, we recommend only opening a maximum of two logs for analysis when using the color blind palette. |
Full Screen Mode
The app will fill the entire device screen when open, so that the system toolbar will be hidden.

Changes require you to manually terminate and restart the app in order to take effect.
Full Screen Brightness
Use the full brightness available on the mobile device screen during logging and analysis.

This improves visibility in outdoor conditions, but it does drain the battery faster.
Disable Screen Lock
Do not allow the device to sleep and lock the screen when the app is running.

During race conditions, long periods of time can occur where no user input is given. This setting provides the device from locking during those times.
Changes require you to manually terminate and restart the app in order to take effect.
Logger Off on Startup
Disable the logger whenever the app is started.

Auto Shutdown
Stop the application after 30 minutes of inactivity.

This will conserve battery life of you have forgotten to disable the logger and shut down the app.
Disable Battery Optimization Check
Disable the battery optimization check when the app is started.

Note: Only enable this option if your device does not appear to correctly report the battery optimization state of the app. This will be the case if you have excluded the app from battery optimizations, however you are still prompted to do so whenever the app starts.
Battery Optimization
Displays the Android battery optimization setting for this application.

For the logger, video processor, and cloud transfers to function correctly, the application must be excluded from device battery optimization.
The user is prompted to exclude the app from optimizations at startup, however this setting can be used to confirm the selection.
On some devices (Amazon Kindle Fire HD, etc.), the battery optimization settings are not accessible via the device settings. Tapping on this setting will be the only way to access this 'hidden' device setting.
Find Logs and Videos
This screen allows you to search and browse logs and videos in Petrel Cloud that have matched your search filters.

You can select logs and videos to download to your mobile device.
Find Logs and Videos Toolbar

The toolbar displays the number of logs found in Petrel Cloud that match the current search filters. You can sort the results as well as modify the search filters or select a local event to populate the search filters.
Search Results Count

This displays the number of logs found in Petrel Cloud that match your search filters.
Sort Criteria and Direction

Tap the sort criteria dropdown to specify the field to sort logs by:

The log sort criteria options are:
| Created |
Sort logs by the date that they were created. |
| Lap Time |
Sort logs by lap time. |
| Owner |
Sort logs by the name of the user that uploaded the log. |
| Driver |
Sort logs by the name of the assigned driver. |
| Event |
Sort logs by the name of the event. |
Tap  or
or  to toggle between sorting in ascending or descending order.
Select Matching Event

Tap to select an event from your device storage to populate the search filters.
Context Menu

Tap to open the context menu for Petrel Cloud search:

Download Logs
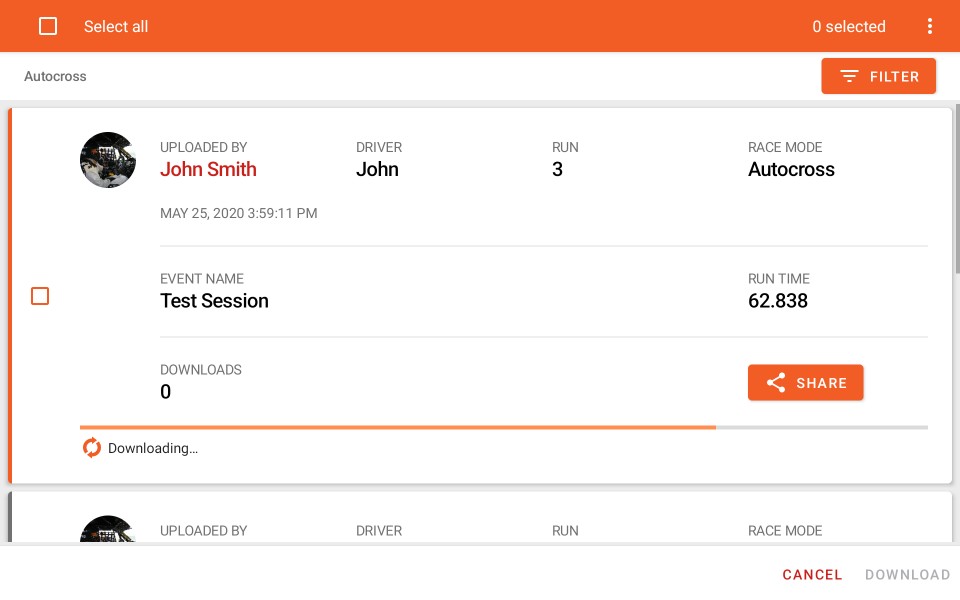
Select logs and videos to queue for download to your device.
Delete Logs

Select logs to delete from Petrel Cloud. You will only be able to select logs that you own.
Search Results List
Logs found in Petrel Cloud that match your search filters are listed below the toolbar.
Tap on each result to select it for download. You may also select any associated videos to download as well.
Log Sharing
For logs that you own, tap on
 to modify the sharing options.
Filters
You can search for logs uploaded and shared on Petrel Cloud using a number of different filters.


Note: In addition to your own logs, results will only appear if they are shared (i.e. public logs, shared with a team that you are a team member of, or shared directly with you by the owner via a sharing link).
Filter Controls
Expand Filters
Tap  to expand the list of filtering options.
Reset
Tap  to reset the filters to the values that were set when entering this screen.
Clear
Tap  to clear all filters options and obtain the greatest number of search results.
Note: The racing mode selection will always be populated and can not be cleared.
Done
Tap  to collapse the filter options and view to the list of search results.
Event Info Filters
Use to filter search results by event attributes.
Racing Mode

Select the racing mode to filter logs by:
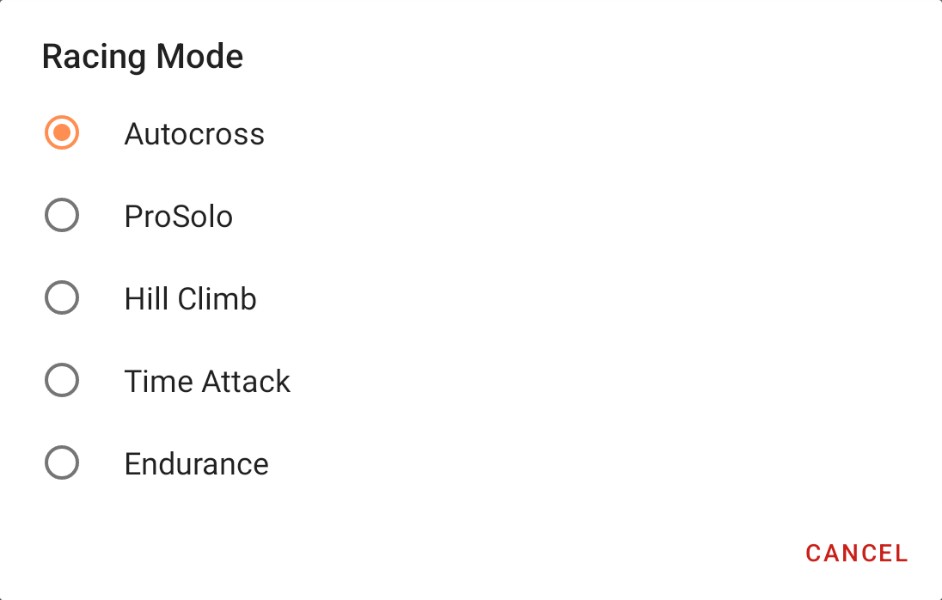
Note: Racing mode must always be selected and can not be cleared.
Event Name

Select the name of the associated event to filter logs by.
Event Location

Specify a physical location near the event using a location picker:
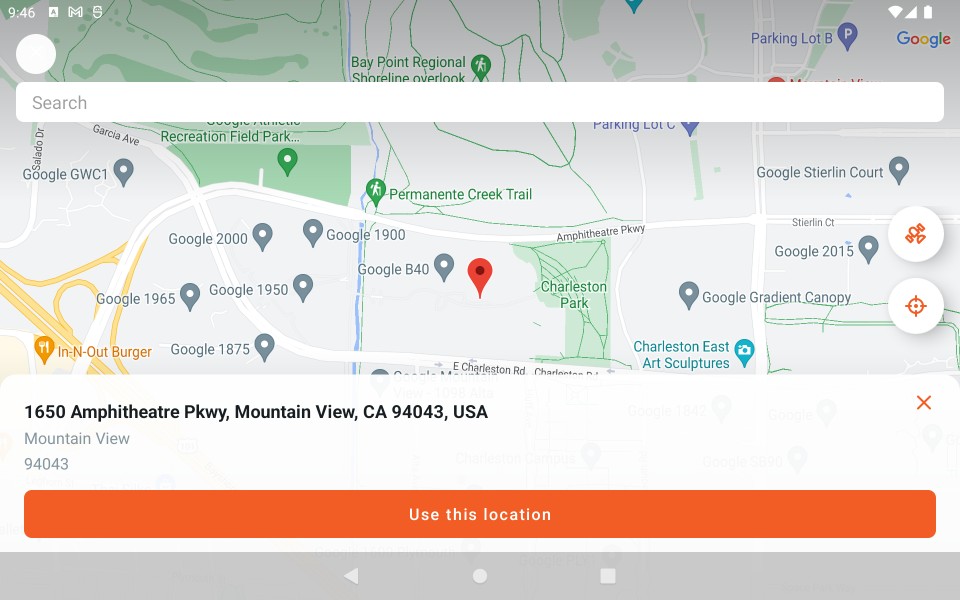
Logs recorded within 1km will be returned in the search. Be wary of larger venues where logs might be missed due to GPS error, etc.
Note: Location selection requires an internet connection and/or the internal GPS receiver to be enabled.
Course Location

For non-circuit racing modes, specify the course location:
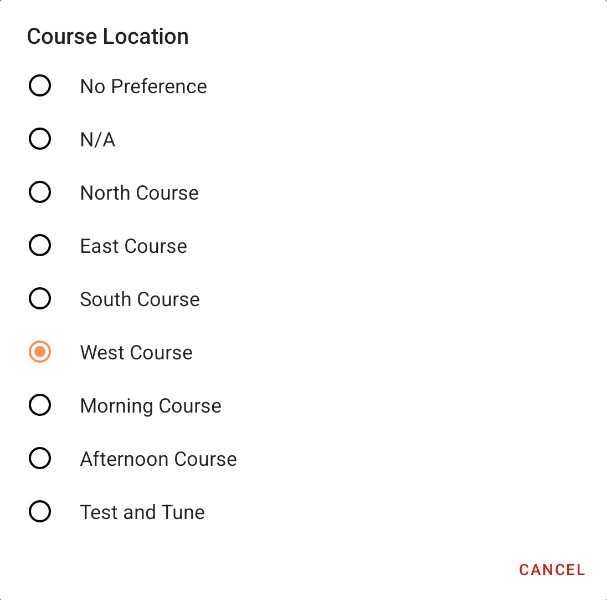
Used to specify a course within an event. e.g. East/West course at Nationals, Left/Right at ProSolo, Day 1/2 courses at multi-day events.
Circuit

For circuit racing modes, select a racing course from a list of circuits saved in the device storage:
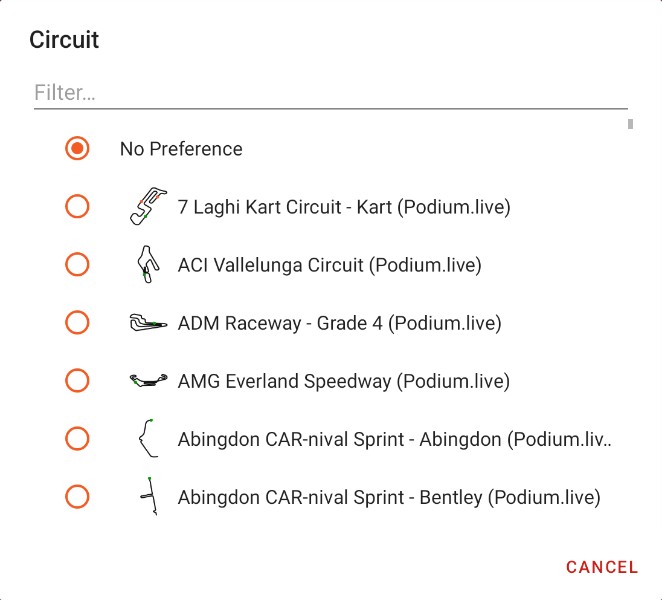
Note: Only circuits saved on the device are available. You may need to update the list if the desired circuit is not available.
Update Circuit List

Tap to update the list of circuits from Petrel Cloud, and store them on the device.
Sharing Filters
You can filter based on sharing or ownership of logs.
Matching Mode

This is a high level filter that allows you to present only logs that were shared in a specific way. Used to search for logs from your team or specific friend.
Tap to select the matching filter:
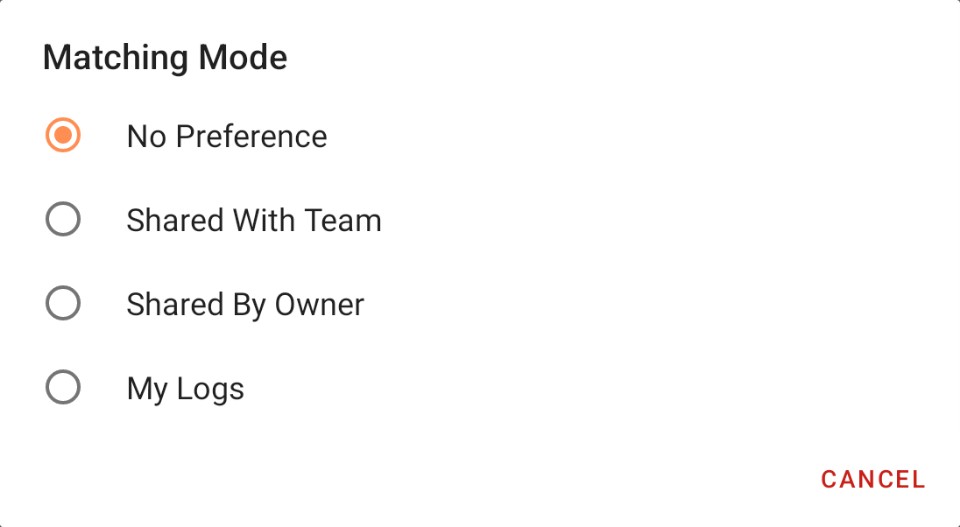
The matching filter options are:
| No Preference |
Return any logs matching remaining filters. |
| Shared Publicly |
Return all publicly available logs. |
| Shared with Team |
Return only logs shared specifically with teams you are member of. |
| Shared By Owner |
Return only shared logs that are owned by a specific Petrel Cloud user. |
| My Logs |
Return only logs you have uploaded to the cloud. |

Tap to specify a team that you are a member of.

Tap to specify the owner name for logs and videos.
Log Date Filters
You can filter based on the date that logs were recorded.
Matching Mode

Used to search for logs created on a specified date or within a date range.
Tap to select the matching filter:
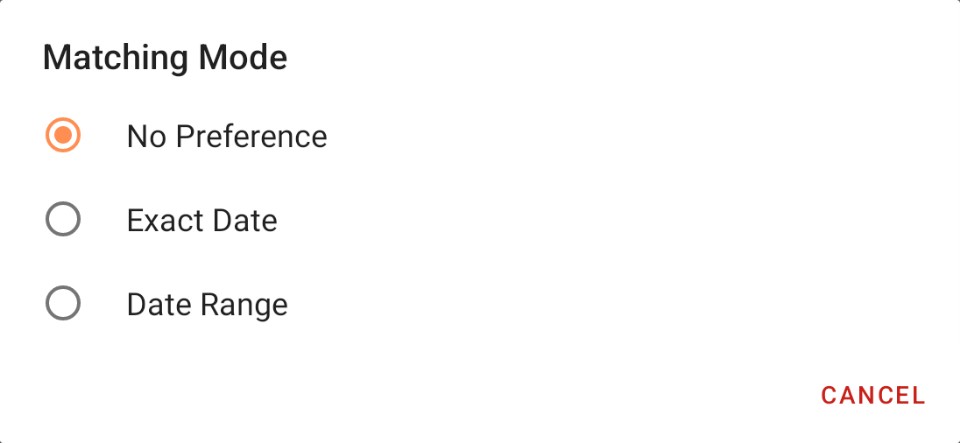
The matching filter options are:
| No Preference |
Return any logs matching remaining filters. |
| Exact Date |
Return all available logs that were recorded on a specific date. |
| Date Range |
Return all available logs that were recorded within a specific date. |
Exact Date

Specify an exact date that the log was recorded on using the date picker:
Date Range
Start Date

Specify the start of the date range, inclusive.
End Date

Specify the end of the date range, inclusive.
Tips & FAQ
- Searching Petrel Cloud requires a working Internet connection on the mobile device. If at an event, sometimes the Wi-Fi camera connection can prevent your device from connection to the Internet.
- No logs found: A specific filter may be preventing any results, so try removing some filter options. Use the Clear button in the toolbar to clear all filters if having trouble. Using a minimal set of filters is ideal. Tap the clear button at the end of a preference to remove that filter criteria.
- Text filters: For all search filters that have open text fields, be sure to check the suggested list as you type, as the suggestions are are based on logs available in the Cloud and may not be spelled exactly as you may assume.
Sharing
Used when uploading or modifying logs to set the privacy of your data in Petrel Cloud
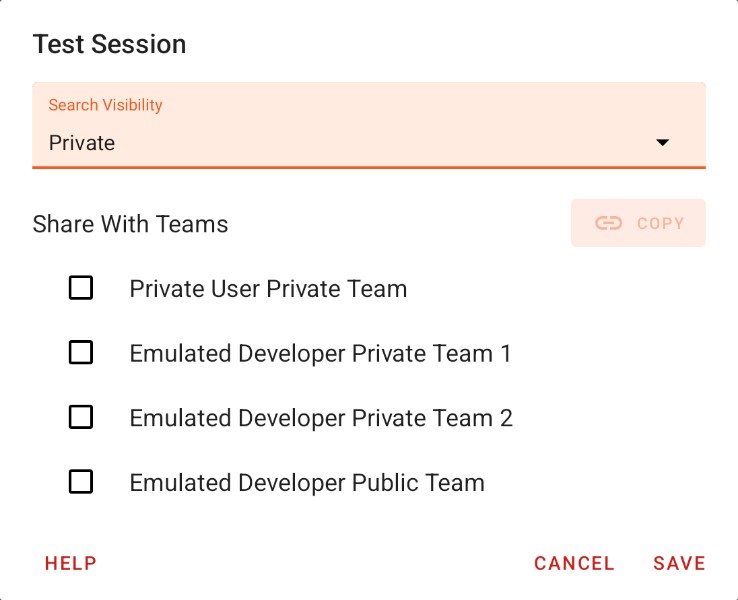
Change these options to restrict other Petrel Cloud users from downloading your logs for viewing (videos as well if you include them).
Search Visibility
Tap to set the search visibility on the selected logs and videos:

The available options are:
| Public |
The selected logs and videos are searchable, viewable and downloadable by all Petrel Cloud users. |
| Unlisted |
The selected logs and videos are only searchable and downloadable to Petrel Cloud users who are members of teams that they are shared with, or other users via a direct link. |
| Private |
The selected logs and videos are only searchable and downloadable to Petrel Cloud users who are members of teams that they are shared with. |
Select the teams from the list that you wish to share the selected logs and videos with.
Only teams that you own or are a member of will appear in the list.
Sharing Link
Tap  to copy a link to the device clipboard that will allow you to directly share the selected logs and videos with other
Petrel Cloud users.
Note: This option is only available when the sharing visibility is set to Public or Unlisted
Once copied, you can paste the link into any communication: e-mail, instant messaging, etc.
To open the sharing link, the receiver must open it in a web browser on their mobile device.
Logs and Video Downloads
Select the event to download the selected logs and videos.
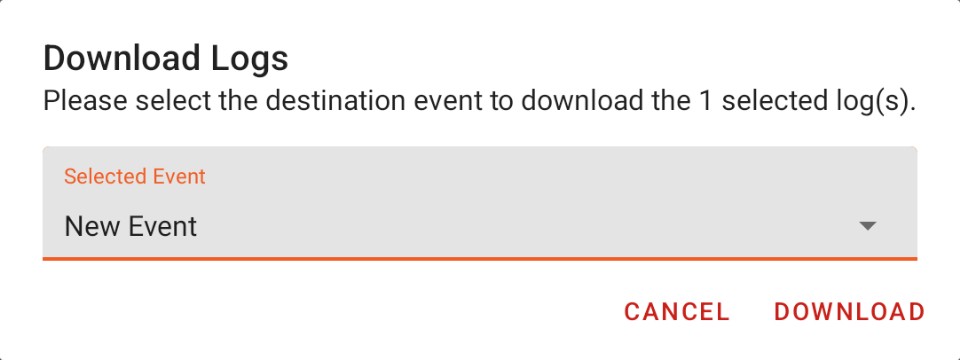
Only events that are configured with the same racing mode as your current search criteria will be displayed.
Note: If no matching local events are found, you can select the option to create a new event with the same name as the event of first selected log.
Find Logs – Matching Event
Select an event from your device storage to configure your search criteria.
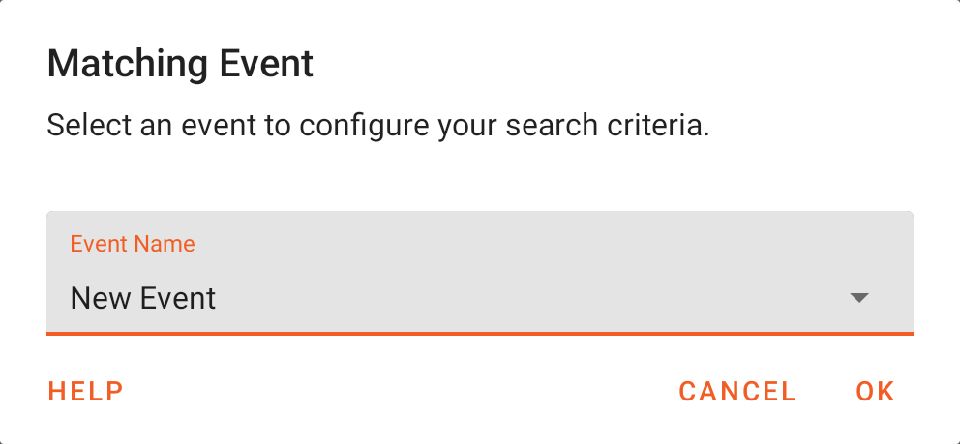
Using this method, you can search for logs and videos matching an event that you have attended.
Search Criteria – Owner Name
Search for logs and video shared by a specific Petrel Cloud user.

To select a value:
- Start typing the user name.
- Tap an autocomplete suggested name from the list.
- Tap to select the value.
- Tap .
Note: Only names that are associated with logs that are visible to you will be included in the list of suggested values.
Note: This requires a working connection to the Internet
Select a team that you own or are a member of in order to filter search results.
Start typing the desired team name, and select the autocomplete suggestion that matches the desired team:
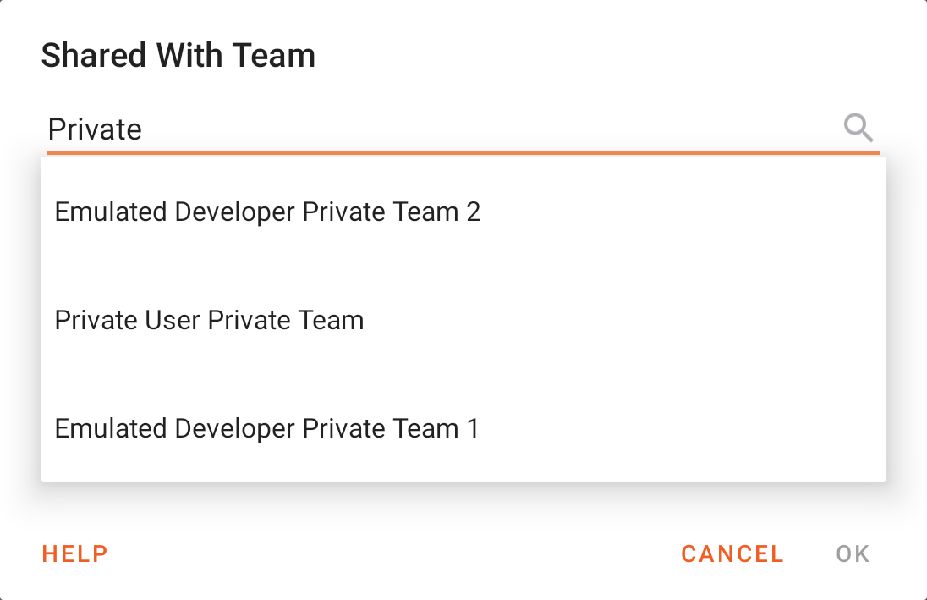
After selecting a suggestion, you can then select the team from the list:
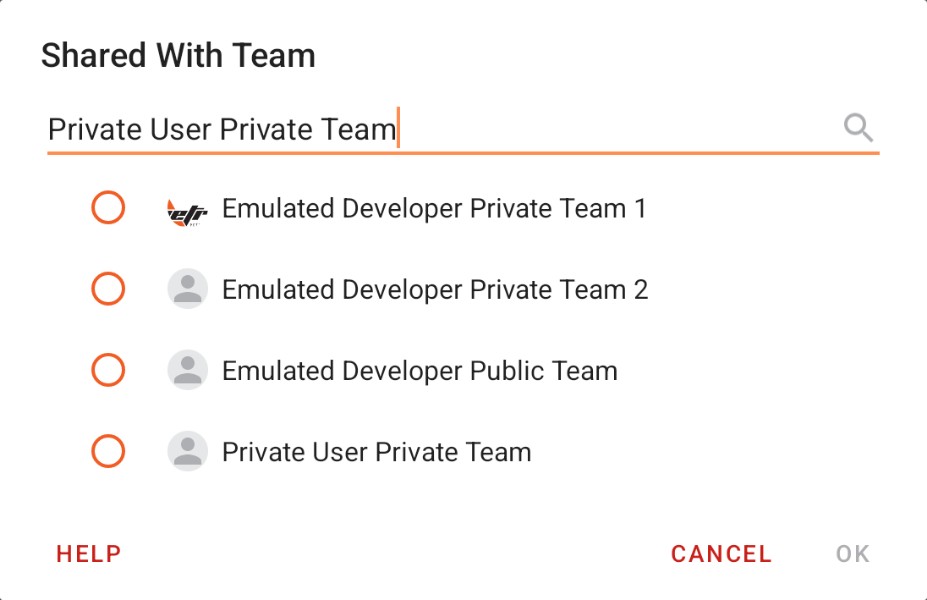
Select the team and tap .
Note: This requires a working connection to the Internet
Search Criteria – Event Name
Search for logs and video associated with a specific event name.

To select a value:
- Start typing the event name.
- Tap an autocomplete suggested name from the list.
- Tap to select the value.
- Tap .
Note: Only names that are associated with logs that are visible to you will be included in the list of suggested values.
Note: This requires a working connection to the Internet
Manage Logs and Videos
Accessed from the main application menu, this screen allows you to manage your own logs and videos in Petrel Cloud.
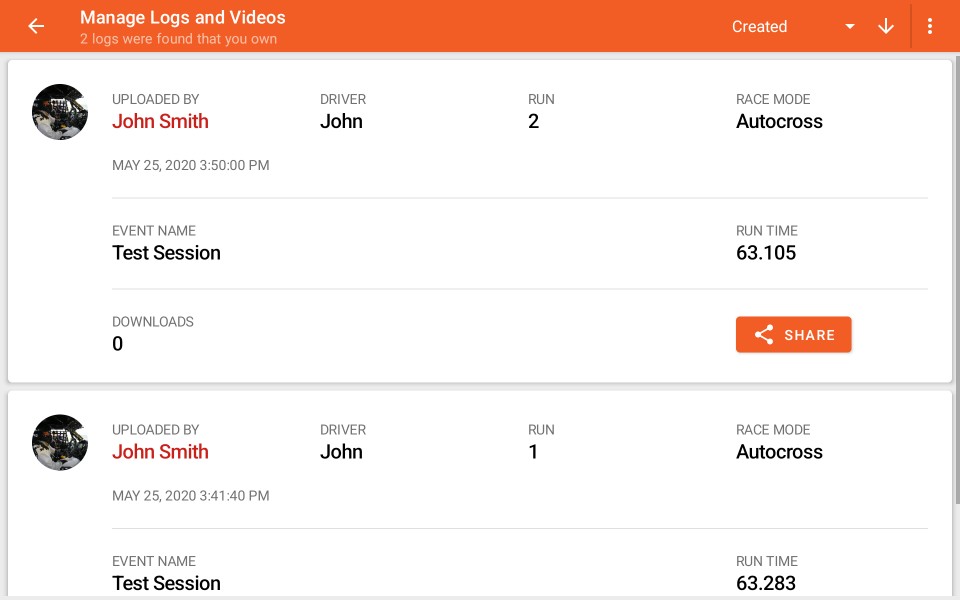
You can select logs and videos to download to your mobile device or delete from the cloud in order to free up storage space. You can also update sharing options for each log.
Manage Logs and Videos Toolbar

The toolbar displays the number of logs found in Petrel Cloud that you own. You can sort the results as necessary.
Context Menu

Tap to open the context menu for Petrel Cloud management:
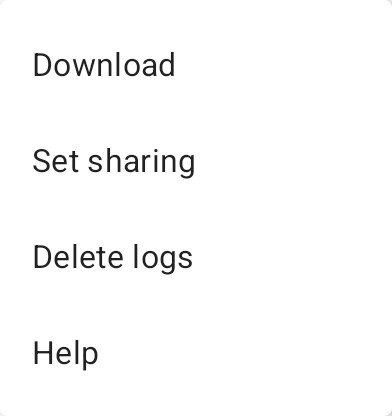
Download Logs
Select logs and videos to queue for download to your device.
Delete Logs
Select logs to delete from Petrel Cloud in order to free up storage space.
Manage Teams
This screen allows you to manage your teams and memberships.
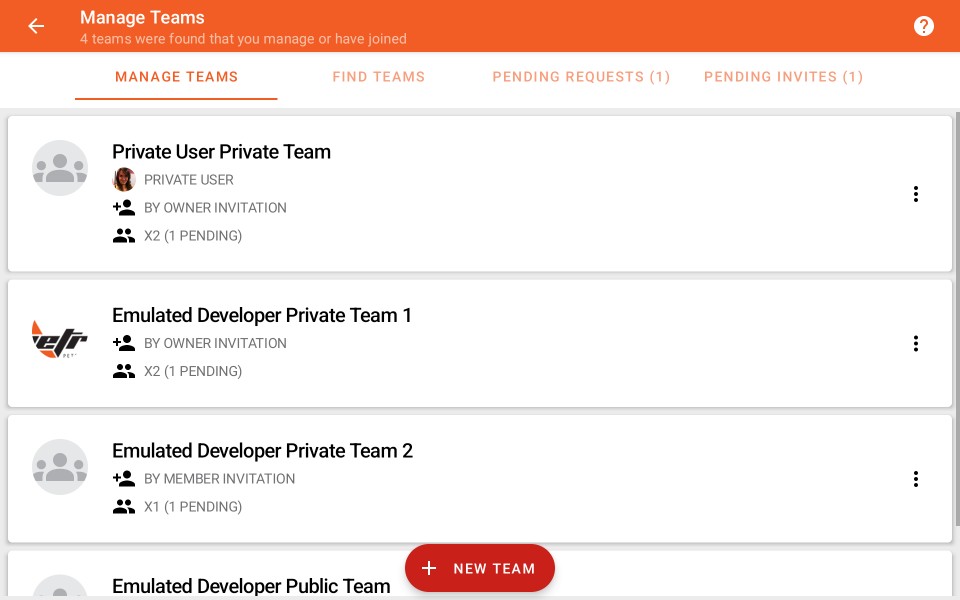
Team Management Toolbar

Team Count

The toolbar displays the number of teams that you own or are a member of.
Team List

Teams are displayed in a list. Both your own teams as well as other teams that you are a member of are displayed.
Note: Teams that you do not own will display the name and picture (if set) of the owner.
Team Context Menu
Tap on a team in the list to open a context menu.
Your Teams
Tap on a team that you own in order to open the following menu:
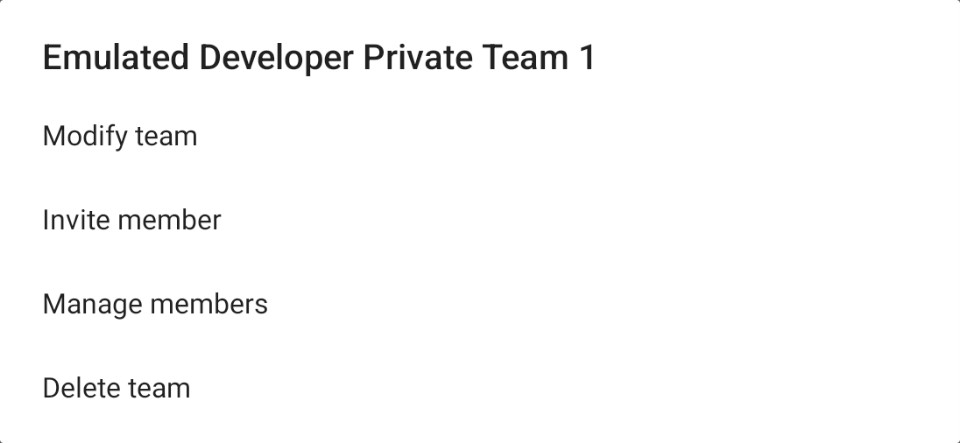
The available actions are:
| Modify Team |
Tap to change the team name. |
| Invite Member |
Invite a Petrel Cloud user to join your team. |
| Manage Members |
Remove members from this team. |
| Delete Team |
Permanently delete the team from Petrel Cloud. |
Delete Team
Confirm that you wish to delete the team from Petrel Cloud by typing the word 'DELETE' and tapping .
Member Teams
Tap on a team that you are a member of in order to open the following menu:

The available actions are:
| Leave Team |
Leave a team you do not own. |
Leave Team

Confirm that you wish to leave the team by tapping .
Create a New Team
Tap  to create a new Petrel Cloud team.
Create or Modify Team
This dialog allows you to specify team attributes
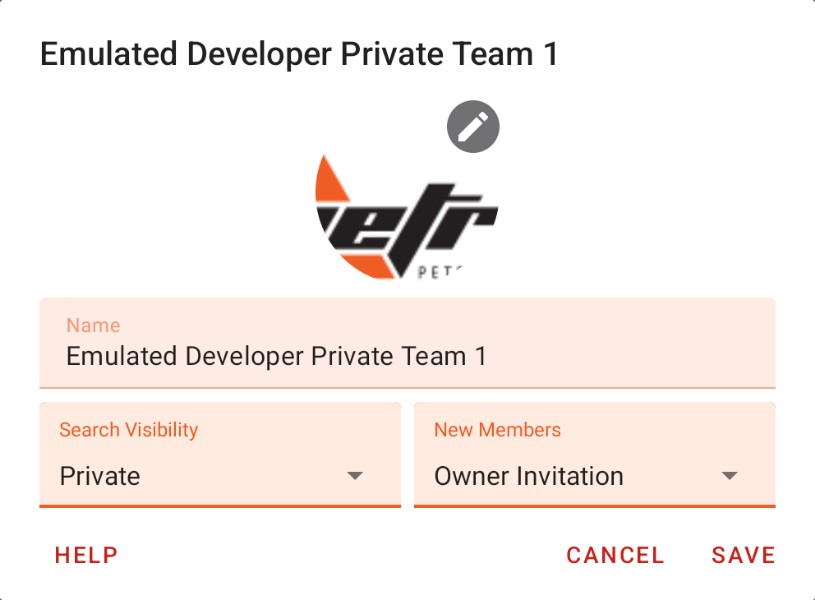
Logo
Tap to select an image from your device to use as the logo or profile image for this team.
The selected image will be cropped as a square from its center.
Name
Specify a unique name for your team.
Search Visibility
Select the visibility of your team to other Petrel Cloud users when searching for teams.
The available options are:
| Public |
All Petrel Cloud users can view this team when searching. |
| Private |
This team will not show up in search results. Users must be invited to join by you. |
New Members
Specify how additional team members can be added to the team.
The available options are:
| Owner Invitation |
Only the team creator can add new members. |
| Member Invitation |
Any team member can invite new members to the team. |
| Public Request |
Any Petrel Cloud user can request to be added to your team and, you will have to approve the request. Note: The team visibility must be set to 'Public' for this option to be available. |
Team – Invite Member
This dialog allows you to search for other Petrel Cloud users and invite them to this team.
To invite a user to the team:
- Type the name of the Petrel Cloud user you wish to invite to the team.
- Existing Petrel Cloud user names will be suggested as you type.
- Tap a suggest name to display a list of all users with that name.
- Tap on a user in the provided list to invite to the team.
- Tap to invite the user to the team.
Note: Only users who have set their visibility to 'Public' in the Petrel Cloud Subscription settings will appear in this search.
Manage Teams Members
This dialog allows you to remove users from this team.
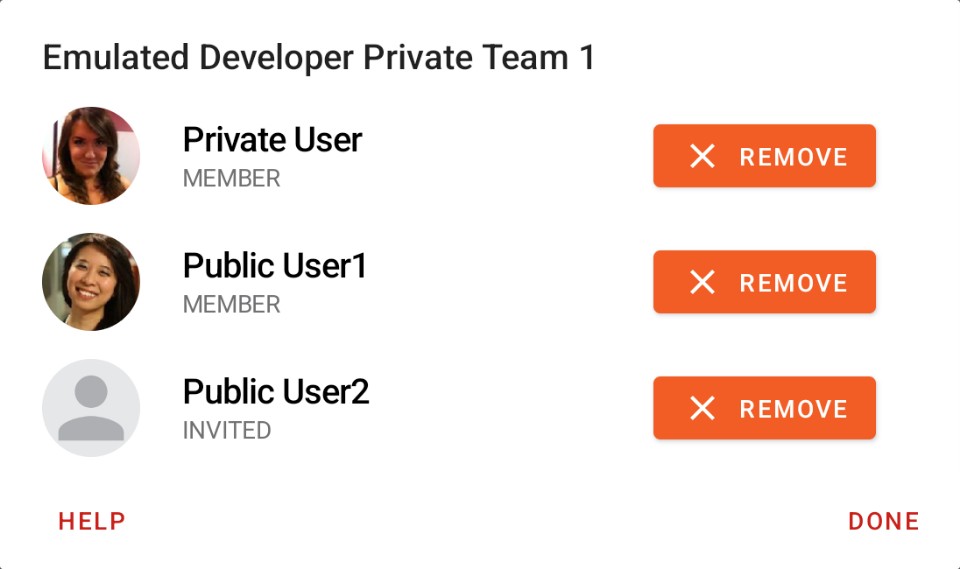
To remove a member from a team:
-
Tap
 next to a member name to remove them from the team.
- You will be asked to confirm the action.
- Tap when you are finished managing membership.
Find Teams
This screen allows you to find Petrel Cloud teams and request join them if allowed.
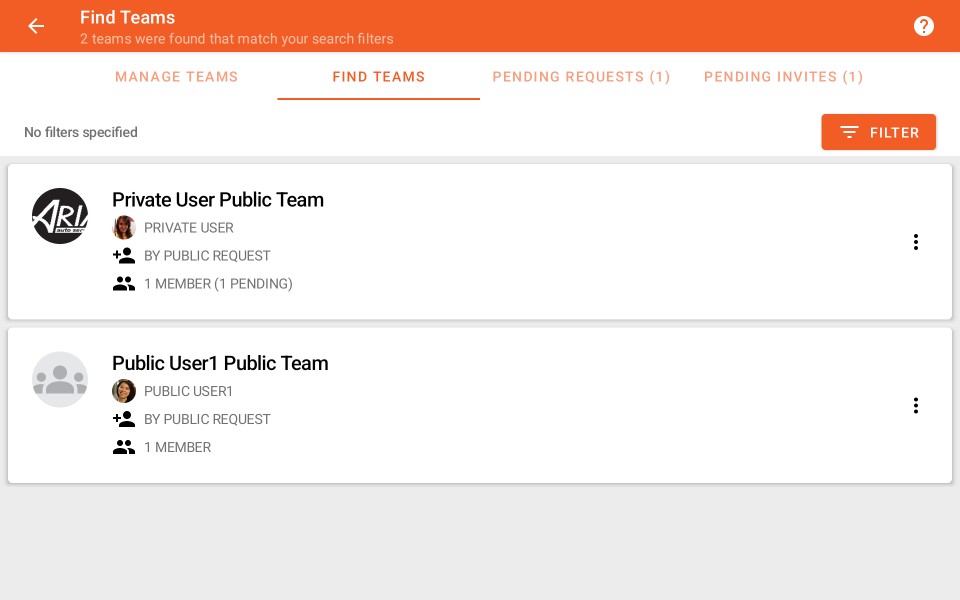
Find Teams Toolbar

Search Result Count

The toolbar displays the number of teams that your search filters have matched.
Team List
Each team that matches your search filters is displayed in a scrollable list:

Note: If a team name is not appearing, it is possible that team is private and you can not find it. Ask the team owner to invite you to the team or change the team visibility.
Team Context Menu
Tap on a team to open its context menu:

The available actions are:
| Request To Join |
Tap to request to join the team. Your request will be pending until it is approved. |
Filters
You can search for teams on Petrel Cloud using a number of different filters.


Filter Controls
Expand Filters
Tap  to expand the list of filtering options.
Reset
Tap  to reset the filters to the values that were set when entering this screen.
Clear
Tap  to clear all filters and obtain the greatest number of search results.
Done
Tap  to collapse the filter options and view to the list of search results.
Team Name

Specify the name of the team you with to filter by.
Search Criteria – Team Name
This dialog allows you to specify a team name to filter your results.

To specify a name:
- Start to type a team name.
- Select the team from the autocomplete suggestions that are provided.
- Tap to select the team name.
Note: Only the names of teams that exist in Petrel Cloud and are shared publicly will appear in the suggestion list.
Pending Requests
This screen lists Petrel Cloud users who have have requested to join teams that you own or manage.
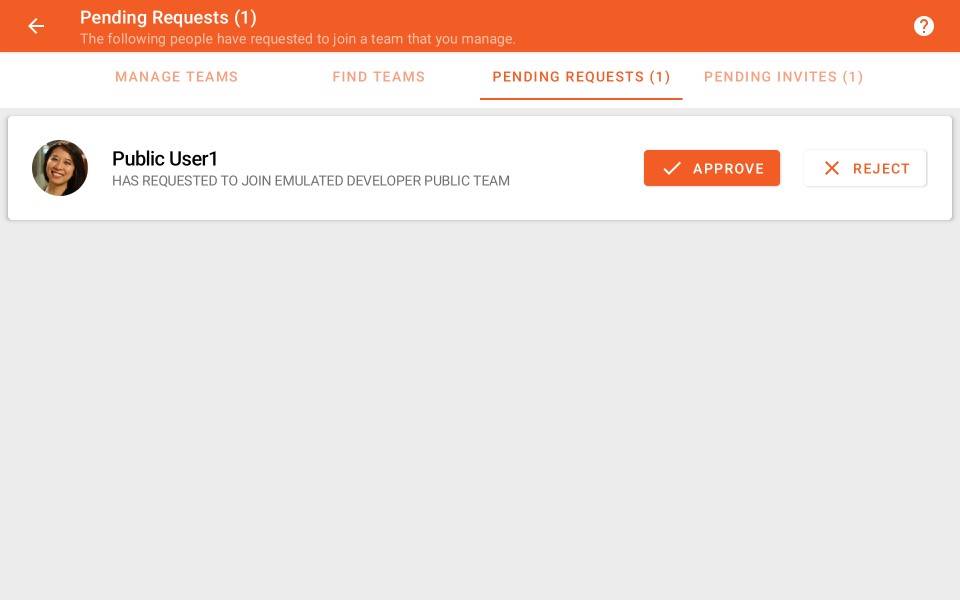
All requests to join a team are pending until they are approved or rejected.
Team Join Requests Toolbar

The toolbar displays the number of pending requests.
Join Request List

Each request to join a team that you own or manage is displayed in the list.
Tap  to approve each request, or tap
 to reject it.
Pending Invites
This screen lists teams that you have been invited to join by other Petrel Cloud users.
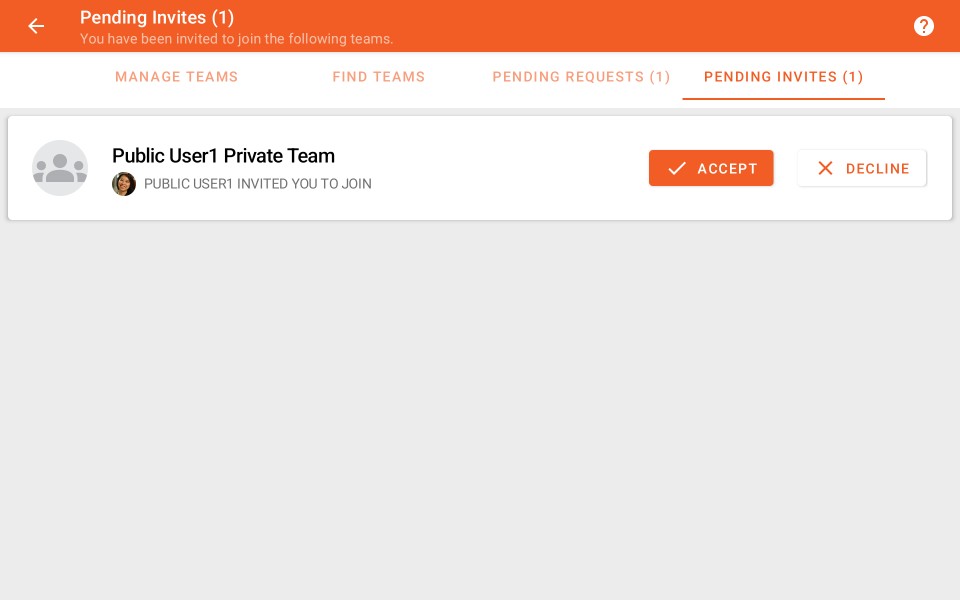
All invitations to join a team are pending until they are accepted or declined.
Team Invites Toolbar

The toolbar displays the number of pending invites.
Team Invite List

Each invite to join a team is displayed in the list.
Tap  to acceot each invite, or tap
 to decline it.
Petrel Cloud Settings
This screen displays the status of your Petrel Cloud subscription, and allows you to modify your plan settings.
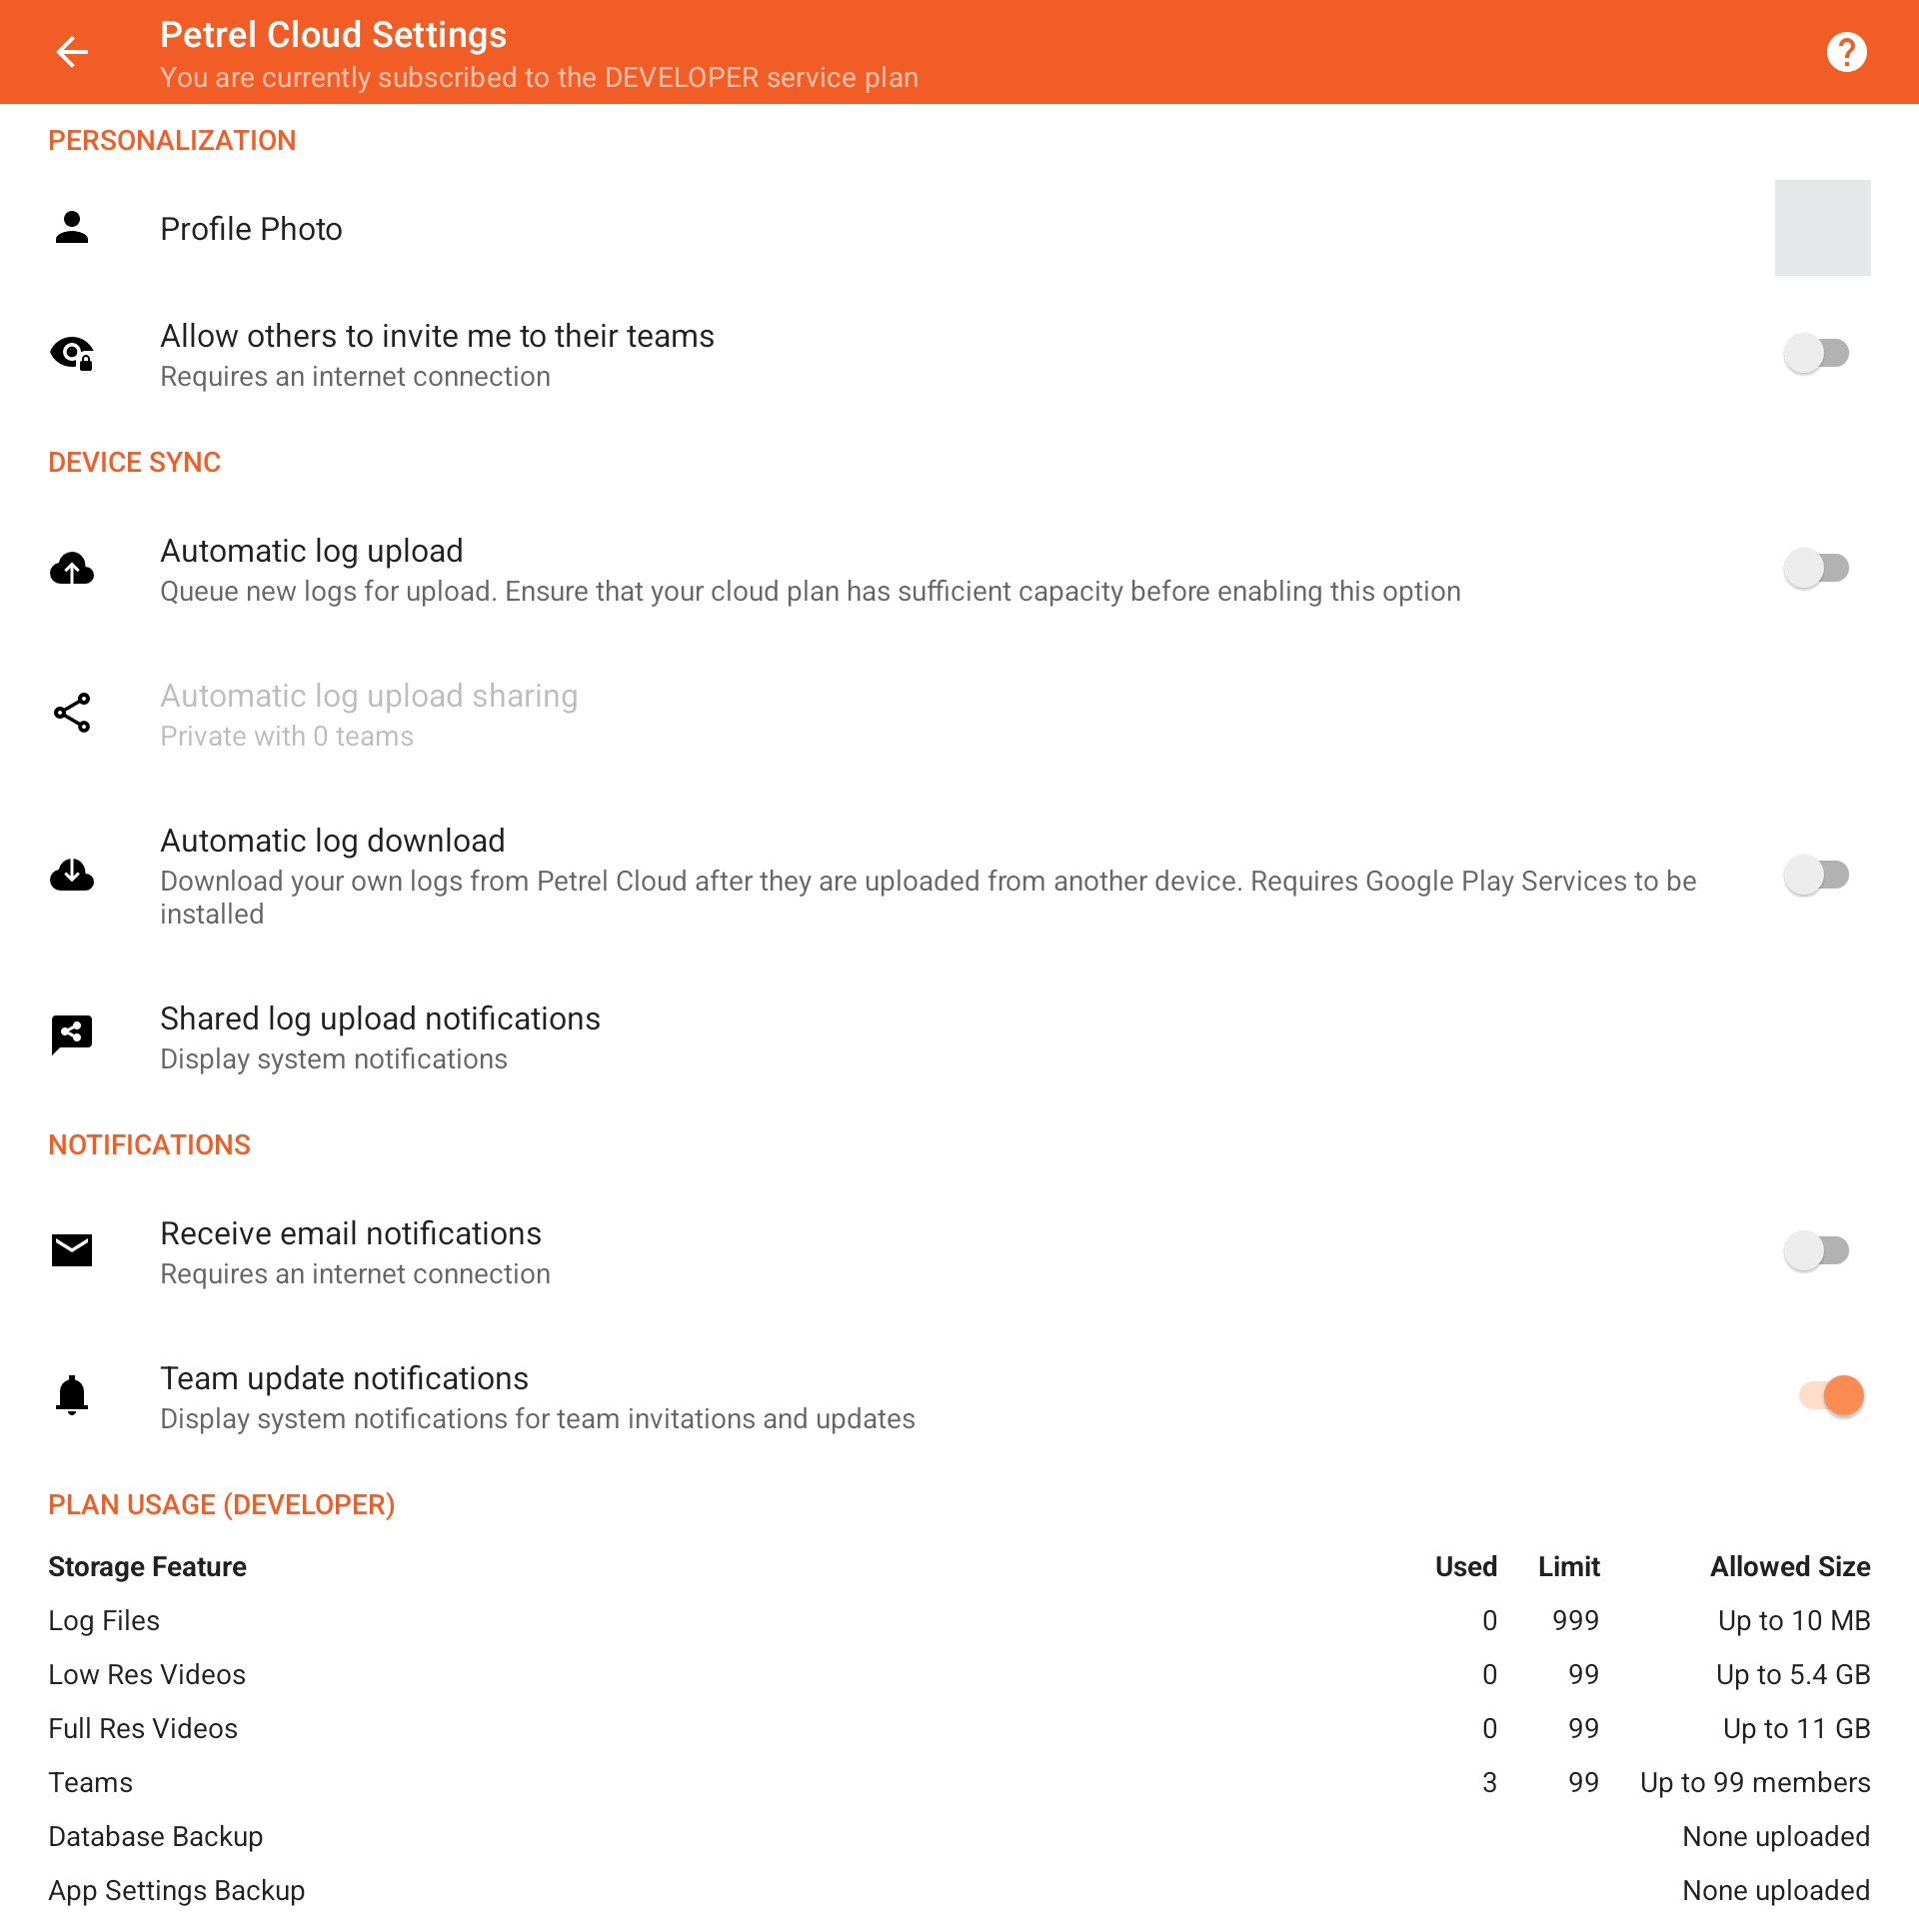
Settings Toolbar

The cloud subscription toolbar displays your current subscription plan. You can upgrade it from the main application user menu by tapping on the Manage Subscription menu option.
Petrel Cloud Settings
Personalization
Profile Photo

Tap to select a profile photo viewable by other Petrel Cloud users when searching for you, or viewing your teams and logs.
You will be prompted to take a picture with the device camera or select an image from your device storage.
Search Visibility

Allows your user profile to be found by others and invited to join teams, so that they can share logs and videos with you.
Device Sync
Automatic Log Upload

Automatically queue new logs recorded on this device to be uploaded to the cloud when.
Logs will be uploaded once the device has detected an active internet connection.
Note: Ensure that your cloud plan has enough capacity to upload new logs. Uploads that fail due to a lack of capacity can be retried from the storage browser.
Automatic Log Upload Sharing

Specifies the sharing options (visibility and teams) of logs that are automatically queued for upload.
Automatic Log Download

Automatically queue your own newly uploaded logs to be downloaded to the device.
Use this option when you want to automatically sync your logs to another device for analysis. Logs will be downloaded once the device has detected an active internet connection.
Note: This feature requires that your device has Google Play Services installed, but it does not work on Amazon Kindle devices. Enabling this option will check that Google Play Services is installed, and prompt you to do so if that is not the case.

Select how to handle newly uploaded logs that are shared with you.
Select from the available options:
- Ignore shared logs
- Display system notifications
- Download automatically
Note: This feature requires that your device has Google Play Services installed, but it does not work on Amazon Kindle devices.
Notifications
Receive Email Notifications

Allows the Petrel Cloud platform to notify you via email when you have been invited to join a team, or when someone has requested to join a team that you own.
Team update notifications

Select to display system notifications when the following events occur:
- You are invited to a team
- Your invitation to join a team has been accepted or declined
- Someone requests to join your team
- Your request to join a team has been approved or rejected
- Someone leaves a team you own
- You have been removed from a team
Note: This feature requires that your device has Google Play Services installed, but it does not work on Amazon Kindle devices.
Plan Usage

This table displays the storage space used and the space limits for your current Petrel Cloud subscription.
 at the bottom of the menu.